How to Replace Front Brakes 2013-14 Ford Flex
Created on: 2019-08-09
Learn how to replace the brakes on your 13-14 Ford Flex, with or without heavy duty brakes. 1A Auto shows you how to DIY it and save some money!
-
step 1 :Removing the Wheel
- Raise the vehicle with minimal weight on the wheel
- Loosen the five 19 mm lug nuts
- Raise and support the vehicle
- Remove the five 19 mm lug nuts
-
step 2 :Removing the Brakes
- Remove the two 17 mm brake caliper slider bolts
- Remove the brake caliper and support it to keep tension off the brake hose
- Remove the two 18 mm caliper bracket bolts
- Remove the caliper bracket
- Remove the T40 brake rotor hold down screw
- Remove the brake rotor
- If the rotor is stuck, thread on a lug nut to prevent the rotor from falling, and then hammer the rotor to break it free
- Clean any rust from the wheel hub surface
- Remove the brake pads from the caliper bracket, tapping them out with a hammer if necessary
-
step 3 :Servicing the Brake Calipers
- Remove the brake pad clips from the caliper bracket
- Clean or replace the brake pad clips
- Clean the pad grooves in the caliper bracket
- Apply brake grease to the pad grooves
- Install the brake pad clips
- Install the brake pads into the caliper bracket
-
step 4 :Installing the Brakes
- Apply anti-seize to the wheel hub surface
- Clean the brake rotor surface
- Install the brake rotor onto the wheel studs
- Install the T40 brake rotor hold down screw
- Install the brake caliper bracket onto the wheel knuckle
- Install the 18 mm brake caliper bracket bolts
- Torque the 18 mm brake caliper bracket bolts to 122 ft-lb (heavy duty) 111 ft-lb (standard)
- Compress the brake caliper pistons
- Install the brake caliper over the caliper bracket
- Install the 17 mm brake caliper slider bolts, with the gasketed bolt at the top
- Torque the 17 mm brake caliper slider bolts to 55 ft-lb (heavy duty) 53 ft-lb (standard)
-
step 5 :Installing the Wheel
- Install the wheel onto the wheel studs
- Install the five 19 mm lug nuts and tighten them by hand
- Lower the vehicle with minimal weight on the wheel
- Torque the five 19 mm lug nuts to 100 ft-lb in a star pattern
- Lower the vehicle completely
-
step 6 :Checking the Brakes
- Press the brake pedal to seat the brake pads
- Check the brake fluid level in the brake fluid reservoir
- Top off the fluid if necessary
- Use DOT4 brake fluid, or the fluid indicated on the reservoir cap, or the vehicle manual
Tools needed
-
Socket Extensions
Torque Wrench
Hammer
17mm Socket
18mm Socket
19mm Socket
Brake Parts Cleaner
Flat Blade Screwdriver
T40 Socket
Brake Caliper Hanger
Anti-Seize Grease
Brake Caliper Compressor Tool. Dual Piston. Pump Style.
Brake Grease
Ratchet
Wire Brush
1/2 Inch Breaker Bar
What's up, guys? I'm Andy from 1A Auto. In this video, I'm going to show you how to do the front heavy duty brakes on this 2013 Ford Flex. The procedure for this is going to be similar to the non-heavy duty brakes. If you need parts for your vehicle, click the link in the description, head over to 1AAuto.com.
I'm going to remove the wheel. I'm going to use a 19 millimeter socket and an airgun. Remove these lug nuts. Grab the wheel, pull it off. I want to remove these two caliper bolts. I'm going to use a 17 millimeter socket and a ratchet, loosen these up. Loosen this one up as well. Ooh, that one was on there a little bit. Then I'm going to switch to an electric ratchet. You can use a regular one or an air ratchet. Pull these slide pin bolts out. Keep in mind, there's a rubber one. That one goes in the top position on this side. So when you pull it out, just keep in mind which position it goes in.
Now I'll take my caliper holder, pull the caliper off. We sell these caliper hangers at 1AAuto.com, just hang it on the front spring and set it out of the way. Now I'm going to use an 18 millimeter socket and take these two bolts out with a breaker bar. Just going to loosen them up first. These are on pretty hard. I'm actually going to switch to a longer breaker bar. If you don't have a longer breaker bar, you can always put a long pipe on the end, just be careful. Give you a little more leverage. That comes loose a lot easier. Do the same for the top. If you get stuck and you can't get it on the bolt, well, I got it on the bolt but a lot of times you can flip the socket one position and just take the socket off here, and just rotate it one position. Then generally you can get on it easier. So, now I can use my electric ratchet and an 18 millimeter socket. This one is still on there pretty good.
Just going to leave a couple threads in the top one so the caliper bracket doesn't spin while I'm loosening it. I'll just do this by hand. I don't want to break my electric ratchet. All right, those are loose. Take those out. It's actually recommended that you replace these. We're going to reuse them. Ford recommends that you throw these out and get new ones. Now just grab the bracket and slide it out just like that. Now we need to remove this screw that holds the rotor on. I'm going to use a T40 and a 3/8 airgun. This is the easiest way for me to get this off. If you don't have an airgun, you could always try an impact driver and try to get it off that way. I'm just going to put a lot of pressure on it. Nice and easy, take it out. Now, the rotor is stuck to the hub because of rust. Rust builds up right there, so what I'm going to do is take a hammer and just hit all in these areas.
If you're worrying about the rotor falling off, just take a lug nut, put it on a couple threads. We actually sell a hammer set with these hammers in it at 1AAuto.com. All right, so I'm just going to give it a hit. Rotate it a little bit. You just want to be careful not to hit the studs. There we go. All right, take that lug nut off. It's a good thing we put that on. Slide it off. All right, so now I want to clean up this hub surface area. You can just use a wire brush and get as much of the rust gone as possible. You can do that or you can use a die grinder with some sanding discs. This way it works a little bit easier. Just if you don't have one, then you can use the wire brush. You just don't want to sand it too much where you change the surface of the actual hub, which would not be good because then the rotor is not going to sit flat correctly. So, just lightly.
We wanna take the pads off the caliper bracket. These are on there pretty good. You can try to wiggle them off. You can take a hammer and just tap them off. Just like that. Same on this one. Take a straight blade screwdriver or a pocket screwdriver. You want to get under here, take these off. If you're going to reuse these, set them aside. Take those off. You're going to want to use a wire brush and clean these off if you're going to reuse them, but we're going to replace ours today. Then right in this area there's some rust there, so we're going to want to wire brush this area, clean this all up, or take a die grinder, clean it up. Die grinder cleans it up a little better, just be careful. You don't want to sand down this too much because you don't want to change the mounting surface where the brakes actually sit on the caliper bracket. So just lightly. Do the same for the other side.
Before we put these anti rattle clips or caliper slide clips back on, I'm going to take some grease, some caliper grease, and just put it on the caliper bracket. It's going to prevent a little bit of corrosion on the bracket. It's not going to prevent it 100%, but it's better than nothing. Then take this, that's the wrong one. Take this one, slide this in position just like that. Do the same with this side. Slide that in position. We'll take a little more caliper grease, just put it on the top, anywhere the pads are going to contact this. Just like that, and we'll do the same with the other side. Now I'll take the brake pads and slide those in position. Make sure you don't get any caliper grease on the pad surface material. Then slide this one in position as well. Now we can install it on the front of the vehicle. Before I put the rotor on, I am going to use some of this copper anti-seize. The copper is generally the high temp anti-seize, so if this gets really hot then it's not going to wash away or burn off.
So, put some of that on, then getting the rotor off next time if you ever have to do it again will be a lot easier. First I'm going to take the new rotor, just put it on backwards real quick so that I can take some brake parts cleaner. I'm just going to spray the backside of the rotor down, take a rag, and wipe it. There is a protective coating on the rotor, so you want to get that off. Then we'll flip it around, line up the screw hole with the threaded hole, and then we'll do the same on this side. A little brake parts cleaner, and wipe it off. Take this caliper bracket, line it up over the brake rotor, just like that. Take these bolts, it's recommended you replace these. We're just going to reuse ours.
I'm just going to take my 18 millimeter socket and a ratchet, tighten these down. Now I have the heavy duty brakes, so I'm going to use the same 18 millimeter socket and a torque wrench. I'm torquing these bolts to 122 foot pounds. If you have the non-heavy duty brakes, you're going to torque those to 111 foot pounds. Now we're going to take this brake caliper, take this hanger off, now I'm going to use this brake caliper compressor. We actually sell this at 1AAuto.com. Line this up. This works great for two piston calipers. Just go very slow, you shouldn't have any problems. Just push that in. When we're pushing that in, that's pushing brake fluid through the hose, through the lines, back up into the master cylinder and into the reservoir. So, it's a good idea to check the reservoir after you're done.
Now those are compressed. Take the caliper, make sure the hose is not twisted. Line this up into position. Now because these brake caliper pins are separate from the brake caliper bracket, I'm going to clean these now. Just clean them off with a little brake parts cleaner. Wipe it down with a rag. Take a little brake grease, put that on, and remember the top one had the rubber piece on it. So, we'll put that back in the top, and we'll do the same with the bottom one. Now I'm going to use a 17 millimeter socket and a ratchet, snug these up, and then I'll torque them. Now we're going to torque these to 55 foot pounds because they're the heavy duty ones. If you have the regular duty, you're going to torque those to 53 foot pounds. Good. Now, put the tire back on. Put the lug nuts on. Now I'm going to use the 19 millimeter socket and a torque wrench. I'm going to tighten these lug nuts down to 100 foot pounds in a star pattern, that way the wheel gets tightened down evenly.
I'll just go around one more time, just make sure everything is good. Next I want to pump up the brake pedal because there's going to be an air gap between the brake caliper piston and the brake pads themselves. So, we want to eliminate that air gap so they stop right away. So, we're good. Pedal feels good. Now we're going to check the brake fluid reservoir, wipe any dust away from the cap itself, check the brake fluid level. If it's too high, you're going to have to adjust it down. If it's too low, add a little bit. Make sure you add the correct brake fluid. This vehicle takes DOT4 brake fluid. So, you don't want to add anything else but DOT4. So, we're good. We're above the minimum line, close to the max.
Thanks for watching. Visit 1AAuto.com for quality auto parts shipped to your door. The place for DIY auto repair, and if you enjoyed this video, please click the subscribe button.
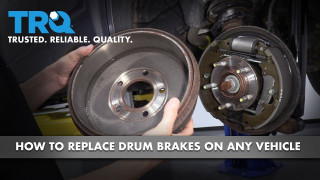
How to Replace Drum Brakes on Any Vehicle
The common features of drum brakes so that you can learn how to replace the brakes on your specific vehicle.
