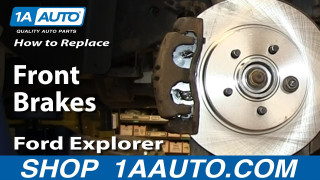
How to Replace Front Brakes 2000-04 Ford F250 Super Duty Truck
Created on: 2011-11-30
Watch this video to learn how to fix squeaky or fading front brakes. The experts at 1A Auto show you how to replace the brake pads and rotors on your 00-04 Ford F250 or F350 Super Duty.
-
step 1 :Remove the Wheel
- Pry the center cap off.
- Loosen the lug nuts.
- Raise the vehicle.
- Remove the lug nuts.
- Remove wheel. (If it is stuck, replace one lug nut and hit the wheel till it brakes loose).
-
step 2 :Removing the Brakes
- Remove the two bolts on the back of the brake calipers.
- Place a screwdriver in the side of the caliper and pry the brake pistons back in.
- Remove the Caliper.
- Pull the brake pads out and remove the spring.
-
step 3 :Removing the Rotors
- Remove the two 21mm bolts from the bracket. (Use a breaker bar or piece of pipe for leverage.
- Remove the caliper bracket.
- Spray the studs and hub with penetrating oil and let it sit.
- Pry the disc free from the hub.
-
step 4 :Replacing the Brakes
- Put the rotor in place.
- Replace the slides in the brake calipers with the new slides.
- Replace the caliper bracket.
- Reinsert the 21mm bolts in the bracket. Torque to 145ft/lbs.
- Put your old pads in the caliper bracket and use a c-clamp to push the pad into the caliper and reset the pistons.
- Wire brush the slides if old, and put them back into place.
- Slide the new pads into place.
- Put the caliper back into place and reinsert the caliper bolts. Torque to 23 - 25ft/lbs.
-
step 5 :Replace the Wheel
- Put the wheel into place.
- Replace the lug nuts.
- Lower the vehicle and tighten the lug nuts in a crossing pattern. Torque to 120ft/lbs.
- Replace the center cap.
-
step 6 :Road Test Before Use
- Pump the brakes until they are firm.
- Test stopping from 5mph
- Test stopping from 10mph.
Tools needed
-
A Piece of Pipe (for leverage)
Large C-Clamp
Torque Wrench
Pry Bar
16mm Socket
17mm Socket
Jack Stands
21mm Socket
Flat Blade Screwdriver
Large Hammer
Ratchet
Wire Brush
1/2 Inch Breaker Bar
Brought to you by 1AAuto.com, your source for quality replacement parts and the best service on the internet.
In this video, we're going to show you how to check and replace the front brakes on this 2003 Ford F250 Super Duty. Obviously we do the passenger side. You would want to repeat the driver side afterwards. You always want to replace your brakes in pairs.
Tools you'll need are jack and jack stand, 16, 17 and 21 millimeter sockets. You'll need a breaker bar or a pipe for some leverage or for some of those lug nuts or other bolts that are difficult. If your vehicle, like ours, is from the Northeast, you might need a large hammer and a large pry bar to get the tire off as well as possibly to get the rotor off, large flat blade screwdriver, a small wire brush, large C-clamp and torque wrench.
Okay, you'll need a large screwdriver or pry bar. It doesn't have to be this big but there's a little slots back in the back. Going to pry out. The next one, that pulls right off. Okay, if you don't have to benefit of impact tools, you want to loosen the lug nuts while the truck is on the ground, then raise and support the vehicle and remove the lug nuts these are 21 millimeter. Here I'll just fast forward as I remove the lug nuts from the wheel. Okay, so my tire is basically just stuck onto the hub, so I put a lug nut back on. That just helps if your tire breaks loose, it doesn't go flying off and hurt you because it can be heavy. Give it some pulls. I try the foot method. It doesn't seem to work. Okay, neither of those methods work, then a nice big hammer. Hit the back of the tire. You don't want to hit the rim because you don't want to bend it and that'll get your wheel loose. Then you remove that lug nut and take the wheel and tire off.
Okay, so inspection of the brakes. You want to check your rotors. You can check the condition of your rotors. You can see they're in pretty good shape visually. Not a lot of rust. Take the back of your fingernail, run it up and down. You'll feel slight groves but you shouldn't feel much. Same thing back side. You shouldn't feel any deep grove. Okay. Then, looking in here, you can see there's your rotor. You see there's quite a bit of life left on the inner pad and then the outer pad has quite a bit of life left there as well.
Next thing you want to do is remove these calipers. You want to remove two bolts, one here and then one right down here. Okay, these bolts should both be 16 millimeter. On this truck, my lower bolt's 16 millimeter, my upper bolt is 14 millimeter. They should come off pretty easily with a regular ratchet. I'll fast forward through removing those. Again, on this truck, there were two different sizes. I believe one of them was replaced from a previous repair. They probably should both be 16 or 17 millimeter.
Okay. As your brakes wear, they have a self adjusting mechanism which is basically the pistons come out of the caliper. You can use a large screwdriver and this is to reset those pistons as well as to help you get the caliper off, but you can just see I'm prying out and if you watch, I'll be forcing the caliper out which is actually forcing the pistons back in. Okay. Now, the caliper's nice and loose. The caliper comes right off. Set it right here on the leaf spring. Okay. You can see there are two little return springs and you can take your outer pad out. I'll move that spring there. You see on my brakes, my outer pad, this is a wear indicator. There's still plenty of life left on there. I'll take my inner pad. Okay, the same thing that wear indicator, plenty of life in it.
Now, if you want to remove or replace your rotors, you're going to have to remove this caliper bracket. There's two 21 millimeter bolts here and down here. These bolts are going to be very tight. The right tool for the job is a good size breaker bar. if you don't have that, you can use your ratchet handle and a nice piece of pipe like this to give yourself some extra leverage to get them started.
Okay, and we'll fast forward here as I remove those bolts the rest of the way and then remove that caliper bracket. On a Northeastern truck like ours, you may run into the discs being pretty well seized onto the hubs, penetrating oil around the studs and as well as around the hub. I rotate it more and let it sit for a while. Use a large hammer. Be careful not to hit the wheel studs. Tap it in and then from the top, just to try and break it loose. Sometimes it'll break loose with just this. Then, the last thing is, you can use a pry bar. Put it between the steering knuckle and the disk and it'll come free. Here goes the new one. It slides right back into place.
Okay. As you can see, the brakes on the truck didn't really need to be replaced but we like to test fit the new parts from 1A Auto. Make sure everything fits on there great and you're going to have a good experience. Right here, I'm just fast forwarding. I just put a couple of lug nuts on, helps hold the rotor into place so you can put everything together easily. In your caliper bracket, there are little slides that the brake shoes run. You want to take those out, replace them with the new ones from your new pads. if your pads do not come with them, you want to clean them with a wire brush.
Okay. Also, you want to check both these. They should slide back and forth nice and easy like these do. If they're catching at all, take them out. Wire brush them, regrease them and put them back in, okay. Now, you take this caliper bracket. Put it in place. Okay and fast forward as I start those nuts in. What I notice is on starting them in is that the bracket is hitting on the rotor and so what I do is take my impact wrench, put another lug nut on and tighten those up and you can see the rotor goes in, then just remove the lug nuts and continue on here and just preliminarily tighten up those caliper bolts. You want to torque these to 145 foot-pounds. As your pads wear, your pistons work themselves out of the caliber. What you need to do is reset them, so I got my old pad here. Put that in place, then I use a large C-clamp. Okay. As I tighten the clamp, you'll see the two pistons move pull back in the caliper, all right.
Okay. They're all set. Okay. I use the wire brush, clean off my slides here and when you put these back in, they do have sides. Push down and make sure that is towards the bracket. See, this won't go up here. Okay. New pads from 1A Auto. Take them, push them up in, and slide them into place. Make sure they're in. Push in the sliding one there. Okay, I'll just fast forward as I start the bolts for the caliper to the bracket. Okay. These bolt I'm going to tighten, I'm going to torque between 23 and 25 foot-pounds.
Okay, speed up the tape here a little bit as I put the wheel back on, start the lug nuts by hand first and then I'll preliminary tighten them up with the ratchet. Okay, now I torqued the lug nuts to 120 foot-pounds, using a crossing pattern and then I go around one by one and make sure they're all torqued.
Okay. Put the center cap back on and then, very important, make sure you pump your brakes a bunch of times. This resets the pistons and the calipers. Then, before you drive your vehicle on the road, just do a test stop from 5 and 10 miles an hour. Make sure the brakes are working properly.
We hope this helps you out. Brought to you by www.1AAuto.com, your source for quality replacement parts and the best service on the internet. Please feel free to call us toll free, 888-844-3393. We're the company that's here for you on the internet and in person.
Shop Products


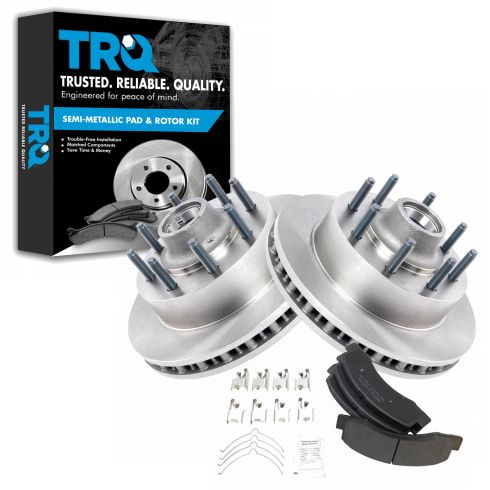
2003-04 Ford Front Semi-Metallic Brake Pad & Rotor Kit TRQ BKA11190
Part Details:
- Semi-Metallic
- Premium Posi
- (2) Front Brake Rotors
- (1) Front Semi-Metallic Brake Pad Set
How to Replace Front Brakes 2002-05 Mercury Mountaineer
That squealing sound means it's time for new brakes! Save money and do it yourself. Learn how by watching this video from 1A Auto!
