How to Replace Front Brakes 1998-2002 Mercury Grand Marquis
Created on: 2012-05-21
Check out this video to learn how you can replace the worn or squeaky front brakes on your 98-02 Mercury Grand Marquis.
-
step 1 :Removing the Wheel
- Pry off the center cap with a flat blade screwdriver
- Retrieve the center safety bolt key from the glove box
- Remove the center safety bolt with the key
- Pry off the wheel cover with a flat blade screwdriver
- Loosen the lug nuts with the vehicle on the ground
- Raise the vehicle with a floor jack
- Secure the vehicle on jack stands
- Remove the lug nuts
- Pull off the wheel
-
step 2 :Inspecting the Brakes
- Turn the rotor by hand or turn the steering wheel to turn the rotor
- Check for gouges on both sides of the rotor
- Check the thickness of the brake pads
- Check the brake pad wear indicator
-
step 3 :Removing the Brake Pads
- Remove the two 13mm bolts from the brake caliper
- Pry the caliper off with a flat blade screwdriver
- Pull the caliper aside
- Pry the brake pads off with a flat blade screwdriver
-
step 4 :Removing the Brake Rotor
- Remove the two 18mm bolts from the brake caliper bracket
- Pull off the brake caliper bracket
- Pull the rotor off
-
step 5 :Installing the New Brake Rotor
- Slide the rotor on
- Thread one lug nut by hand to hold the rotor in place
- Clean the caliper bracket with a wire brush
- Make sure the caliper bracket slides move smoothly
- Put the bracket back into place
- Start the 18mm bolts by hand
- Tighten the bolts to 90 foot-pounds of torque
-
step 6 :Installing the New Brake Pads
- Put an old pad in the caliper
- Use a large C-clamp and the old pad to push the pistons back
- Install the new brake pads into the bracket with the notches on the upper side
- Put the caliper on
- Thread bolts by hand
- Tighten bolts to between 15 - 16 foot-pounds
-
step 7 :Reattaching the Wheel
- Turn the wheels straight
- Remove the placeholder lug nut
- Slide the wheel into place
- Put on the wheel cover bracket
- Start the lug nuts by hand
- Tighten the lug nuts preliminarily
- Lower the vehicle to the ground
- Tighten the lug nuts to 100 foot-pounds in a crossing or star pattern
- Reattach the wheel cover
- Put the center safety bolt in with the key
- Push on the center cap
-
step 8 :Testing the Brakes
- Return the center safety bolt key to the glove box
- Pump your brakes repeatedly until they feel firm
- Test your brakes at 5 miles per hour and then 10 miles per hour
- Road test the vehicle
Tools needed
-
21mm Socket
13mm Socket
A Piece of Pipe (for leverage)
Large C-Clamp
Socket Extensions
Flat Blade Screwdriver
Jack Stands
18mm Socket
Ratchet
Wire Brush
Floor Jack
1/2 Inch Breaker Bar
Brought to you by 1AAuto.com, your source for quality replacement parts and the best service on the Internet.
Hi, I'm Mike from 1A Auto. I hope this how-to video helps you out, and next time you need parts for your vehicle, think of 1AAuto.com. Thanks.
In this video, we're going to show you how to service and replace the front brakes on this 2000 Mercury Grand Marquis. We're going to show you, obviously, the passenger's side; the driver's side is the same and you want to always do the brakes both sides whenever you're doing them. This is the same for any '98 to '02 Marquis, even the same for the later as well as the Ford Crown Victoria. Tools you'll need are: you'll need a new pad and rotor set from 1AAuto.com, as well as jack and jack stands, 13, 18 and 21mm sockets with ratchet and extension. Obviously, your tire iron can substitute for the 21mm. You'll need a breaker bar or a pipe for extra leverage, large screwdriver, wire brush, torque wrench, and a large C-clamp.
Start out by removing the wheel cover. You pry off the center cap. Then, there should be a key somewhere in your car in the glove compartment. Remove the center nut and then pry the wheel cover off. If you don't have air tools, you'll want to loosen the lug nuts with the wheel on the ground and then raise and support the vehicle and remove them. I'm going to fast forward here as I just remove those lug nuts, set aside that bracket that holds the hub cap and take the wheel and tire off.
Now, we can check the condition of the brakes. You can see I turned the wheels so there's easy access to the back of the caliper. To check the condition of your disks, run the back of your finger along the disk. Small light grooves are okay. If you feel a ridge at the top, it's either a sign that you want to have your brake rotor turned or get a replacement from 1A Auto. The outside pad looks like it's got some fair life left. You can see here's the metal pad and then the pad itself against the rotor. The inside pad, if we look through here, we see, that's the metal pad then the pad itself and then the rotor. The inside pad is pretty thin. It's in need of replacement.
What you're going to do is remove this bolt and this bolt first. These bolts are 13mm and they should come apart fairly easily. I'm just going to speed it up as I remove the lower bolt and then I remove the upper bolt. With those bolts off, take a screwdriver, put it right under here, pry between your caliper and the caliper bracket and bring the caliper up and off. Actually bring it up in here, just for the time being. Your shoes you just pry and pull right out. There's a line right down the middle here. That's actually the wear mark. It indicates that this outer pad, like I said, has got a little bit of life left, but this inner pad is pretty much at the end of its life.
Now you'll want to remove two larger bolts: one here and one down here. These bolts are 18mm and you're either going to want to use your breaker bar or, if all you have is a ratchet, put your ratchet on here and a piece of pipe. Put the pipe on the ratchet and then pull nice and easy until the bolt starts breaking loose. I'll fast forward, again, as I loosen up that bolt, as well as loosen up the top bolt, and then remove them both. Once that bracket is off, rotor comes right off.
Here's the new rotor from 1A Auto. It goes right on. I just put a lug nut on just to hold things in place. Before you reinstall this caliper bracket, you want to use a wire brush and just clean off these stainless steel slides where the calipers go. The other thing on this is you want to make sure that these slide in and out freely, because that's actually what your caliper slides on. Put this between the steering knuckle and the rotor, take your bolt, push it in from the outside and kind of push it towards the bracket and start turning it clockwise to get it to go in. Get one started, put the other one in and get that started. I'm just going to speed up here as I use socket and ratchet to preliminarily tighten those bolts. Now, tighten and torque these bolts to 90 foot-pounds.
Now, you're going to bring your caliper back down and you're going to want to force your pistons back into the caliper. Take your old brake shoe, put it in there and then you want a large C-clamp. Try and get it as close to the middle as you can and, as you tighten it up slowly, it forces the pistons back into the caliper. Here are the new pads from 1A Auto. The little notches go up actually. Put them in. Push it into place. Put it in and into place. Now on the caliper, you might have to push the slides in a little bit. Put the caliper down, push that in, squeeze this one in and down into place. Now, these bolts that hold the calipers in place go in. Push it in and start turning. Push it in and start turning. Speed up the film here, again, as, again, I just preliminarily tighten those bolts. Here I use a torque wrench and you want to make sure that these are tightened to anywhere between about 15 and 16 foot-pounds.
Straighten the wheels and then remove the lug nut. Put your wheel and tire back on. Start all the lug nuts with the little bracket for the wheel cover and then just preliminarily tighten them with the impact wrench or your socket and ratchet. With the wheel on the ground use a torque wrench and tighten them to about 100 foot pounds, using a star pattern. Then put your wheel cover back in place, put the center safety bolt back in, tighten it up, and make sure it's all on there good.
Always make sure you put your key back in the glove compartment and then whenever you've done work on the brakes, make sure you pump up your brakes, and get the pedal nice and hard before you road test the vehicle. Then, when you road test do a couple of stops. Actually, before you road test, stop from like 5 and 10 miles an hour, make sure the brakes are working properly before you road test.
We hope this video helps you out. Brought to you by www.1AAuto.com, your source for quality replacement parts and the best service on the Internet. Please feel free to call us toll-free, 888-844-3393. We're the company that's here for you on the Internet and in person.
Shop Products


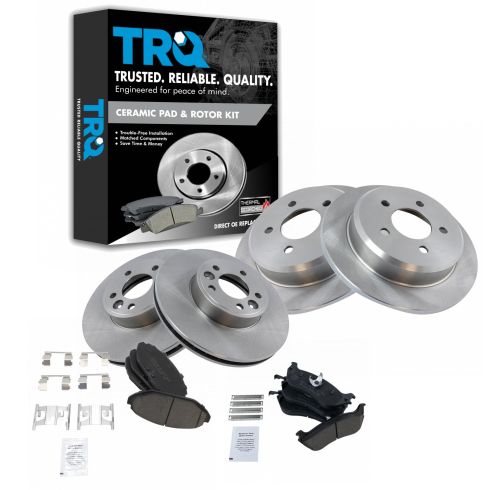
1998-02 Ford Lincoln Mercury Front & Rear Ceramic Brake Pad & Rotor Kit TRQ BKA11537
Part Details:
- Ceramic
- Premium Posi
- 12.44 in. (316mm)
- Solid
- Vented
- 5 Lug
- 11.22 in. (285mm)
- (2) Front Brake Rotors
- (2) Rear Brake Rotors
- (1) Front Ceramic Brake Pad Set
- (1) Rear Ceramic Brake Pad Set
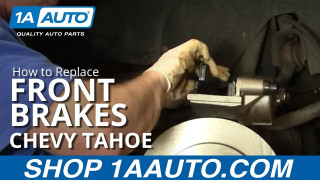
How to Replace Front Brakes 1995-2000 Chevy Tahoe
Check out this video to learn how to replace the front brakes on your 95-00 Chevy Tahoe.
