How To Replace Front Brakes 1996-99 Cadillac Deville
Created on: 2011-08-11
Check out this video to learn how to replace the front brakes on your 96-99 Cadillac DeVille. 1A Auto shows you how you can do it yourself.
-
step 1 :Remove the wheel
- Pry up the center cap with a cloth and flat blade screwdriver.
- Loosen the lug nuts with a breaker bar and 19 mm socket or lug wrench.
- Raise and secure the vehicle.
- Remove the lug nuts and set the wheel aside.
-
step 2 :remove the brake pads and rotor
- Observe the wear on your brakes.
- Remove the 15 mm bolts on the caliper with your socket and breaker bar.
- Use a flat blade screwdriver to pry between the rotor and brake pad in order to compress the caliper piston.
- Pry off the caliper and use a c-clamp to compress the piston.
- Tuck the caliper out of the way.
- Remove the brake pads and remove the caliper bracket by unbolting the 15 mm caliper bracket bolts with your socket and breaker bar.
- Use a wire brush to clean up the caliper bracket.
- Remove the rotor.
-
step 3 :Install the new rotor and brake pads.
- Clean the rotor with brake cleaner.
- Mount the rotor onto the hub.
- Install the caliper bracket and torque the 15 mm bolts to 85 ft lbs.
- Clean up the slides that mount onto the caliper brackets for the brake pads with a wire brush.
- Mount your new pads, dabbing a bit of anti-seize grease where the pads meet the slides.
- Put the caliper back on, and torque down the two 15 mm bolts to 25 to 30 ft lbs.
-
step 4 :Replace the wheel
- Hand-tighten the lug nuts and lower the vehicle
- Torque the lug nuts to 100 ft lbs in a star pattern.
- Pump your brakes to reset the caliper pistons.
- Do a couple test stops in the drive way before test driving the vehicle.
Tools needed
-
A Piece of Pipe (for leverage)
Large C-Clamp
Socket Extensions
Torque Wrench
15mm Socket
Jack Stands
19mm Socket
Flat Blade Screwdriver
Ratchet
Wire Brush
Floor Jack
Cloth Rags
1/2 Inch Breaker Bar
Brought to you by 1AAuto.com, your source for quality replacement parts and the best service on the internet. Hi, I'm Mike Green, I'm one of the owners of 1A Auto. I want to help you save time and money repairing and maintaining your vehicle. I'm going to use my 20 plus years experience, restoring and repairing cars and trucks like this to show you the correct way to install parts for 1AAuto.com. The right parts installed correctly that's going to save you time and money. Thank you and enjoy the video. In this video, we're going to show you how to change the pads and routers on this '97 Cadillac Deville.
On this vehicle, the brakes are actually in good shape so we just show you how to take them apart and put them back together. You can order new routers and pads for 1A Auto, this is the same for '96 to '99 Deville. Tools you'll need are jack and jack stands, 15 and 19 mm sockets with ratchet and extension and you'll need a breaker bar or a pipe for extra leverage for a couple of bolts and also a large C-clamp. Use a screwdriver, I like to use a rag so I don't scratch the wheel or the center cap. Pry it underneath there. Your lug nuts are 19 mm, if you don't have the benefit of air tools, you'll want to start with the wheel on the ground, loosen the lug nuts and then raise and secure the vehicle and remove the lug nuts the rest of the way. Okay, now with your wheel turned, you can see right inside here, you can see that little hole in the brake pad that is exactly a wear indicator. It would indicate on this brake pad, you are in good shape and if you look at your outer pad, you can see that there's some still some pretty good like in it.
You want to make sure that you check both sides because sometimes you can have one side that's not worn and the other side can be more worn. Our brakes are fine, I've checked both sides but I am going to take them apart and put them back together just to show you how to do it. The next thing you want to do is remove these two bolts here, which releases your caliber. These two bolts are 15 mm. They should come apart pretty easily. Okay and we'll speed it up here as we take out those bolts. Make sure that before you put these back together that these pins are nice and clean and they have a little bit of grease on them. These look very good. Now use your wrench here to kind of pry my caliber off. All right, now just put the caliber up here out of the way. There's our inner pad again, our outer pad and you can see the wear mark there. They've got some good life on them, not a ton of miles but definitely don't need to replace them yet but if you did want to replace them you can pull your pads right out like that. Okay, now your routers and on this vehicle, most vehicles what you want to do is take your back of your fingernail and kind of run it along the routers, feel for any deep grooves or gouges and then just kind of inspect the condition of the routers and these look absolutely fine.
If you feel any grooves or there's too much rust or corrosion or your routers look thin than you do want to replace them. To remove and replace the routers, there are two large bolts here and here. These bolts are 15 mm as well so what I have here is my ratchet and I'm going to use a piece of pipe. Okay the pipe goes on there, gives me some extra leverage and I'll push slowly down on the pipe. I can feel bolts starting to break loose. On top here, I'm going to use a short extension, use a piece of pipe again. Just easy pressure until the bolt starts to break loose. Once that brackets off, the router simply comes right off. What I like to do is I just put one lug nut on to kind of hold it in place. The bracket goes between the knuckle and the router then the bolt goes in with space around the back. Okay and we'll speed it up here as we just put those bolts in and tighten them primarily. Tighten them up to 85 foot pounds. You want to use a wire brush and you can actually take these slides off and you want to clean out where the pads move back and forth. Now your pads, obviously I'm not putting new pads in because mine are fine.
What this vehicle really needed was a new hub. Put the pads back in just by placing them like that. Now if you're putting new pads on, you'll need to- you can see my cylinder is out of the caliber some so you'll need to push that cylinder back in and you can do that with a large C clamp. Okay, we'll speed it up here as we tighten up that clamp, push that piston back in. How you may want to remove check your brake fluid if it's overfull you may want to remove some of the fluid so it doesn't leak out. Now it goes down like that. Okay, put the slides back in, make sure they're nice and clean and have some grease on them, tighten them up with your ratchet and socket and pull them nice and snug. They should probably be about 25 to 30 foot pounds and then remove that lug nut and now we can put our tire back on. Start the lug nuts by hand, tighten them up preliminarily with your wrench and then you'll do the rest of the tightening when the car is on the ground. Now here with the car on the ground, tighten the lug nuts up to 90 to 100 foot pounds using a star pattern. Most important is the last step, make sure whenever you take your brakes apart, pump your brakes a bunch of times first to do a stop from like five and then ten miles an hour before you do a road test.
We hope this helps you out. Brought to you by www.1AAuto.com, your source for quality replacement parts and the best service on the internet. Please feel free to us toll-free 888-844-3393, we're the company that's here for you on the internet and in person.
Shop Products


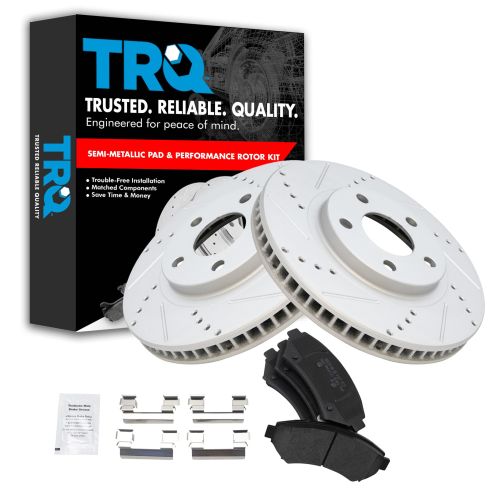
Front Semi-Metallic Premium G-Coated Performance Brake Pad & Rotor Kit TRQ Performance BKA12193
Part Details:
- Premium Posi
- Semi-Metallic
- Vented
- 11.92 in. (303mm)
- 5 Lug
- Performance
- Premium G-Coated
- Slotted X Drilled
- Performance
- (1) Front Semi-Metallic Brake Pad Set
- (1) Front Premium G-Coated Performance Brake Rotor Set
How to Replace Front Brakes 2014-17 Infiniti QX50
This video shows you how to install new, quality TRQ brake pads and rotors on your 2016-19 Infiniti QX50.
