How to Replace Front Brakes 2014-17 Infiniti QX50
Created on: 2020-04-03
This video shows you how to install new, quality TRQ brake pads and rotors on your 2016-19 Infiniti QX50.
Tools needed
-
Torque Wrench
Socket Extensions
Pry Bar
Jack Stands
Brake Parts Cleaner
Safety Glasses
21mm Socket
Gloves
Flat Blade Screwdriver
Brake Caliper Hanger
Socket Driver
Paper Towels
Copper Anti-Seize
Wheel Chocks
Brake Grease
Brake Caliper Compressor Tool. Quad Piston. Ratchet Style.
Drain Pan
Ratchet
Floor Jack
Wire Brush
1/2 Inch Impact Gun
22mm Socket
Okay, friends. So let's get started on this front brake job. I'm gonna put down these parts and we're gonna get right over to the vehicle. Once you're sure that you have it nice, and safe, and secure and it's at a good working level, we're gonna continue on by removing this cover. To do that, you'll notice this little slot. Grab your little pry bar or screwdriver, whatever you've got. Pop this right off. Once that's out of the way, you could take a peek and you might notice you have this right here. This is called a locking lug nut. You're gonna need this key, which is, generally speaking, located in your trunk. If it's not, maybe it's been moved. But this is what it looks like and it goes right on here. Use your 21-millimeter socket, remove all your nuts. Remove the wheel.
Now that we have the wheel off, you can see the backside here, which is where the caliper is. You can go ahead and push back the caliper. You can use a screwdriver or a pry bar. Pry bar's obviously better. Just go in between the caliper and the rotor and just try to push this back. And what that's gonna do, inside of the caliper right here, there's two pistons and those pistons need to go squishing back in here. So they're taking pressure from the pads on the rotor. If for some reason you can't get in there and you can't get a push back, that's okay. We're gonna remove these bolts right here and I'll show you what to do next. I pull it right out of there. Take the caliper off. Here's those pistons I was talking about. When you push these in, you can't just grab here and squeeze this one in because then this one's gonna push out. You need to have both these pushing in at the same time. To do that, you can use a tool that looks like this. And as you crank it, it's gonna push in both those pistons at the same time. You could also use one of your original brake pads, the ones that you're replacing, and then use the other caliper pliers to kind of just squeeze and go right in the center. I'm gonna go with this because that's the tool it's made for. Okay. Go nice and slow. Because what I'm doing here is I'm actually pushing fluid back up through the lines, and obviously I don't wanna do that fast. Yup. That feels like it's all the way back. Take a look. They're both even. If I push this one in, this one would have popped out. So I did both at the same time. Let's set this aside.
The next thing we wanna do is get these pads out of here. I'm gonna continue on with my pry bar. Just carefully slide those out. You wanna pay attention to where this squealer is. This is the wear indicator. So once the pads get down to a certain level, the wear indicator will start rubbing against the rotor and you know it's time to replace your brakes. So just pay attention to where this one went. When it was on here, it was facing up. So when I replace the brake pads, I'm gonna make sure I have that wear indicator facing up. So the next thing I wanna do is remove these 2 22-millimeter bolts. And those hold the caliper bracket on, so be careful once you take them out that this doesn't fall down and potentially hurt you. I'm gonna leave that one so it's almost all the way out, but it's still in a couple of threads. That's what the boat looks like. Remove the bracket.
Now that that's out of the way, let's get the rotor off and take a peek right here. This is the hub, which is also the mating surface, where your is gonna ride. You wanna make sure that you clean that up so it's nice and smooth. To do that, you can either use one of these brushes. Just go like that, get in between here. That looks pretty good. Or in severe cases where you have a lot of raised areas, you can also use a tool like this. Okay. So this looks pretty great along the majority of the mating surfaces, but you need to make sure you get in between the hub area and the lug studs. You're not gonna get much better than that. Let's move along.
Okay, friends. Before we go too much further, let's just do a quick comparison of our parts only to make sure that we have the correct ones. First, we're gonna check these rotors. We wanna make sure they have the same diameter. So that's the overall circumference of them. You just stack them on top of each other and you can tell these line up perfectly. I love it. The next thing I would do, turn them over just like this. Obviously doing it on the pad might be a little bit different than in real life, but you'd wanna check to make sure that the hat height is the right height. Okay? So if this rotor doesn't match up right along here, maybe it's sitting up about this high, well, you know you get the wrong rotor. This one actually looks perfect. We're gonna continue onto the brake pads. I don't need all of them, but let's go like this and kind of put them over each other and just take a peek. Make sure they have the same overall length and the same overall width. This looks great. Let's get back to it.
Okay. So just in case you hadn't noticed hand protection, eye protection. Here we go. So we've got our caliper bracket on the bench. We need to get these tins off of here. You can use a small pocket screwdriver, pry bar, screwdriver. Just go ahead and pry them off. Take a peek at them. They look pretty good. Let's set that aside. Set that one aside as well. As you could tell, they both look the same. You don't have to worry about mixing those up. That's great. Next, I'm gonna grab these caliper sliders and the slider is actually gonna come out from the boot, just like this, and then slides out. This one, I'll show you real quick, has a little rubber grommet on it or a boot. Okay? And that kind of prevents this from vibrating around inside here. It's kind of like a vibration dampener. You wanna make sure that you remember that wherever you took this one out of, it goes back into that same hole. So I have my bracket like this. I'm gonna go just like that. Do the same for this one. Just as I suspected, no rubber. Don't mix those up. Let's continue on. I'm gonna go just like that. There we are. Make sure you check the condition. If you have any rips or tears or even if this boot just feels dry and brittle and it doesn't wanna move, you would wanna replace these. That feels great.
So here we have a stripped caliper bracket. At this point, we wanna clean this down so it's nice and pretty. Little bit of parts cleaner, nothing special. Eye protection, hand protection, mouth closed. Little bore brush. It's gonna get the crowd out of there. Do the same on this one. Another squirt. Let's check it. Oh. Yup. That's why you got to clean these. Still nasty. I'll tell you what I'm gonna do. If it keeps coming out nasty like that, just shit it again with that bore brush. So now that we have those holes nice and cleaned out, I'm gonna continue on with my little brush and I'm gonna go right along here. This is right where those tins are gonna ride. You wanna make sure you don't have anything bubbling up. If you do, take a small screwdriver, just chisel it away. If for some reason the brush wasn't working and you felt the need to use one of these tools, you can use something like this. It's almost like a cloth. I wouldn't necessarily use the sanding desk unless you had to only because if you use this and you took away too much metal, you're gonna have noises with your breaks.
Okay. So those look pretty great now. I did all four. I love them. They look good. Somewhere I'm gonna pay attention to is this area right inside here. This is along where the rotor's gonna be riding and your pads, of course, are gonna squeeze up against that rotor. If this has a whole bunch of crud in there, it's potential that it could get on your rotor and in between the pads and the rotor, affecting your braking. So just go ahead and clean that out. A lot of brake dust in there. Let's move along to these tins. Just go ahead and use your brush. Generally speaking, these aren't necessarily gonna come super clean. I mean, they've got a lot of extra little doodads on there. They're gonna catch on your brush. But as long as you don't have anything on there, that's gonna prevent your pad from moving like it should, because it does have to slide in and out a little bit. You're pretty much doing all right.
So assuming you did the front side and it looks pretty good, you don't obviously have to do up here so much. If you wanna make it look pretty, well, good for you. You come along to the backside. This is the area where it's gonna be going up against the bracket. So it's another area that you need to make sure it doesn't have any raised areas, or edges, or anything like that. We got our little prongs on the forward side. This one looks great. Do the same to all your tins. So now we're gonna make sure we clean up these caliper sliders. Overall, you should be able to clean them right down with a real nice clean rag. Just get off all that extra gunk and grease and stuff. Last thing you want is anything to contaminate the new lube that you're gonna be putting in there. That looks pretty great. If you noticed on your caliper slider pin that you have a lot of rot and rust and maybe there's like pitting and stuff, you might wanna take it to a wire wheel and just clean it up, but this one feels nice and smooth even though it's a little bit discolored.
So next it's time to clean up these boots. Just take your rag, give it a couple twists like this. Go ahead and push it right on through. If you can't get it through, use your screwdriver, whatever you've got. And I'm gonna try to spread this out best I can. As I spread it out, I'm gonna roll it. I'm just gonna roll the rag or roll the boot right over the rag and this is just gonna clean off all that gunk that's on the inside. Look at that. Nasty. I'm gonna grab a new piece or a new area, at least. I don't need to change the whole rag. The next thing I'm gonna do is I'm gonna grab some of this synthetic Moly grease. I'm just gonna put on a teeny bit on this bracket here. You don't wanna do too much. The last thing you want it to do is come squeezing out along here and potentially get in between the rotor and the brake pads. Let's move along to grabbing our tins. I'm just gonna press those right on there. Perfect. Oh, yeah. This is coming along great.
Okay. So next we have our boots. Let's take a little bit of this Moly grease, go right inside this hole. Okay? You know, maybe take a little bit more. And then, of course, in this one just like that. By putting the grease inside this hole before the boot, it creates a layer where moisture won't be able to get in between the boot and the bracket. Put it right in there and give it a couple of twists. Do the same thing for this one. Those look great. They're definitely not falling out and they're in great condition. You're gonna grab these sliders. Continue with that grease, lube them up.
Something to pay attention to on the sliders is right up along this top area there's a little groove. You need to make sure you get some of that grease up in there. That's gonna be where it connects onto this upper part of the boot. If you don't put any grease there, there's potential for moisture to get inside and ruin the whole brake job over time. And push it in. Once it's in, just give it a couple of good twists in and outs. Perfect. Do the same over here. This is the one with the little boot. We remember that. The next thing I like to do is just put the rotor up on here like this, keeping our hand and eye protection on, of course, little bit of parts cleaner, and just clean down those braking surfaces right along here. That's good. Flip it around and do the same thing here. Tiny bit of copper never seize just right along those meeting areas. We've got our rotor. Put it upon there. Grab one of your lug nuts and start it on. That should hold it from moving around. Let's keep moving. Okay. I'm just gonna use my little brush. I'm gonna go right along here, get off as much of this old brake dust as possible. Obviously, don't breathe any of that in. Let's let that dissipate.
I'm gonna continue on with that Moly grease. I'm gonna go right along the piston where it meets onto the pad. Both of them, obviously. And then these little ears right here. Pretty much any place that mounts up against the pad or as a mating surface, you're gonna put a little bit of lubricant and that's gonna help with vibration dampening and noise reduction. Let's take our nice and freshly prepped caliper bracket. Our two caliper bracket bolts. I like to use a little bit of thread locker, by the way, slide it right up on here. We're gonna put these in, bottom them out, and then we're gonna torque them to 91-foot-pound. Torqued, torqued.
Okay. So now it's time to get the pads in on here. We know we have the correct pad for the inside. We have the wear indicator and that's gonna be facing up, right? Before we go ahead and put them in, though, we need to make sure that we pay attention to these little tins. They have those little flippy dues. Those are gonna go on this ridge of the pad. They're gonna go right there. And what's gonna happen is it's gonna try to separate those pads from the rotor. You step on the brake, the caliper squeezes this together. As soon as you let go, those little flippy dues are gonna push these back away from the rotor to help with cooling. So make sure you put them so it pushes those little flippy dues in towards the rotor. That's good. Do the same to the other side.
I'm just gonna hold the pad just so it doesn't come popping out on me. Now I'm gonna grab my caliper, bring it right down here, put it over those pads. I have my caliper, two bracket bolts, they're very small. And I use a little bit of thread locker. I'm gonna start them both in, snug them up, and then I'm gonna tighten them to 25-foot-pounds. Torqued. Torqued. Perfect. Now let's do the same to the other side. Let's get this lug nut off of here. Obviously you wanna double-check that rotor I already did, but just double-check the rotor braking surface, make sure you didn't get any, you know, greasy thumbprints on it or anything. Go ahead and grab that wheel. Put it right up on there. Before you let it go, make sure you start on a lug nut. Now I'm just gonna start on all the lug nuts. I'm gonna bottom them out and then we'll torque them down to manufacturer specifications.
So now that I have the vehicle with the wheel barely touching the ground so that it won't spin but not with the complete weight of the vehicle on the ground. I'm gonna torque these to 80-foot-pounds in a star pattern. Awesome. Make sure you grab that key off of there. And once you do, you can go ahead and put this cover on. Something to pay attention to is on the back of the cover. You're gonna see something that looks a lot like a valve stem that's like a diagram. You just wanna line that up with where this one is. I'm gonna go just like this. You can use a rubber mallet or just your hand, but be careful. Give it a little bonk, make sure everything's lined up the way it should. Make sure you put this away where it belongs.
So next we're gonna make our way under the hood. And right on the driver's side, you're gonna see this panel right here and it says right on it, Brake Fluid. Grab these little tabs, lift this up. There's your master cylinder. As you could tell, you have a maximum line and a minimum line. Just give it a little wiggle and check to make sure your brake fluid's up close to that maximum line. Once it is, go ahead and get inside your vehicle. We're gonna pump up the brakes till it's nice and firm then we're gonna come back out here and double-check to make sure this is full. Let's do that. So I'm just gonna pump this up nice and slow. Okay. It's nice and firm. Very close to the top. I wouldn't expect it to be all the way at the top, but I can feel that it's not dropping anymore. At this point, I know that my calipers are all nice and pumped up. Let's go double-check that brake fluid.
Okay. So as you can tell, the brake fluid is a little bit low. I'm just gonna lift this up. I'm gonna look right on the cap and it tells us to use DOT 3 brake fluid. So you'd need to use DOT 3. I'm gonna go ahead and add some right up to that maximum line. And that's perfect. The last thing that you want is to come up above the maximum line and that can cause an issue. Make sure you cover it as soon as possible and make sure it's nice and snug. After that, I'm gonna put this cover on here. We'll close the hood and we'll take it for a road test.
Shop Products


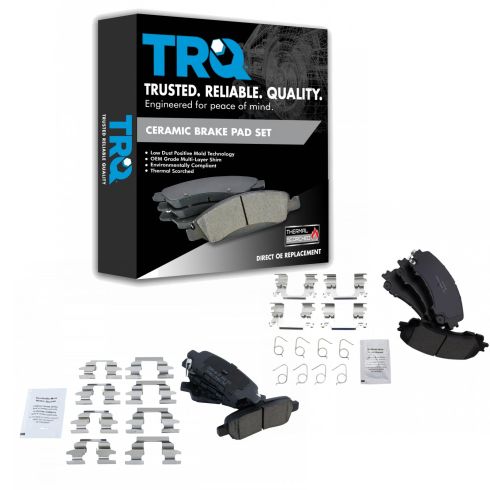
Nissan Rogue Infiniti Q50 Q60 QX50 Front & Rear Ceramic Brake Pads TRQ BFA13105
Part Details:
- Premium Posi
- Ceramic
- Ceramic
- (1) Front Ceramic Brake Pad Set
- (1) Rear Ceramic Brake Pad Set
- Yes
How to Replace Rear Brakes 2001-05 BMW 325Xi
Learn what steps are needed to remove the old rear brakes and prepare and install new ones with this how-to video
