How to Replace Front Brakes 2005-10 Chrysler 300
Created on: 2017-01-17
Check out this video to learn how you can replace the worn or squeaky front brakes on your 05-10 Chrysler 300.
-
step 1 :Removing the Wheel
- Loosen the lug nuts with the vehicle on the ground
- Raise the vehicle with a floor jack
- Secure the vehicle on jack stands
- Remove the lug nuts
- Pull off the wheel
-
step 2 :Removing the Brake Pads
- Hold the wheel studs with a brake rotor
- Remove the two 13mm bolts from the caliper bracket
- Pull the caliper off
- Put the caliper aside
- Pry the brake pads off with a flat blade screwdriver
-
step 3 :Removing the Brake Rotor
- Remove the two 18mm bolts from the caliper bracket
- Pull off the brake caliper bracket
- Strike the drum surface of the rotor with a hammer to loosen the rotor
- Pull the rotor off
- Clean the hub surface with a wire brush
-
step 4 :Preparing the New Brake Pads and Rotors
- Pry off the brake pad shims with a flat blade screwdriver
- Clean the brake pad shims with a wire brush
- Clean the caliper bracket with a wire brush
- Apply brake grease to the shim-mounting area of the caliper bracket
- Place the shim onto the caliper bracket
- Apply grease to the caliper shims
- Pull out the caliper slides
- Apply grease to the caliper slides
- Push the caliper slide into the caliper
-
step 5 :Installing the Brake Rotor
- Apply grease to the hub surface
- Put the rotor onto the hub backwards
- Spray the rear of the hub with brake cleaner
- Pull off the brake rotor
- Slide the brake rotor on
- Spray the front of the rotor with brake cleaner
- Put the caliper bracket into place
- Insert the two 18mm bolts into the caliper bracket
- Tighten the two 18mm bolts to 70 foot-pounds of torque
-
step 6 :Installing the Brake Pads
- Put the brake pads into the caliper bracket
- Apply grease to the back of the brake pads
- Push back the caliper piston with grove lock pliers
- Put the brake caliper into place
- Insert the two 13mm bolts into the caliper
- Tighten the two 13mm bolts to 44 foot-pounds of torque
-
step 7 :Reattaching the Wheel
- Slide the wheel into place
- Start the lug nuts by hand
- Tighten the lug nuts preliminarily
- Lower the vehicle to the ground
- Tighten the lug nuts to 110 foot-pounds in a crossing or star pattern
Tools needed
-
Socket Extensions
Torque Wrench
Jack Stands
Gloves
Flat Blade Screwdriver
Paper Towels
Bungee Cord
Anti-Seize Grease
Ratchet
Wire Brush
Floor Jack
1/2 Inch Breaker Bar
Complete Metric Socket Set
Hi, I'm Mike from 1AAuto. We've been selling auto parts for over 30 years! We're dedicated to delivering quality auto parts, expert customer service, and fast and free shipping, all backed by our 100% satisfaction guarantee. So visit us at 1AAuto.com, your trusted source for quality auto parts.
In this video, we're going to be working with our 2006 Chrysler 300 3.5-liter, rear-wheel-drive. We're going to show you how to remove and replace your vehicle's front brake pads and rotors. While we're performing this process on the passenger side, the procedure is the same on the driver side, and we always recommend you replace these parts in pairs.
If you like this video, please click, subscribe. We have a ton more information on this and many other vehicles. If you need these parts for your car, you can follow the link down in the description over to 1AAuto.com.
Here are the items you'll need for this repair: full metric socket set, ratchet, socket extensions, breaker bar, torque wrench, brake grease, brake cleaner, wire brush, bungee cord, flat blade screwdriver, gloves, paper towels, jack and jack stands
Using a 21mm socket and a breaker bar, loosen all of your lug nuts about one turn. Raise and support your vehicle. We're using a lift to make it easier to show you what's going on, but this job can easily be done at home with a jack and jack stands. Remove your lug nuts the rest of the way by hand. Remove your wheel and tire.
Remove the two 13mm bolts securing the caliper to the bracket. We'll do this using a 13mm socket and ratchet. Remove the caliper, and using a bungee cord, zip tie, or mechanic's wire, hang it up out of the way. Remove the pads. Remove the two 18mm caliper bracket bolts with a 18mm socket and ratchet. Be sure to crack both of these loose before removing either one fully. Remove the caliper carrier, and remove the rotor.
Here we have our old brake pads and rotors that we removed from our vehicle, and our new parts from 1AAuto.com. As you can see, these parts are exactly the same. The rotors are the same size and shape, both vented, and the pads are the same size and shape. Our old ones really weren't that bad. However, the vehicle had been sitting for a long time, and we have a lot of texture and rust corrosion built up on the old rotor which is going to eat these pads away a lot faster, make some pretty rough noises when you're braking, and cause inefficient braking as well because of the poor contact surface. It's not going to grip and slow you down correctly. These new parts from 1AAuto are going to go in direct fit just like our original equipment, get our vehicle stopping safely, smoothly, and quietly. Fix you up right.
Using a small flat blade screwdriver, pop off the brake slides. Now, these aren't very rusty or corroded, so we can just clean these up and reinstall them. First, we'll use a wire brush. Make sure you have a dust mask and safety glasses on when you remove this rust from the contact surfaces. These don't have to by crazy, perfectly smooth. You just want to remove the majority of the buildup. Apply a thin coat of brake grease. Clean up your slides the same way. Reinstall it onto your caliper carrier and apply a thin coat of grease to that as well. Hold the boot and remove the pin. Wipe the old grease off of the pins, and apply a new coat. This, you can go a little bit thicker on.
Now, this rust buildup on the end isn't a big deal. However, if it were down on the actual moving portion of the pin, we would want to replace them. You'll also need to make sure that the boot seats back on the pin correctly. We'll repeat this process on the other side of our bracket. Now that our caliper bracket is cleaned and greased, it's ready to go back on the vehicle.
Apply a thin coat of brake grease to the hub surface. Be sure to get the flat surface as well as the bore. This will prevent our rotor from getting frozen onto the hub. Install the rotor onto the hub backwards, and spray it down with some brake cleaner. This removes the coating they used to prevent the surfaces from rusting while these parts are in storage. We'll flip it around and spray that down too.
Now, this next step isn't entirely necessary, but if you have access to an old axle nut or some other type of large spacer. You can put it over the wheel stud and tighten the lug nut down to it to keep the rotor straight while we install the rest of our components. Reinstall the caliper bracket and the two 18mm bolts which we'll tighten down with our 18mm socket and ratchet, and then tighten to 70 foot-pounds.
Install your new brake pads in the caliper carrier, and grease the backsides of the shims with a thin coat of brake grease. Remove the caliper from whatever you used to secure it. Using a pair of groove jaw pliers, slowly compress the caliper piston. Reinstall the caliper and the two 13mm bolts securing the caliper to the guide pins. Using your 13mm socket and a torque wrench, torque the caliper bolts to 44 foot-pounds.
Remove the wheel lug as well as the axle nut, if you used this method, and reinstall your wheel and tire. Get all five of your 21 mm lug nuts on as tight as you can by hand. Lower the partial weight of your vehicle back onto the tires. Torque your lug nuts to 110 foot-pounds in a cross pattern.
Thanks for watching. Visit us at 1AAuto.com for quality auto parts, fast and free shipping, and the best customer service in the industry.
Shop Products


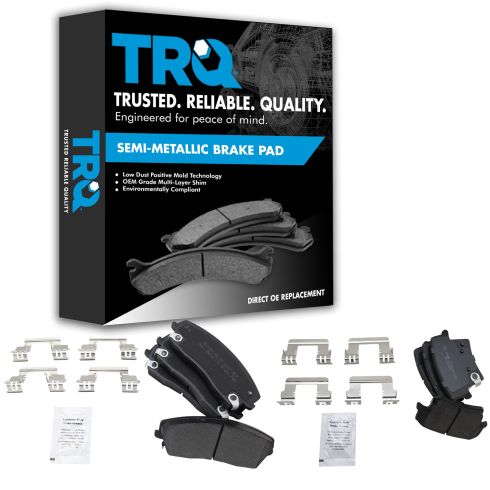
Dodge Chrysler Front & Rear Semi-Metallic Brake Pads TRQ BFA12931
Part Details:
- Semi-Metallic
- Premium Posi
- Semi-metallic
- (1) Rear Semi-Metallic Brake Pad Set
- (1) Front Semi-Metallic Brake Pad Set
- Yes
How to Replace Rear Brakes 2013-17 Honda Accord
Watch this video to learn how to install new engineered to fit TRQ rear brake rotors and pads on your 2013-17 Honda Accord.
