How to Replace Front Brakes 2003-04 Nissan Frontier
Created on: 2013-10-22
How to repair, install, fix, change or replace your own worn, squeaky, fading old front brakes on Nissan Frontier and Xterra, model years 03 and 04.
-
step 1 :Removing the Wheel
- Loosen the 21mm lug nuts with the vehicle on the ground
- Raise the vehicle with a floor jack
- Secure the vehicle on jack stands
- Remove the lug nuts
- Pull off the wheel
-
step 2 :Inspecting the Brakes
- Turn the rotor by hand or turn the steering wheel to turn the rotor
- Check the thickness of the brake pads
- Check the brake pad wear indicator
- Check for gouges on both sides of the rotor
-
step 3 :Removing the Brake Pads
- Remove two 14mm bolts from the brake caliper
- Pry the brake pads into the caliper with a flat blade screwdriver to push in the pistons
- Pull the caliper aside
- Pry the brake pads off with a flat blade screwdriver
- Remove the brake pad slides
-
step 4 :Removing the Brake Rotor
- Remove the 6mm Allen bolt from the hub cover
- Remove the six 14mm bolts from the hub
- Remove from two 22mm the brake caliper bracket
- Pull off the brake caliper bracket
- Remove the cover to the hub assembly with a 6mm Allen key
- Wipe off the area inside the hub to access the circlip
- Place the circlip pliers intbetween the two ear on the circlip, expand it, and pull it out
- Pull the silver collar off and use a screwdriver to help expand if nessecary
- Remove the two Phillips head screws
- Pry off the ring with a flat blade screwdriver
- Twist off the threaded collar
- Pull the rotor off
-
step 5 :Removing the Hub Assembly
- Use a 14mm socket and impact wrench to remove the 6 14mm bolts from the hub assembly
- Spray penetrating oil on the hub assembly
- Using a hammer and chisel remove the hub assembly on the rotor
-
step 6 :Installing the Hub Assembly
- Place the hub assembly in the rotor
- Thread the 14mm bolts to the hub assembly by hand
- Tighten them with a 14mm socket and impact wrench
- Clean the inside of the hub assembly with a towel
- Grease the inside of the hub with wheel bearing grease
- Place the outer bearing into place
- Add more bearing grease to the hub
- Clean off the axle
- Apply a small coat of grease to the axle
-
step 7 :Installing the New Brake Rotor
- Slide the rotor on
- Place the threaded sleeve collar on with a flat blade screwdriver until it's tight
- Line up the hole on the threaded collar with the collar with the Phillips screws
- Insert and tighten the two Phillips head screws to the collars
- Insert the silver collar and expand the circlip with circlip pliers and insert it
- Reinstall the hub cover
- Tighten the bolts on the hub cover by hand and then with an allen key or socket and ratchet
- Clean the rotor off for excess grease with brake cleaner
- Make sure there is grease on the slides in the caliper bracket
- Clean the bracket with a wire brush
- Clean the springs with a wire brush
- Put the bracket back into place
- Start the bolts by hand
- Tighten the bolts to between 90 and 100 foot-pounds of torque
- Torque the hub bolts to 25 foot-pounds
- Tighten the 6mm Allen bolts
-
step 8 :Installing the New Brake Pads
- Place the brake springs into the caliper bracket
- Clean the rotor with brake cleaner
- Place brake grease onto the tabs of the brake pads
- Install the new brake pads into the bracket
- Put the caliper on
- Thread bolts by hand
- Tighten bolts to between 25 and 30 foot-pounds
-
step 9 :Reattaching the Wheel
- Slide the wheel into place
- Start the lug nuts by hand
- Tighten the lug nuts preliminarily
- Lower the vehicle to the ground
- Tighten the lug nuts
- Tighten the lug nuts to 100 foot-pounds in a crossing or star pattern
-
step 10 :Testing the Brakes
- Pump your brakes repeatedly until they feel firm
- Test your brakes at 5 miles per hour and then 10 miles per hour
- Road test the vehicle
Tools needed
-
A Piece of Pipe (for leverage)
Torque Wrench
14mm Socket
Hammer
Rust Penetrant
Jack Stands
Brake Parts Cleaner
21mm Socket
Bearing Grease
6mm Allen Wrench
Circlip Pliers
Flat Blade Screwdriver
Chisel
Ratchet
Floor Jack
Cloth Rags
1/2 Inch Impact Gun
22mm Socket
Brought to you by 1AAuto.com, your source for quality replacement parts and the best service on the Internet.
Hi, I'm Mike from 1A Auto. I hope this how-to video helps you out, and next time you need parts for your vehicle, think of 1AAuto.com. Thanks.
In this video, we're going to show you how to service the front brakes on this 2003 Nissan Frontier. It's the same procedure right to left as well as 2001 to 2004 for the Frontiers. You'll need new brakes from 1A Auto, 22mm, 21mm, and 14mm sockets, ratchet, jack and jack stands, 6mm Allen socket or key, large and small flat blade screwdriver, circlip pliers, hammer and chisel, and a pipe for extra leverage. You'll also need some bearing grease and rags.
If you don't have the benefit of air tools, you'll want to loosen your lug nuts with the vehicle on the ground, raise and secure the vehicle, and then move the lug nuts, wheel, and tire.
Next, do a quick inspection of the brakes. You can see the outer pad right in between there. It actually has plenty of life left. You can see the inner pad through the check hole here, and there's actually good life left. These brakes are actually in good condition, but we are going to change them out just to show you how to do it.
You can also check your rotors just by running the back of your finger along them. Make sure there's no deep grooves or anything in them. Turn the wheels by grabbing them or use the steering wheel, and then you can see two 14mm bolts hold the calipers to the caliper bracket. We'll use a 14 mm socket and socket wrench to remove those. Fast-forward here using a large screwdriver to pry the caliper out, and you're prying against the rotor. This just helps to loosen the caliper up, compresses the pistons back in a little bit, and allows you to pull the caliper up and off easier.
Now, you'll want to remove the pads. They really should just kind of pull right out, but we'll use a screwdriver to help pry them out. Now we can pull the stainless steel slides that are in the caliper brackets out.
To remove the rotor, you'll need to pull the hub cover off. It's a 6mm Allen bolt, and we put the screwdriver in the disc to hold it in place. We'll fast-forward here. There are six more 14mm bolts that you're just going to need to loosen up. Keep that screwdriver in there for resistance. I'll fast-forward as I do that. Two 22mm bolts hold the caliper bracket on one there and there. You'll see we'll use our ratchet, and we'll use a pipe also for some extra leverage to get those bolts started.
Fast-forward as we remove those. I'll go ahead, and with that 6mm Allen key, or the socket and ratchet, remove the cover that goes to the hub assembly. I'll fast-forward as I do that. You're going to need to wipe out that area so that you can access the circlip that holds the drive shaft in place. You'll notice that there's a clip in there that you're going to have to expand with your circlip pliers. Place it in between the two ears, expand it, and pull it out.
See here, the method that we found to be best is to insert the pliers, expand the clip, and pull that whole silver collar off with it so that that collar actually helps pull it off. Then you're going to meet with another groove there at the end of the axle shaft. You might need to use a screwdriver to help expand it. That's what I've done here. Then go ahead and pull those pieces, both pieces, off.
Now you're going to find, behind there, two Phillips head screws, and small screws. Go ahead and remove those and set them aside. I'm going to use a small flat blade screwdriver to pry that ring off there. Pull that off and set that aside. Insert that small flat blade screwdriver and twist off the threaded collar there counterclockwise. Go ahead and set that aside when you've got that off.
Now you can pull your rotor assembly off. Be careful of that outer bearing that comes with it. Use a 14mm socket and impact wrench to remove, finally, completely remove, those six 14 mm bolts. I will fast forward as I do that. I've got those two pieces of 2 by 4 set up so that I can knock the center hub assembly off from the rotor. You can see it's necessary for me to spray some penetrating oil there to help with it. Then I'm going to use a chisel and a heavy hammer to knock it free. I'm going to go and move around in a circle on that hub portion and free it up.
Now we've got a new brake rotor up there, and we're going to place that hub assembly back in. Start reinstalling those 14 mm bolts that hold the hub assembly to the rotor by hand. Now I'm going to clean out the inside of that hub assembly with a towel. Make sure that I get as much grease as I can out of there, being careful of the bearing and not wanting to get any dirt in there while I'm cleaning it out.
Use some wheel bearing grease and grease the inside of the hub. You can see I'm cleaning off the outer bearing there. I'm going to put that aside for a second and, just by hand, take as much grease as I can and put it into the hub, packing it in as much as a I can, and then putting that outer bearing back in place and adding even more grease to that. I'm going to clean off that axle area right there. Once I've done that, gotten all the dirt and old grease off of it, I'm going to apply a new, small coat of grease.
Now you can reinstall the rotor with the hub assembly. Be careful about that outer bearing so that it doesn't pop out on you. Now you can go ahead and start back in with the threaded sleeve, or collar there. Start it by hand, use your screwdriver, and work it back on until it's tight. What you're going to have to do here is line up the holes in that threaded collar with that second one that has the two Phillips head screws that go through it. Basically, you want that threaded collar to be tight, but then back it off enough so that some of the holes, or at least two of the holes, line up and you can get a screw into both of them.
Here, I'm just going back and forth with it until I get them to line up. I'll fast-forward as I do that. Now, once you've got those holes lined up, or at least two of them, reinstall the two Phillips head screws. I'll fast-forward as I do that.
Go back in with that third collar there and the circlip that's going to go in front of it, or to the outer portion of the axle. Get your circlip pliers ready, expand it, and slide it over it. You might need a little flat blade screwdriver to help you seat it. Reinstall the cover with the 6 mm Allen bolts that go through it. Tighten them up with either your Allen key or your ratchet and socket. I'll fast-forward as I do that.
I'm going to clean that rotor off of any excess grease that I got on it while I was doing the work. You want to do the front and the back. The caliper guide, you're going to want to make sure that those slides are free. You can pull it out of the boot and make sure that there's grease in it. Then reinstall it and make sure that the boot is secure. Do that for both. Then we're going to clean up the caliper guide now with a wire brush.
We'll do the same for the springs that go between the pad and the caliper guide. I'm going to turn that assembly a little bit more so I can get to the back better. I'm going to re-install the caliper bracket and the 18mm bolts that hold it in place. I'll go ahead and fast-forward as I tighten those up. We'll go ahead and torque the bolts between 90 and 100 foot-pounds.
Okay, you've got the screwdriver inserted into the rotor again, and it's holding against the caliper bracket. I'm going to torque those bolts to 25 foot-pounds. I'm going to use that screwdriver again to keep that assembly from moving, and I'm going to tighten up those 6mm Allens. Take your brake springs and put them back on to your caliper bracket. Final cleaning of the rotor, front and back, with some brake cleaner and a rag. I'm going to use a little brake grease to put on the tabs of the brake pads before you put them into the caliper.
Reinstall the brake pads into the caliper guides. Reinstall your caliper and the 14mm bolts that hold it in place to the caliper bracket. I'll go ahead and fast-forward as I tighten those up. These bolts should be tightened up between 25 and 30 foot-pounds.
Re-install your wheel and start your lug nuts by hand. Go ahead and tighten the lug nuts back up. Now torque your lug nuts in a star pattern to 100 foot-pounds. Before road testing always pump your brakes up. Make sure you get a nice firm pedal and then do test stops from 5 and 10 miles an hour before road testing.
We hope this video helps you out. Brought to you by www.1AAuto.com, your source for quality replacement parts and the best service on the Internet. Please feel free to call us toll-free, 888-844-3393. We're the company that's here for you on the Internet and in person.
Shop Products


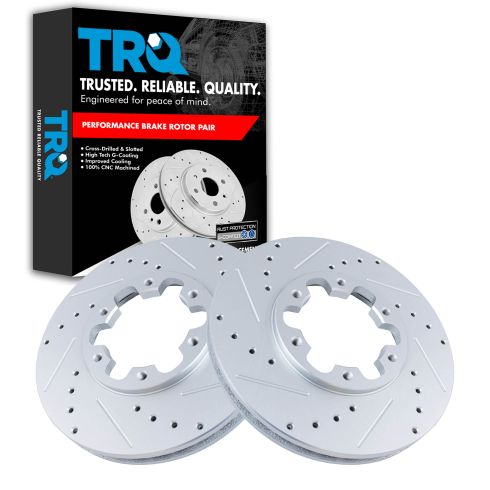
Nissan Infiniti Front Driver & Passenger Side 2 Piece Premium G-Coated Performance Brake Rotor Set TRQ Performance BRA74943
Part Details:
- Performance
- Premium G-Coated
- 2 Piece
- 6
- 283 mm
- 11.14 in
- Vented
- 4.88 in
- 124 mm
- 28 mm
- Cast Iron
- Slotted X Drilled
- 38 mm
- 10 mm
- 1.02 in
- Yes
- 0.39 in
- Performance
- 26 mm
- (1) Passenger Side G-Coated Performance Brake Rotor
- (1) Driver Side G-Coated Performance Brake Rotor
- No
- No
- Conventional
- 1.50 in
- 1.10 in
- 100 mm
- 3.94 in

How to Replace Front Brakes 2007-14 Chevy Silverado Truck
Watch this video to learn how to fix squeaky or fading front brakes. The experts at 1A Auto show you how to replace the brake pads and rotors on your 07-13 Chevy Silverado or GMC Sierra.
