How to Replace Front Brakes 2002-14 Volvo XC90
Created on: 2019-08-29
Learn how to change your own brakes! 1A Auto shows you how on your 02-14 Volvo XC90 in this step by step video! Check it out!
-
step 1 :Removing the Wheel
- Raise the vehicle with minimal weight on the wheel
- Loosen the five 19 mm lug bolts
- Raise and support the vehicle
- Remove the lug bolts
- Remove the wheel
-
step 2 :Removing the Brakes
- Pry the rotor inwards to compress the piston
- Remove the caliper slider pin caps
- Remove the two 7 mm hex caliper slider pins, taking not of each pin's location
- Pry off the pad spreader clip
- Remove the caliper
- Remove the brake pads from the caliper
- Support the caliper
- Remove the two 18 mm caliper bracket bolts
- Remove the 10 mm rotor hold bolt
- Remove the brake rotor
-
step 3 :Installing the Brakes
- Clean the wheel hub surface
- Apply copper anti-seize to the wheel hub if desired
- Install the Brake rotor
- Install the 10 mm rotor hold bolt
- Apply brake grease to the surfaces of the caliper that contact the brake pads
- Apply brake grease to the caliper slider pins
- Install the pins into the caliper, making sure to return each pin to the original location
- Install the brake pads into the caliper, the outer pad has the slotted tab
- Clean the pad contact surfaces of the caliper bracket
- Install the caliper bracket with the two 18 mm bolts
- Torque the 18 mm caliper bracket bolts to 26 ft-lb plus 60 degrees
- Install the brake caliper
- Tighten the brake caliper slider pins
- Replace the caliper slider caps
- Install the pad spreader clip
-
step 4 :Installing the Wheel
- Hold the wheel up on the hub, or use a stud pin to help
- Install the 19 mm lug bolts
- Tighten the bolts by hand
- Lower the vehicle with minimal weight on the wheel
- Torque the 19 mm lug bots to 103 ft-lb
Tools needed
-
Socket Extensions
Torque Wrench
Rust Penetrant
Pry Bar
Jack Stands
18mm Socket
19mm Socket
Brake Parts Cleaner
Pliers
Flat Blade Screwdriver
Angled Die Grinder
Brake Caliper Hanger
7mm Hex Socket
Copper Anti-Seize
10mm Socket
Ratchet
Wire Brush
Floor Jack
1/2 Inch Breaker Bar
Hey friends, it's Len here at 1A Auto. Today, we're working on our 2004 Volvo XC-90. This is the all wheel drive. We're going to be doing a front brake job. It's going to be super simple. I can do it, you can do it too. As always, if you need these or any other parts, you can always check us out 1aauto.com, thanks.
Okay friends, so just a quick note, we're going to be doing a lot of videos and replacing parts on this particular vehicle. If you happen to notice in the video that you're watching, all of a sudden a part just is brand new and it wasn't brand new before, odds are we cut out, we were doing another job, we replaced that part, we cut back in and we're just showing you the stuff that you need to know to be able to do your particular replacement.
Okay friends, so now what we're going to do is we're going to loosen up the wheel. I've got my vehicle supported from the ground, but the wheel's still touching so that it can't spin while I do this. I'm just going to use my 19 millimeter. I have a thin wall socket on there so it can squeeze in between the rim and the in the lug nut. I'm just going to break it free. It's a tight one. That's the reason for doing it while it's still in the ground. If you tried doing this up in the air, the wheel of course is going to spin.
Okay, so I've got three out of my five lug bolts out. This is what they look like right here. They screw directly into the wheel bearing. Once you take off this one right here and then you go to take this one off, there's going to be nothing holding this wheel on, so you need to pay attention to that. I'm just going to take this one lug here, lug bolt, put it in a couple threads, and that's just so the wheel won't be able to come off and potentially hurt me. Push my wheel up against, just grab it. I'm holding the wheel so it can't fall down at this point, and we'll just grab it off and set it aside safely.
Okay, so now it'll be time to push back the caliper. Some people would like to open up this right here. This is your bleeder screw. Other people won't even open this up. It really depends on what you want to do. You do you, booboo. To show you what I'm talking about with the pry bar, just go right in here, find something to pry on, and then just get this to go. Just like that. Now we got it so our caliper can move around, so when we put new pads in there, they'll have plenty of room to be able to squeeze in. Now that we have this push back, we can move ahead to the next step.
Okay, so we have these little covers. They're hollow. There's one right here, there's one right up here, and that's just for the caliper sliders. They protect them from moisture and debris and all that, and they're very easy to pop out. You can just use your pry bar or a screwdriver or whatever you want. Then we'll come in here and we're going to take out these sliders. They should be an Allen head, 7 millimeter. This is what your Allen looks like, it's the shape of a stop sign, 7 millimeter. There we are. Almost out. It's unscrewed completely at this point, it's just in the rubber, and normally I would just leave it in for at this point, but I want to show you what it looks like so I'll just grab my pliers, try to pull it out of here. There we are.
This is the slider. This portion right here goes in and out inside the boot, and this part right here screws into the bracket. We'll set this aside and we'll grab the second one out. Here it is. Second one, same as the first. We'll make sure we clean these up good before we reinstall them. Okay, so for this, I'm going to use my pry bar and a screwdriver, and we're going to take out this clip right here. To do that, i'm going to use my screwdriver, get right in here. I'm going to twist and pop that right out of there. If I had a third hand, I could have caught it, but it is what it is. That's what it looks like. There's a little tab right here. It slides down in here. This thing right here just flexes and that's what holds it. Okay, we'll set this aside.
Okay, so now we'll just grab our caliper, give it a little wiggle. This is one giant caliber. I don't know if I've seen one this big for something like this, but okay. Here's what we're dealing with. We've got our pads in here. Should probably just slide right out. There we are. Got these little clips. They just sit in there, so that's what was holding it. We'll set it aside. Grab this one, same thing. Set that aside. Now we're going to put this up here for now and I'm going to grab something to hold it so it can't dangle. All right, we'll just get this hanging, put it right up on the coil, hopefully. There we are. That's just so we're not hanging it off of the flex hose. This is a giant caliper, it probably weighs quite a bit and we don't want to put any tugs on our flex hose. I'm going to use my 18 millimeter socket with a nice long ratchet, and we're going to remove this bolt right here and this bolt right here.
Oh yeah, try doing that with a short ratchet. Once they break free, it's easy peasy. Our caliper bolt. This one, I'm holding the bracket of course. Bolt number one and bolt number two, both look the exact same. Looks like we have some thread locker on there so I'll make sure I cleaned that off before I re-install. Then of course, it would be your prerogative if you want to use thread locker in the end. There is a difference with the pads and the difference would be the clips right here. You could tell the difference. This one of course has a much bigger clip and that sits inside of the caliper piston, and then this one right here has smaller clips. They sit in that little hole on the outside of the caliper and it's got the little thing for the a piton to go through. Okay, just wanted to show you so when we go to re-install some new pads you'll remember which is which.
We're just going to remove this right here. I'm going to use my 10 millimeter, on my ratchet. That's holding the rotor on, okay, because generally speaking, most wheel bearings have studs that come out and that'll hold the rotor from falling off on you. This one, not so much. It also helps keep the rotor from moving around on a new install, and that way there, you don't get any rust and debris behind there. There's what our little mounting bolt looks like. It's very small. We don't want to lose it because we need it.
Here we are friends, a quick product comparison for you over here. Over here, we have our original front brakes out of our 2004 Volvo XC-90. We just removed them, super easy. Over here, we have our brand new quality 1A Auto parts. These are performance parts, they're drilled and slotted. This is for dust dissipation and also heat distribution. It's going to distribute the heat, try to get it out and away from the rotors so your breaks don't overheat under heavy braking situations. You're going down a long hill, you just climbed Mount Washington. Whatever it is you're doing, these are going to be able to cool down nice and easily for you and you're not going to end up with something like this. Hard spots on your rotors, this is very bad.
What happens is, is once this starts to build up right here and your rotors heat up from breaking, it swells. As this swells and your pad comes around, bump, bump as it goes around. Right? That happens, you're going to feel, in your steering wheel. You ever be driving down the highway or anything like that, you go to step on the brakes and you feel out of your steering wheel? That's because of something like this, hard spots on your rotors due to the rotors not being able to cool down the way that they're supposed to.
Like I said, we've got drilled and slotted rotors here. We've got quality brake pads for you to install. They've got the same clips that you're looking for. Remember, this is the front one. It's got the nice little thing for your piton to go through. We got the clips where it goes into your caliper, holds it in nice and tight. Of course, they've got the little thing in the center there, that's to help with dust and air and everything like that. We'll set those down. As you can tell, these are quality parts. I don't see any reason why I wouldn't want to install them into the vehicle, so I'm going to go ahead and do it. If you need these or any other parts, you can always check us out 1aauto.com. Thanks.
Okay, so now it's time to clean up this hub. We just got the rotor off. We want to make sure when it's time to put on the brand new rotor, this is as clean as can be. You want it to look almost new. If you can get it new booya. All right, so you can go with a couple of different options here. Can use something like this, we sell it right on 1aauto.com. It's got a little a standing blade on here. Cleans it up. Nice. You can go like that, that looks great. Or if you've got all day and you're not really doing anything, you just want to spend some time outside or in the garage, you can go a little brush. This is also available on 1aauto.com. Works just as good. There we are. That looks pretty great.
Okay, so now what we're going to do is we're going to put on a little bit of copper never seize here. That's just going to help the rotor come off if you ever have to take it off again someday. You know, 60,000 miles or whatever, maybe you want to do another break job. We've got our quality 1A Auto rotor here. This is where that little bolt's going to go through, and it's going to go through any one of these holes, so you don't really have to worry too much about that. Let's get this up on here. Get our little bolt. Okay, it's just a small bolt, so I didn't need to go out here and give it like a bonk, bonk, bonk, try to break it off in there. It's not about breaking things. It's about getting the job done. The rotar's on. Let's move ahead to the next step.
All right, so now we'll grab our caliper, our handy tool there. Okay, so here's the inside of our caliber area. This is the piston, the muscle. Just make sure there's no moisture coming out from around there. That would mean there's a bad seal. This looks good. Some of this stuff's a little a rotted and flaking here, but it really doesn't look like it's too bad. Nothing that I would worry about. Right back here is where the rubber boot is, where your slider is going to come through. There's one right there as well. The sliders, when you look at them, you'll notice that the top one's going to be a little longer than the lower one. In case you look at them and you're like, "Oh no," this is what we're dealing with. Top one's going to be the long one. The lower one's going to be the shorter one. Okay. It's pretty easy.
I'm just going to set this like this, and then I'm going to use some, little bit of silicone paste or you can use a brake lube probably be better. We'll go with that. I like this because it's darker and silicone paste is a little bit more expensive as well. I guess it really just depends on what you want to do. But, essentially, any type of lubricant that won't just wash off or melt away once the breaks heat up because that's what they do. It's friction, right? You step on the brake, it causes friction, makes you stop. I'm going to go right on the ear right here. Pretty much anywhere where the caliper is going to be touching up against the pad, i'm applying a little bit of this lubricant. That's just because it's going to help with vibration dampening and help keep moisture out from in between there. That's always nice.
We've got our little slider pins here. I'm just going to grab a big glob, apparently. I don't know why it's doing that. Okay. I'm just going to go right along like this. You don't necessarily need to get any on the threads. It's not about the threads so much as just the smooth part of the metal. I didn't mention, but I did clean up the sliders so they're not all pitted in corroded and full of gunk. I cleaned them up with a wire wheel real quick so they looked good. Now we can reuse them. Like I said, the long one goes in along the top. Just get that in. I like to give it a little twist as I'm going here. That just helps make sure I get the lubricant going all the way around, super important. Here we are.
They're starting to come through. Let's give them a little push so they're pretty much flush, and that way they won't get in the way. Now I'm going to grab our pads, leave that there. Here's our pads. We remember, we have the outer pad, which has the little slot, and then we have the rear or the inner pad I should say, which has the area that presses into the piston. I'll start with the inner pad. Going to bring it in, line it up with the piston. You might need to squeeze in the little ears for the pad because they're just waiting to do their job, which is to hold onto the piston so they can't just slide around. That holds in there pretty good. It's not flopping around. That inner pad is good to go.
Grab your outer pad. This one, for right now, is just going to go in here. Let's see if I can get the, we've got little tabs, so the tabs are, they're trying to hold onto the caliper right now so you just got to really kind of give it a good squeeze. Anytime now. Oh yeah, booya. A little bit of pressure. All I did really was I tried to kind of wedge it, get one side coming through, and then I came through from this side, essentially on the backside of this, and pressed on this ear so I could squeeze at the same time, pop it through. Give it a little wiggle, nothing's moving. We're looking good.
We're just going to take our 1A Auto brush here, clean up our bracket. This one's really not in bad conditions, so it shouldn't require very much service. If you have large chunks of anything or grooves coming across here where the pad might get caught, you could just use that other tool there that I showed you earlier. This puppy right here, and just kind of ... something like that will do a good job. But for what I'm dealing with, this looks really good. I'm just going to clean it up.
We've got our bracket. Just get this one right over here. We've got our two bolts. It's up to you if you want to go ahead and use some thread locker on them, we'll leave it up to you. I'm not going to get mad at you. Stuff like this I like to use a little dab, but it's your prerogative. You do your booboo. Going to snug this up, bottomed out, bottomed out. Let's torque it down. It's going to be two steps, 26 foot pounds. There we are. Which, as you could tell, is not very much at all. Now we're going to go ahead and we're going to bring this to the next step, which would be an extra 60 degrees.
Okay, so now we're going to take this. So the line matches up with our 60 degrees there, which apparently is super tight. I have never seen, yeah, looks good. All right, so 60 degrees. We'll do the same to the top one. Just get our caliper on here now. It should just slide right over, the pads sit right into the bracket. That feels nice, very nice. I'm going to take my 7 millimeter Allen head. I'm just going to see if I can get it started in here. If it feels like it's getting tight prematurely, it's probably cross-threading in, so you know, use your best judgment. It feels like both of these are started in at this point. I'm just going to go ahead and snug that. Come up here and going to do the same thing to this one. Tight, tight. Let's move along.
We've got our little covers. We'll just make sure we put those back over this. They're easy to forget. Okay, so we've got our little clip here. There's our little piton. It's going to go inside there. This area right here, it's going to go right underneath, and right underneath there. Start with whichever side you want. Get your center lined up, and then just bring this down, slide it in there. It's going to mess with you a little bit. You definitely want to make sure that your piton goes in through here, and just give this a little shake like that. I can see it coming right through, right there. That looks good. This is underneath here where it's supposed to be, and that's where it's supposed to be. Awesome. Let's move along. Okay, so that's it for the brakes. We got that all done. To do the other side of the vehicle, you just do the same exact procedure. Easy peasy.
All we have left now to do is get the wheel on here and get it torqued up, and down the road we go. Okay, so now to make it easier to get the wheel up on here where we don't have the lug studs that are sticking out and you put your wheel up on and it just kind of holds the wheel nice and easy for you, you don't have to stand there and hold it forever. Volvo decided to make it fun and interesting and make it work your muscles a little bit. Well, one, 1A Auto sells this awesome tool, and basically all these are is they're going to give you a lug stud, so when you're putting your wheel on, you just slide your wheel right over this and it's going to kind of hold it there so you don't have to sit there and try to muscle it the whole time while you try to line up the holes and put your lug stud in, or lug bolt.
I'm going to set that aside. I'm going to grab my wheel, bring it right over. Hold on to one of my lug nuts. Just going to bring this up, slide it right over that. Boy oh boy, that made it easy. Now, we just take our lug bolt, put our wheel up against there, start this in, hopefully. I should have grabbed one of my sockets, it would've made my life a little easier here. There we are, and even though I was holding the wheel steady that whole time, I didn't have to have my whole body holding it, trying to line it up while I'm staring into the hole and put this through. Thank you, 1A Auto. We'll just start all these lug nuts in, and then we'll bottom them out and torque them down.
Okay, we've got all the lug nuts bottomed out. Now we'll just bring the vehicle back down so the wheel's touching the ground, but without full force of the vehicle's weight on the wheel. Then we'll torque down these lug nuts. Here we are friends, we've got our torque wrench out. It's set to 103 foot pounds. I have my thin wall 19 millimeter socket because there is limited space to get in between these lug bolts and the wheel. When we tighten these down, we're going to go in a star pattern here, here, here, here, here. Then, if we decide to go around again, we'll do the same thing.
But anyway, the reason for going into star is essentially, so as we're going around, if the wheel is cantered it a little bit, it won't get stuck that way and maybe the torque wrench thinks it's torquing it down to 103 like it's supposed to be, but it's a little bit cocked off to the side, and then you drive it down the road, hit a bump or whatever, everything starts loosening up, your lug bolts come out. Long story short, just tighten them in a star pattern. There we are. I always like to go around twice. Doesn't cost me anything, doesn't hurt me any, and it's a small price to pay for safety. Okay, all torqued up. Great job everybody.
Thanks for watching. Visit 1aauto.com for quality auto parts shipped to your door, the place for DIY auto repair. If you enjoyed this video, please click the subscribe button.
Shop Products
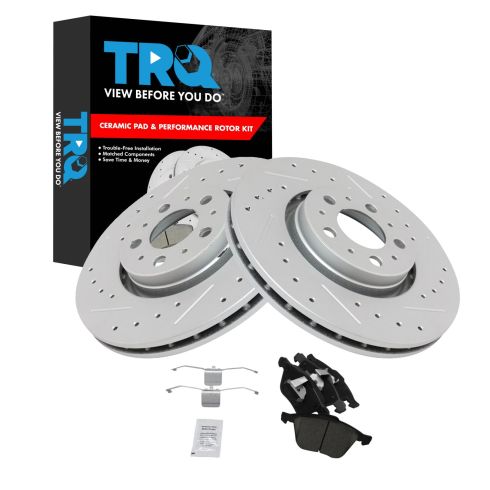
Volvo XC90 Front Ceramic Premium G-Coated Performance Brake Pad & Rotor Kit TRQ Performance BKA12874
Part Details:
- 12.44 in. (316mm)
- Performance
- Vented
- Premium Posi
- 5 Lug
- Ceramic
- Premium G-Coated
- Slotted X Drilled
- Performance
- (1) Front Ceramic Brake Pad Set
- (1) Front Premium G-Coated Performance Brake Rotor Set

How to Replace Front Brakes 2001-06 BMW 325Ci
How to repair, install, fix, change or replace your own worn, squeaky, fading old brakes on 06 BMW 325Ci
