How to Replace Front Brakes 2001-05 BMW 325 Xi
Created on: 2019-06-04
Learn how to remove the old front brakes and prepare and install new ones with this how-to video. This video also includes the necessary torque specs
-
step 1 :Removing the Wheel
- Loosen the 17mm lug nuts with the vehicle on the ground
- Raise the vehicle with a floor jack
- Secure the vehicle on jack stands
- Remove the lug nuts
- Pull off the wheel
-
step 2 :Removing the Rear Brakes
- Unbutton the ABS wire retainer
- Press the clips on the ABS sensor with needle nose pliers and disconnect it (driver side only)
- Pry out the brake pad retainer spring with pliers and a flat blade screwdriver
- Remove the brake caliper bolt covers
- Remove bolts from the brake caliper with a 7mm Hex socket and ratchet
- Pry the brake pads into the caliper with a flat blade screwdriver to push in the pistons
- Pull the caliper aside and secure it to the suspension with a bungee cord
- Pry the brake pads off with a flat blade screwdriver
- Remove 16mm bolts from the brake caliper bracket
- Pull off the brake caliper bracket
- Remove the 6mm hex screw from the rotor
- Pull the rotor off
- If the rotor will not come off, thread the lug nuts and strike the hub area of the rotor with the ball end of a ball peen hammer
- Remove the brake pads from the brake caliper
-
step 3 :Preparing the New Brake Pads and Rotors
- Clean the wheel hub with a wire brush
- Apply copper anti-seize to the wheel hub
- Clean both sides of the rotor with brake parts cleaner
- Put the rotor on
- Tighten the 6mm hex screw to the rotor
- Remove the brake pad slides
- Clean the slides with a wire brush
- Clean the brake pad slides mating surface on the brake caliper with a wire brush
-
step 4 :Installing the New Brakes
- Put the caliper bracket back into place
- Start the 16mm bolts by hand
- Tighten the bolts to 81 foot-pounds of torque
- Use a caliper piston tool to push the pistons back
- Apply brake grease to the brake pad tabs
- Install the new brake pad into the caliper
- Install the brake pad to the caliper bracket
- Put the caliper on
- Apply grease to the caliper slides
- Tighten the 7mm hex bolts on
- Tighten bolts to 20 foot-pounds
- Attach the caliper bolt covers
- Attach the brake pad clip
- Connect the ABS wire to the brake pad with needle nose pliers
- Button the ABS wire retainer
-
step 5 :Reattaching the Wheel
- Slide the wheel into place
- Start the 17mm lug nuts by hand
- Tighten the lug nuts preliminarily
- Lower the vehicle partially to the ground
- Tighten the lug nuts to 95 foot-pounds in a crossing or star pattern
- Lower the vehicle completely
-
step 6 :Testing the Brakes
- Pump your brakes repeatedly until they feel firm
- Check the brake fluid level is between the min and max line and add accordingly
- Test your brakes at 5 miles per hour and then 10 miles per hour
- Road test the vehicle
What's up, guys? I'm Andy from 1A Auto. In this video, I'm going to show you how to replace the front brakes on this 2001 BMW 325xi. If you need these parts or other parts for your vehicle, click the link in the description and head over to 1aauto.com.
Now we're going to be doing the driver's side brakes on this vehicle. This has a pad sensor on this side. It doesn't have one on the passenger's side, so when you're doing the passenger's side, there may not be a sensor.
All right, I want to loosen the these lug bolts. I'm going to use a 17 mm socket and a breaker bar, loosen them up.
Now I'm going to raise and support the vehicle. We're using a two-post lift. If you're doing this at your house, you can use a jack and jack stands.
Now I'll take these lug bolts out. Just use the socket to help you get them out. I'm going to just hold the wheel with my other hand so it doesn't fall. Take the last one out. Then I can grab the wheel and slide it off.
All right, so I'm going to use some needle nose and I'm going to just grab right here. Try to squeeze this. This is the brake pad sensor. And then try to pull it out just like that. There's a little spring in there. And then we can take this off here. That's the retainer that holds it on.
You want to take this spring off. There's a couple ways to do this. I'm just going to take some large pliers, squeeze this, and then take a screw driver. Watch your eyes, because normally, these springs go flying. Try that. Pull it off.
On the back of the caliper, there's two little caps that cover up the bolts to hold the caliper on. I'm going to use a small screw driver, take these caps off just like that. Then I'm going to use a 7 mm, hex head socket and ratchet. Take these two bolts up. Once I break those free, I'm going to use an air ratchet. If you don't have an air ratchet, you can just use a regular ratchet. Take that bolt out. It's like a slide bolt. The caliper actually slides on this. Pull that one out, as well.
Just going to use a straight-blade screw driver. Just pry this out a little bit just to loosen up the caliper. That's going to push the piston in a little, and then we can just slide it out. And then I can use one of these caliper hooks. Just slide it in here. We sell these at 1aauto.com. Then hook it on the coil spring.
I'm going to take these two bolts out for the caliper bracket. I'm going to use a 16 mm socket and a breaker bar just to break them free. Loosen that one up, and then loosen this one up. All right, now I'm going to use an air ratchet. If you don't have an air ratchet, you can just use a regular ratchet with the 16 mm socket. Slide the bracket back. Take those bolts out.
We want to take the screw out. This holds the rotor on. We can use a 6 mm socket and a ratchet. We can give that a try. A lot of times, these are pretty tight on there, so you're going to have to use an impact driver. We actually sell this impact driver. What it normally does, you normally put different bits in this piece, but this actually comes off, and then you have an adapter for a 3/8 socket, so we can slide that on. Slide that in there. We can hit this with a hammer.
Now the rotor doesn't have any studs, so keep your hand on the rotor, or you can put a lug stud in there. Pull that out. I'm just going to put one of these in, because the rotor's stuck on there. Oh, it's kind of loose, but then I'll take a hammer and just give it a tap, and it pops right off. Pull it off.
Take these pads off the caliper. Those are pretty rusted on there. This pad off. Give this pad a tap.
Here's the old brake parts. Here's the new brake parts from 1aauto.com. If you look at the rotor, the rotor's the same height, has the same machined surfaces. The pads. Pads are the same style, have the same ears, the same pad material, same place for the pad sensor. You can get yours at 1aauto.com, and you'll be ready to do it yourself.
Right. Now we want to clean this hub up a little bit before we put the rotor on. We can take this wire brush. We actually sell a kit of these. It comes with three different brushes. We'll just sand this down. All right, so that the rotor doesn't stick to this hub next time we take it off, I'm just going to put a little anti-seize just around the center here. Just spread it out. I don't like to use a lot of this, because it gets everywhere, so just a nice, thin coat.
Now there's a protective coating on the rotor to prevent it from rusting, so I just want to spray that off with a little brake parts cleaner and wipe it off on the back side, then can position this on the hub. You can take that screw that holds the rotor on, get that started. Just take a ratchet and just snug this up. You don't have to have it too tight. Just snug. Clean this side of the rotor, brake parts cleaner and a rag.
I'm going to clean the bracket. We'll use this wire brush. Just clean this area right here. Any of the areas where the pad is going to make contact with it, just get that rust off.
Now we can reinstall this caliper bracket. Slide that in position, put the two bolts in there. Now I'm going to use my 16 mm socket and this torque wrench. We actually sell this torque wrench at 1aauto.com. I'm going to torque these bolts to 81 foot-pounds.
Now I'm going to take the caliper hook off, slide that out of the way. I have this brake caliper piston compressor that we sell at 1aauto.com. Slide it in there, and then it's going to ratchet. This is going to compress the piston in the caliper, send the brake fluid through the hose, through the brake lines, back into the master cylinder, and into the reservoir. Just do it slowly. You can slide the tool out.
Just going to take a little brake caliper grease, put it on the ears of the pads. This flat one is going to go right here on the outside. Make sure it slides in there nice, which is good. And then this one with this clip is going to go on the piston side of the brake caliper. Slide that in. Then we can take the caliper and just slide it in position, just like that.
All right, now I want to clean these brake-caliper slide pins. I'll just take some brake parts cleaner and a rag, just clean them up. If they're rusty, you're going to want to get a wire brush and get the rust off. Those look pretty good.
Just take a little caliper grease, put them on these bolts right here, just like that. Now we'll slide this into the caliper. Then I'll take the 7 mm, hex-head socket and get these bolts started. Take a ratchet, tighten these down. Now I'm going to be use a 7 mm, hex-head socket and a torque wrench. We're going to torque these to 20 foot-pounds. Take the caps, put the caps back in.
I'm going to reinstall this spring. This holds the caliper to the bracket, prevents it from rattling around. It's a good idea to replace these when you're doing this job, but it's not necessary. Make sure that's in there properly. That's good.
Now before I put the wire through this retainer right here, I'm just going to slide it in position on that pad. Just take the needle-nose pliers to help assist and just slide that into position. Just like that. And then put this retainer right there. Lock that down.
Now I'm going to install the wheel. Line it up with the lug holes. I'll hold the wheel on. Grab a socket with my lug bolt. Get that started. All right, now I can lower the vehicle and torque the lug nuts.
Now I'm going to use a 17 mm socket and this torque wrench that we sell at 1aauto.com. I'm going to torque these lug bolts to 95 foot-pounds in a star pattern so that it torques the wheel down evenly. I'll just go around again.
After we do the brake job, we want to make sure we pump the brake pedal, because right now, there's an air gap between the caliper piston and the brake pads, so we pump that and that gets rid of that air gap.
We want to check the fluid level and make sure that the fluid level is between the min and the max, preferably closer to the max. Ours is a little bit high, so we will have to extract some of the fluid. If it was low, you would have to add some. You're going to check the cap and make sure you use the appropriate fluid. This is DOT 4 only.
Thanks for watching. Visit 1aauto.com for quality auto parts shipped to your door. The place for DIY auto repair. If you enjoyed this video, please click the subscribe button.
Shop Products


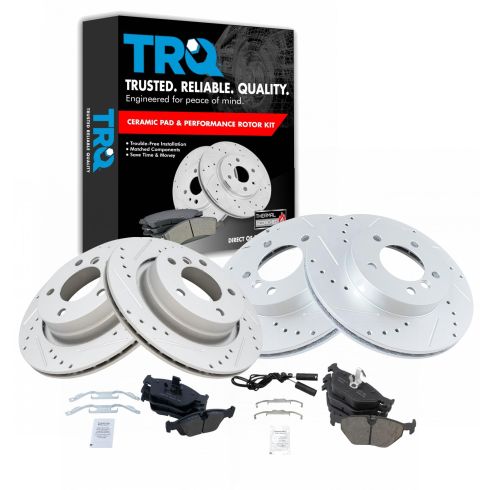
BMW 323Ci 323i 325Ci 325i 328Ci Front & Rear Ceramic Premium G-Coated Performance Brake Pad & Rotor Kit TRQ Performance BKA12327
Part Details:
- Ceramic
- Premium Posi
- Vented
- 11.57 in. (294mm)
- 11.81 in. (300mm)
- Vented
- 5 Lug
- Performance
- Premium G-Coated
- Slotted X Drilled
- Performance
- (1) Front Premium G-Coated Performance Brake Rotor Set
- (1) Rear Premium G-Coated Performance Brake Rotor Set
- (1) Front Ceramic Brake Pad Set
- (1) Rear Ceramic Brake Pad Set
How to Replace Rear Brake Pads and Rotor 2003-11 Ford Crown Victoria
Watch this video to learn how to replace the rear brake pads and rotors on your 03-11 Ford Crown Victoria, or Mercury Grand Marquis
