How To Replace Front Brakes 2001-04 GMC Sierra 2500HD
Created on: 2011-03-29
Replace the squeaky, fading, or rusty front brakes on your 01-04 GMC Sierra yourself, after watching this 1A Auto video to learn how.
-
step 1 :Remove wheel.
- Remove hub cap or center cap if you have it, using a 21mm socket if needed.
- While your car is still on the ground, use your 22mm socket to loosen your lug nuts.
- Jack up and secure your car with jack stands.
- Remove the lug nuts with your 22mm socket and ratchet.
- Remove the wheel and set aside.
-
step 2 :Remove the calipers
- Use a screwdriver to force the pistons back in.
- Remove the two 18mm bolts to remove the calipers.
- Use a wire tie to fasten the caliper out of the way.
- Use your screwdriver to pry out your brake pads.
- Remove the two 21mm bolts on the caliper bracket to remove it.
- Remove the caliper bolt sleeves.
- Check their condition and clean them with a wire brush if necessary.
- Screw in the two 10M bolts into the rotor till it pulls it off.
- Pull off the brake rotor.
- Hit the rotor with a rubber mallet or hammer if necessary.
- Take care not to damage the lug studs.
-
step 3 :Install new rotor and pads
- Clean new rotor with brake cleaner.
- Clean hub with a wire brush.
- Use a little anti-seize to keep the rotor from seizing to the hub.
- Insert your new pads into the brackets.
- Put your caliper bracket back on, and tighten the bolts to 120 ft lbs.
- Compress the caliper piston with a c-clamp and block of wood to reset the pistons.
- Mount the caliper on the bracket and torque the bolts in to 90 ft lbs.
- Use a little anti-seize to keep the rotor from seizing to the hub.
-
step 4 :Put wheel back on
- Use a little anti-seize to keep the wheel from seizing to the rotor.
- Make sure to use a star pattern when putting your wheel lugs back on.
- Tighten to 120 ft lbs.
- Replace hubcap/center cap.
-
step 5 :Test and set brakes
- Before driving the car again, start it up and pump the brakes a few times to get the pistons in the brakes in place.
- Test the brakes in your driveway before taking the car onto the road.
- Set your rotors by evenly braking from 30mph to 10mph, 50mph-30mph and finally 70mph to 40mph.
- This is best done on a straight back road without any traffic.
Tools needed
-
Large C-Clamp
Torque Wrench
Hammer
16mm Socket
18mm Socket
Block of Wood
21mm Socket
Flat Blade Screwdriver
Anti-Seize Grease
Wire Ties
Lug Wrench
Ratchet
Wire Brush
Floor Jack
1/2 Inch Breaker Bar
22mm Socket
Brought to you by 1AAuto.com your source for quality replacement parts and best service on the internet.
Hi, I'm Mike Green. I'm one of the owners at 1AAuto. I want to help you save time and money repairing or maintaining your vehicle. I'm going to use my 20+ years experience restoring and repairing cars and trucks like this to show you the correct way to install parts from 1AAuto.com. The right part installed correctly that's going to save you time and money. Thank you and enjoy the video.
In this video we're going to show you how to change the front brakes on this 2002 GMC 2500 HD, pretty much the same as any 2000-2006 and even some '07, the 2500HD as well as the 2500 both GMC as well as Chevy Silverado. Tools you'll need are: A jack and jack stands, various millimeter sockets with a ratchet, an extension, a breaker bar or metal pipe for some leverage if you don't have impact tools like I have in the video, penetrating oil, a large screwdriver or pry bar, a wire brush, two 10 m x 70 mm long standard thread bolts, anti seize lubricant, and a large C-clamp and a piece of wood.
Okay, so you'll want to remove your caps 21 mm, do this carefully. Okay, we'll fast forward a little bit and we'll use fast forward quite a bit for these monotonous parts. If you don't have air tools you'll want to loosen the lug nuts with the tire on the ground, then jack up and support with jack stands under your vehicle. We're using a 22 mm. Okay, and we'll fast forward here again as we remove the rest of the lug nuts and remove the tire from your vehicle. You can see here I go to the other side and just turn the wheel, you can also just use your steering wheel, this allows you access to the back easier. Okay, so you want to inspect your brakes and you can see the face of this rotor is nice and smooth, if you run the back side of your fingernail up and down it, it looks pretty good. Then there's, you can actually see, probably, you can see right here when you move, you can see that moving part to the rotor, just to the left of it that's your brake pad, which it looks like there is pretty good life and this right here is your other brake pad and again, it looks like pretty good life. But, if you come down here and we look up in here and look at the surface of the rotor in here one, I can see some pitting which I don't like, and then there's a pretty good groove on this here so I'm going to remove the calipers and the rotors.
To remove the calipers I'm going to start with these two bolts here, okay, this bolt and this bolt. Okay, I want to remove the bracket to remove the rotor or the disk, I'm going to move this bolt and this bolt down here. I'm just going to take a big screwdriver, put right in here, and then slowly pry out. Okay, and that does two things it resets the pistons and also loosens it up so that the caliper comes right off.
The bolts are 18 mm, so a breaker bar is your best tool and if you only have a ratchet what you can do is take a piece of pipe and put it on the end and that gives you more leverage. Then you can pull and loosen those up. I do have air tools so I'm going to use them. Pull your pins out here and you'll want to clean these up and re-grease them. My lower one is not coming out very easily. Okay, that was pretty dry so we really need to clean that up and grease it well. It's okay to use the screwdriver to pry the caliper to come off. Then you'll want to set that here. Then your pads come off easy enough. If you were just changing your pads, we just pull off like that. Now the bolts that hold this bracket on are 21 mm. So what you'll probably want to do is spray a bunch of penetrating oil on there. Another thing that will help is if you take a screwdriver and you clean as much of the scale and stuff right here, okay, after you scrape that out coat back here with the penetrate as well. And I did show doing that to one spot, what you want to do is spin the rotor around and scrape all the scale for the entire diameter of the rotar and also coat the entire circumference of the rotor.
Is some M10 metric bolts; these are 7 cm long and just thread them in these two holes. I'm going to use my impact wrench, so you're basically just going to tighten them up so you pull the rotor and it comes off. Then take your bolts back out of the rotor. We can see on this rotor there is some definite pitting issues and we're going to replace it. With the rotor off, we want to clean off the hub. I used a screwdriver to scrape some of the scale off and then a wire brush to clean up more of the rust and then we're going to use some anti seize and put it on there. You can also use some, just some motor oil or penetrate to seal it.
Okay, so here's our new rotor from 1A Auto, the exact same as the old one and it has the threaded holes so it will come apart and I put a bunch of anti seize in the inside and put it on here. Give it good tap and then I like to put a couple of lug nuts on just makes it easy to get the brakes all together. Okay, now I'm going to take the brake parts cleaner, cut a paper towel, make sure there's no grease or anything still on the rotor. If you don't have brake part cleaner, household rubbing alcohol will do the same thing. Okay, so here's our caliper brackets, okay the stainless steel slides here take the wire brush and just clean those and polish them up nice, not polish them but just clean them off.
Now, here without 21 mm bolts we're bolting the bracket back on to the backside of the steering knuckle. Do keep in mind that the bracket goes on the rotor side so we'll start these bolts. Tighten these up to 120 foot pounds. These shoes have thin shins on them so you want to put a little coat of silicone lubricant on them and then you want these wear tabs to be facing against the way the wheel is going, you basically want them facing down. So, you put this on.
Okay, so you remember our slide bolt that was dry? Take a screwdriver and kind of get any of the scale off of it. This one is borderline needing to be replaced actually. Okay, a little grease on it, make sure it's greased up well. Okay, what I've got here is a piece of wood on both pistons and then a large C-clamp and as I tighten it's going to force the pistons back into the caliper. Tighten it as much as you can and get those pistons seated as far down there as you can and your clamp goes over the wood and then your caliper will go down right over, but you need to kind of move the little boot around a little bit, and then your bolt you cleaned up and lubricated. So, the caliper still moves back and forth we want a little bit more, I'm going to put these up to 90 foot pounds.
Okay, we're going to speed it up here, as I straighten the wheels, remove those two lug nuts, a little bit of anti seize or you could just put some oil or something just to keep the wheel from seizing to the disk. And now put the wheel on start your lug nuts by hand first, then I use my 22 mm impact wrench just to tighten them up preliminarily. Okay, now with the truck on the ground I'm going to torch my lug nuts to 120 foot pounds. I'm going to use a crossing pattern and then just another key while I'm doing this, before you drive your vehicle make sure you pump your brakes a whole bunch of times until the pedal feels nice and firm. That works the cylinders or the pistons back to the set position and then just make sure your brakes hold the vehicle in gear and then do a stop from 5 mph and a stop from 10 mph before you go out and road test your vehicle.
We hope this helps you out. Brought to you by www.1AAuto.com-- your source for quality replacement parts and the best service on the internet. Please feel free to call us toll free: 1-888-844-3393. We are the company that serves you on the internet and in person.
Shop Products


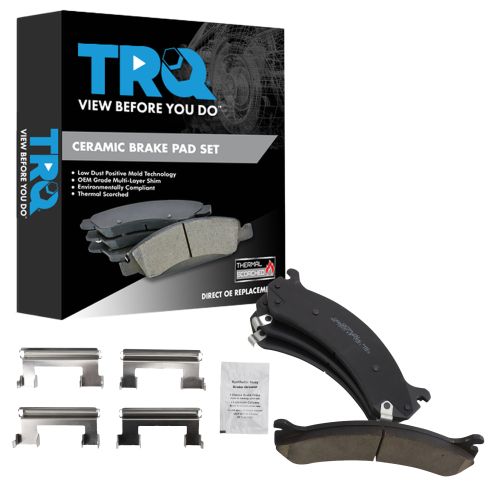
Chevrolet GMC Cadillac Hummer Front Ceramic Brake Pads TRQ BFA73096
Part Details:
- Premium Posi
- Contact Point Grease
- Hardware
- No
- Ceramic
- Black
- Yes
- 0.71 in
- 18 mm
- Mechanical
- Yes
- Yes
- Yes
- Bonded
- Yes
- Yes
- 4
- Yes
- Standard Replacement
- 0.71 in
- 0.71 in
- 18 mm
- Black
- Yes
- 0.71 in
- Steel
- 216 mm
- N
- R-S-R
- No
- 18 mm
- 2.64 in
- 216 mm
- 67 mm
- 67 mm
- No
- 18 mm
- 2.64 in
- Ceramic
- Yes
- 8.5 in
- 8.5 in
- Yes
How to Replace Front Brakes 2007-14 Chevy Silverado Truck
Watch this video to learn how to fix squeaky or fading front brakes. The experts at 1A Auto show you how to replace the brake pads and rotors on your 07-13 Chevy Silverado or GMC Sierra.
