How to Replace Front Brake Pads and Rotors V6 3-6L 2010-14 Chevy Camaro
Created on: 2017-03-28
How to repair, install, fix, change or replace your own worn, squeaky, fading old front brakes on 11, 12, 13, 14 Chevy Camaro
-
step 1 :Removing the Wheel
- Loosen the lug nuts with the vehicle on the ground
- Raise the vehicle with a floor jack
- Secure the vehicle on jack stands
- Remove the lug nuts
- Pull off the wheel
-
step 2 :Removing the Brakes
- Put a 17mm wrench on one lug stud to counter-hold the rotor
- Remove the T30 Torx bolt from the brake rotor
- Remove the two 14mm slide bolts from the brake caliper
- Pull off the brake caliper
- Hang the caliper aside with a bungee cord
- Remove the two 18mm bolts from the caliper bracket
- Pull off the caliper bracket
- Strike the rotor with a hammer if necessary
- Pull off the rotor
- Tap the pads out of the caliper bracket with a hammer
-
step 3 :Preparing the Brakes
- Pry the brake shims off the caliper bracket with a flat blade screwdriver
- Clean the caliper bracket with a wire brush
- Clean the shims with a wire brush
- Apply brake grease to the caliper bracket
- Press the shims onto the caliper bracket
- Apply brake grease to the shims
- Slide the guide pins out of the caliper bracket
- Clean any old grease or debris off the guide pins
- Apply grease to the guide pins
- Slide the guide pins into the caliper bracket
- Clean the hub surface with a wire brush
- Apply grease to the hub surface
-
step 4 :Installing the Brakes
- Slide the rotor onto the hub backwards
- Spray brake parts cleaner onto the back of the rotor
- Install the rotor onto the hub normally
- Spray brake parts cleaner onto the front of the rotor
- Install the T30 Torx screw into the rotor
- Put the caliper bracket into place
- Install the two 18mm bolts into the bracket
- Tighten the two 18mm bolts to 44 foot-pounds of torque
- Tighten the 18mm bolts a further 90 degrees
- Install the brake pads into the caliper brackets
- Apply brake grease to the back of the brake pads
- Release the brake caliper
- Compress the caliper piston with pliers
- Slide the caliper onto the bracket
- Install the two 14mm guide pin screws into caliper
- Hold the guide pins with pliers
- Tighten the guide pin bolts to 20 foot-pounds
-
step 5 :Installing the Wheel
- Slide the wheel into place
- Start the lug nuts by hand
- Lower the vehicle to the ground
- Tighten the lug nuts to 144 foot-pounds in a crossing pattern
Tools needed
-
Socket Extensions
Torque Wrench
14mm Socket
Hammer
17mm Socket
Jack Stands
18mm Socket
Brake Parts Cleaner
Bearing Grease
Flat Blade Screwdriver
Paper Towels
Bungee Cord
Slip-Joint Pliers
Ratchet
Wire Brush
Floor Jack
22mm Socket
Hi, I'm Mike from 1A Auto. We've been selling auto parts for over 30 years. We're dedicated to delivering quality auto parts, expert customer service, fast and free shipping, all backed by our 100% satisfaction guarantee. Visit us at 1AAuto.com, your trusted source for quality auto parts.
In this video, we're going to be working with our 2011 Chevy Camaro. We're going to show you how to remove and replace your vehicle's front brakes. We are doing this on the passenger's side, but the procedure will be exactly the same on the driver's side, and we do recommend you do these as a pair. If you like this video, please click subscribe. We have a ton more information on this and many other vehicles, and, if you need this part for your car, you can follow the link down in the description over to 1AAuto.com. Here are the items you'll need for this repair.
Using a 22mm socket and a breaker bar, we'll loosen all of our lug nuts. Raise and support your vehicle. We are doing this on a lift to make it easier to show you what's going on, but this can easily be done at home on a jack and jack stands. With the tire off the ground, go ahead and finish removing your lug nuts and the wheel and tire assembly.
We're going to use a 17mm wrench, you can really use anything that fits over the lug studs, to counter-hold our rotor while we use a T30 Torx socket to remove the rotor screw. Remove the two 14mm caliper slide bolts with a socket and ratchet. Now, these caliper guide pin bolts are one-time use, so if you remove them be sure you have a new set to install. Sometimes these slides will spin. You'll either need the right size wrench or a pair of pliers to hold those in place. We'll then remove the caliper and use bungee cords, zip tie, mechanic's wire, whatever you have around to secure it up and out of the way and keep the tension off of the brake hose.
The two caliper bracket bolts are torqued to yield, so you will need to replace the two of these. Use an 18mm socket and ratchet to break them loose and remove them. Be sure to crack both of them loose before you remove either one. Remove the caliper bracket. It may be necessary to hit the rotor with a hammer, but we just had ours off recently so we can just pop it off by hand. Remove the old pads from your caliper bracket. These can get a little stuck, so you might need to tap them out.
We'll then pop off the brake shims; you may need a flat blade screwdriver to help pop these off. We'll then use a wire brush to scrub down any rust buildup and debris. We'll also want to remove any buildup off of the slides. Ours aren't in bad shape, so we can clean them up, grease them, and reuse them, but, if yours have heavy corrosion, or they're bent or rusted, you're going to want to put a new set on there. We'll then apply a thin coat of brake grease to the surface that our caliper shims sit on, and while this isn't important to the actual movement of the pads, just this thin little coat of grease is going to prevent it from rusting up so next time we do our brakes we should just be able to wipe that off, throw a new coat on, and keep going. Just a little work now will save us a lot of work later. Reinstall the shims and make sure you apply a thin coat of grease to those as well. These are a little more important, because this is actually the surface that our pad rides on. You're going to want to make sure that it rides smoothly and quietly.
We'll then hold down the boots and pop the guide pins out. If there's any old grease and debris on there, we'll just wipe that off with a paper towel. If these are heavily corroded, you will need to replace them as well. Otherwise, just toss some grease on there and pop them back in.
Now, our hub surface is pretty clean, but if you have any rust you'll want to go ahead and scrub it down with a wire brush and smoothen up the surface. Then, again, put a thin coat of brake grease on there just to keep our rotor from sticking on like last time.
Install the rotor onto the hub backwards and spray it down with brake parts cleaner to remove the coating they use to prevent it from rusting in storage. Flip it over and install it the right way. Be sure to line up the rotor screw hole with the threaded part of the hub, and spray this side down as well. Then, we'll reinstall our T30 Torx screw. I'm just using the driver and an extension for this. There's really no need to put these on super tight. It's just to hold the rotor in place to make assembly easier. It doesn't actually secure it to the hub or anything.
Reinstall your caliper bracket as well as your two new caliper bracket bolts. We'll then snug these up with our 18mm socket and ratchet before torquing them. Torque the bolts to 44 foot-pounds, then add 90 degrees to each bolt.
Install the brake pads back into the caliper brackets. Apply a thin coat of grease to the back side of the brake pads, as well. Release the brake caliper, and using a pair of tongue and groove pliers, collapse the piston slowly until it's bottomed out in the bore. Then, reinstall your caliper onto the bracket and start your two 14mm guide pin screws. Use a pair of pliers, or the appropriate size wrench, to hold the guide pin from rotating and torque the new caliper guide bolts to 20 foot-pounds.
Reinstall your wheel and tire and get all five of your lug nuts on as tight as you can by hand. You may also use a 22mm socket to help you spin these in. Lower your vehicle back onto its wheels. You can now torque your lug nuts to 140 foot-pounds in a cross pattern.
Thanks for watching. Visit us at 1AAuto.com for quality auto parts, fast and free shipping, and the best customer service in the industry.
Shop Products


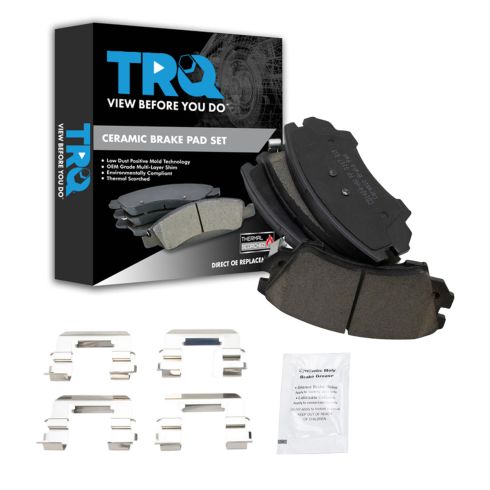
Chevrolet Camaro Caprice Front Ceramic Brake Pads TRQ BFA73222
Part Details:
- Premium Posi
- Contact Point Grease
- Hardware
- No
- Ceramic
- Black
- Yes
- Mechanical
- Yes
- Yes
- 0.67 in
- Yes
- Bonded
- Yes
- Yes
- 4
- Yes
- Standard Replacement
- 17 mm
- 17 mm
- 0.71 in
- Black
- 0.67 in
- Yes
- 0.71 in
- Steel
- 5.59 in
- 5.59 in
- N
- R-S-R
- No
- 18 mm
- 2.60 in
- No
- 2.60 in
- 66 mm
- 18 mm
- 142 mm
- 66 mm
- 142 mm
- Ceramic
- Yes
How to Replace Drum Brakes on Any Vehicle
The common features of drum brakes so that you can learn how to replace the brakes on your specific vehicle.
