How to Replace Front Brake Hose 1988-2002 GMC Sierra 1500
Created on: 2020-05-18
Watch this video to learn how to install a new brake flex hose on your 1988-02 GMC Sierra.
Tools needed
-
14mm Wrench
Torque Wrench
Hammer
Socket Extensions
Pry Bar
Jack Stands
Safety Glasses
Pocket Screwdriver
Ratchet Strap
Gloves
Hose Pinch-Off Pliers
Flat Blade Screwdriver
Socket Driver
Wheel Chocks
Center Punch
Drain Pan
Floor Jack
22mm Socket
Once you have your vehicle safely raised and supported, we're going to remove this center cover right here. This will expose those lug nuts. You can see six lug nuts. We're going to remove all 6 of them using a 22-millimeter socket. I'm just gonna take one lug nut, leave it on there just so the wheel can't fall off on me. Remove the wheel. Now, something that's super important to remember is you want to have some nice hand protection, eye protection, and a nice bucket to make sure you collect any of that fluid that might come out. You want to make sure you're safe.
So, now our flex hose is actually broken, which is the reason why we're replacing it. What I went ahead and did is I use one of these line pinchers right up top, which I would recommend that you do as well, whether or not your line is broken. The next thing I'm gonna do is start at the bottom here. And I'm going to remove that banjo bolt that holds the line to the actual caliper itself. Now, if you were to look along the backside of the caliper, the line should come right down along here. I'm going to remove this banjo bolt. This bolt right here, you're going to want to set aside because we're going to be reusing it. Okay. So, for me, this is very frozen onto the caliper. So, I'm just going to use a nice pry bar here. You can use pretty much anything like a punch or whatnot and a hammer. We're just going to break it free. There's going to be a couple of washers, but we're going to be replacing those.
The next thing you want to pay attention to is looking at the caliber. If you can still see one of those crushed gaskets is on there, you need to remove it. You definitely do not want a double gasket. Check the area. If it looks like it needs to be cleaned, now's the time to do it. So, here's what the gasket looks like. And, of course, that's the line that it was on. If you were to look on the other side, you can tell that they definitely adhere to metal. And so, like I said, it could be stuck on the backside of your caliber. If you can still see the copper, it needs to come off. So, now, if you lift this up, you can either remove it or just hold it up. It's up to you. I'm going to come right back here and I'm going to spray this with some penetrant. I'm going to let it sit for a little while. The reason for that is because the fitting that's on there might actually adhere to the steel line and while you think you're turning off the fitting from this hose right here, you might actually be twisting and breaking the steel line as well.
So, now, to get to where the line and the hose connect, you can either keep lifting this up and try to hold it and get to it or you can remove these push clips. To do that, you can use a tool that looks like this or even a tool that looks like this. That looks great. So, now, if you look right up along here, you can see where the fitting is. We have a nice mirror there so you can see what's going on. I'm going to remove this fitting, but I want to pay attention to right along here to make sure that the line is not twisting and/or breaking. If this is twisting, you've done damage to the line already and you're going to need to rerun a line. Unless, of course, it just barely started to twist a tiny bit. Brake lines are under a lot of pressure, keep that in mind.
I like to give it nice little bonks. That kind of helps break things free. As I do this, I can tell the line is not moving. So, I'm just going to go ahead and spray it and then I'll work it in. So, this is nice and loose. For me personally, I don't have much fluid dripping right here, but if you do have fluid dripping, obviously, you want to catch that because it is chemical. And it also kind of just makes you want to realize that you have to move a little quick at this point. So, what we're gonna need to do is have our flex hose ready because we're going to remove that from here coming soon. So, we're just going to look at our brake hose. If you were to look at it, you're going to see that it has a bend. You want to make sure that it's going in the same direction as the original line. If for some reason it's starting off in the opposite direction, that means it's for the opposite side of the vehicle.
So, the next thing we want to do is remove the lock that holds this flex hose into this bracket. To do that, there's a little tab right here. It kind of comes down like a U, and it's gonna go right over the flex hose. So, if you look at the flex hose itself, you're going to be able to see that it has a groove. Now, you would assume that it's inside of the bracket. And then on the opposite side of the bracket, it's going to have a little fork that comes down like that. I'm just going to stick this in there. I'm going to try to give it a couple of bonks. And I want it to come right up. That's what it looks like right there.
I can wiggle this around, it breaks free from the bracket. That's great. Let's finish removing this hose. All right. So, we got it off of there. We can see the flex hose. The next thing you want to do is just compare this to your new one to make sure you're dealing with the same flex hose 100%. So, now holding this up, I can see that I have the same link. The couplers came up to the same area and it's going to have the same bend. That's very important. Like I said, if this bend went in the opposite direction, I know I would have the wrong flex hose. With that said, we'll set that one aside. I'll recycle it later.
The next thing we want to do is take a peek right up in here. If you see a whole bunch of rust or dirt or debris just from moving it around, try to get it off of there. We want to make sure there's nothing in the fluid itself and, of course, the threads if possible. So, that looks really great. The condition of it looks good. If I thought it was super rusted or if I could see right on the tip here it looked as though it was damaged, I would obviously have to replace the line. This looks good though. I'm gonna put this in. Now, I'm just gonna start this all in by hand. Before I start tightening anything up completely though, I'm going to make sure that the hose is inside the bracket. So, that's definitely going in.
At this point, you kind of just put it so it's going to be facing down approximately where it wants to go. And then you just kind of push in at the same time on the bracket and it should fall right into place. Once it's in place, we're going to grab that lock. You'll notice on your luck, you have a couple of little flippy-dos. The flippy-dos need to go towards the engine and the flat side is going to go towards the bracket. It's obvious, but I'll mention it. A couple of bonks.
Obviously, you want to make sure that the lock is all the way down as far as it can go. If this pops up, the flex hose could come loose and, of course, it could rub through and you're going to have a major braking issue at that point. I'm going to give this a nice tug. That's going nowhere. At this point, we'll continue tightening up this fitting. Okay. So, I've got this sort of bottomed out. I'm just gonna give it a little bit more with my nice small wrench here. Perfect. If you have a long ranch, obviously, you don't want to put too much pressure because you don't want to strip out the threads. That would be very bad. Let's move along.
So, now, we're going to be having to reuse this banjo bolt right here. It's important to make sure you pay attention to it to see if it has one of those copper gaskets on there. If it does, use a small pocket screwdriver and take it off. If you leave that on, you'll double gasket and you're going to have major braking issues potentially down the road. We'll set that aside for recycling.
Now, you want to check the threads. Make sure those are good. And then check this area along here to make sure it isn't overly rotted or pitted or anything like that, which might cause a leak. It's always a good idea to replace those gaskets, it comes with the kit. So, I'm going to use those nice new ones. So, I'm just gonna use my rag, wipe this down, give it a thorough inspection, make sure that the hole is not clogged in any way. You should be able to see light coming down through here if you have a little flashlight. If you can't see any light, this could be plugged, which is obviously gonna cause a braking issue.
Take your two new gaskets, take one of them and put it on the banjo bolt. We're going to take the banjo bolt and we're going to go through the flex hose, and then we're going to take our other gasket and go right on the other side. And then we're going to go ahead and insert this into the caliper. We're going to also clean this right here. Make sure that there's no debris in or around the hole, especially where the gaskets going to be. So, we have the surfaces clean. We have a gasket in between the line and the caliper, and we also have one in between the banjo bolt and the hose/line itself.
Okay. It just bottomed out right there. Now, this is something that's important to think about, so I'm just going to make a mention of it. Once it bottoms out, the gaskets should pretty much be doing their job, but it's always a great idea to try to just squish them down. Because what you'll notice is that the caliper and the banjo bolt had those little record grooves on them. You need to make sure that those are gonna fit right in. So, we're going to compress these gaskets just a tiny bit. So, here I am, that's it right there. Perfect. Give this a wiggle. Make sure it does not move around in any way. Make sure that you have plenty of clearance right up along where your control arm is and that your flex hose is not twisted. If this is making a U or a circle or a Mickey Mouse head, obviously it's not installed correctly. All right.
So, at this point, we can put this back up or if you thought maybe you might've made a mistake, you could leave it open because maybe you wanted to take this back off for any reason. But for me, I can tell and I can see right through here, and I know that if I had to, I can go ahead and snug this up a little bit more, even with this on.
So, now, the next thing that we would want to do is open up the bleeder screw on our caliper. Ours is actually in pretty poor condition. So, you're going to notice that the caliper changes colors and it's going to be brand new. So, now that we have the flex hose in here, you want to make sure that you gravity-bleed the system. To do that, you want to make sure that your master cylinder is full, of course. And then you're going to open up this bleeder screw and just watch as air comes out. As air finishes coming out, it should actually kind of turn into a solid amount of fluid and then we'll close it up and then we'll continue with the bleeding process.
It looks like it's getting close. All right. So, the fluid's coming out. I'm gonna close this off. Okay. So, now, we're gonna need a second person because they're gonna need to pump up the brake for us. They're gonna pump it three to five times nice and slow. Then they're going to hold that brake pedal, they're going to let us know they're holding it, we'll open up the bleeder, we're going to watch for air. Once we've done that and the fluid stops coming out, we're going to close it off. We'll bleed it a couple more times that way until we see no more air bubbles coming out. Okay. Just make sure this is tight. I've got my collection bucket. All right. Do you mind pumping up the brake?
So, I'm watching that fluid. I saw a lot of fluid and very little bits of air. So that's great. We want to make sure that there's no air. Okay. Go to pump. That one looks really good. I didn't see very much air at all. Let's do it one more for good luck. Go ahead and pump. Oh yeah, this looks great. Okay. Let's close this off. Perfect. Clean up your mess. Make sure you put your bleeder screw cover back on there. That's very important. And then, of course, we'll get the wheel on there and torque it to manufacturer specifications. Let's get the wheel on here. Torque your lug nuts to 120 foot-pounds. Torqued. Let's grab that center cover, make sure you line up the holes with the lug nuts or else you're going to know it when you go to bonk it on. Perfect.
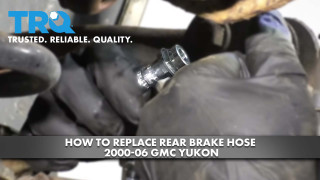
How to Replace Rear Brake Hose 2000-06 GMC Yukon
This video shows you how to install a new rear brake hose on your 2000-06 GMC Yukon.
