How to Replace Front Brake Calipers 1988-2002 GMC Sierra 1500
Created on: 2020-05-18
Watch this video to learn how to install a new front brake caliper on your 1988-02 GMC Sierra.
Tools needed
-
Torque Wrench
Gloves
Hose Pinch-Off Pliers
Wheel Chocks
Brake Grease
Drain Pan
Floor Jack
Brake Parts Cleaner
Safety Glasses
22mm Socket
Once you have your vehicle safely raised and supported, we're going to remove this center cover right here. This will expose those lug nuts. You can see six lug nuts. We're going to remove all six of them using a 22-millimeter socket. I'm just gonna take one lug nut, leave it on there just so the wheel can't fall off on me. Remove the wheel. Now, something that's super important to remember is you want to have some nice hand protection, eye protection, and a nice bucket to make sure you collect any of that fluid that might come out. You want to make sure you're safe. The next thing we're going to do is take some of these line pinchers. You definitely don't want to use vise grips, and we're going to just pinch off the flow of brake fluid going down the brake hose, and now we can continue. The next thing we're going to do is bounce around a little bit. And the reason why I said that is because what we're going to do is break free this banjo bolt right here, but then we're going to snug it just a teeny bit so it's not leaking. At that point, we'll continue on to taking out the caliper sliders. And then, of course, we'll continue on by replacing or removing the banjo bolt and we won't have to worry about fluid coming out in case we have to give the caliper any bonks.
Okay. That broke free. It doesn't always break free easy like that, that's why I did that before I removed the sliders so the caliper is still nice and sturdy. Use your 3/8ths socket, it's an Allen head. I wanna go right inside here and you should be able to feel it lock in. There we are. We can move the caliper around now. Before we go too far, let's go ahead and remove this. Make sure you have that bucket lined up though because, more than likely, there's going to be some fluid either coming out of the hose still or even out of the reservoir area where the piston is in the caliper. Okay. It's ready to come out. You're going to notice that there should be two gaskets. Sometimes they stick to either the caliper or the banjo bolts or even the hose. So, now, if you look at this banjo bolt, you can see that there's a gasket still stuck on it. You need to remove that. You can use a pocket screwdriver if it doesn't come right off. Take a look inside that banjo bolt. We're going to set it aside. You'll notice that it has a hole, but the caliper actually usually comes with a new banjo bolt and with new gaskets. If you're replacing the caliper and your pads are worn and your rotors are worn, it's a good idea to replace the brakes at this time. Because if you're taking off the caliper, everything else is pretty much going to be falling right off. But if you're not, you will just take one of your lug nuts and put it on here so this holds the rotor up against the hub. That way there, it's less likely for any of the rust from inside the fins falling in between, and, of course, causing the wheel to be off-kilter making an imbalance or even worse.
So, now, your caliper should slide out. If it doesn't, it's probably catching right on here and there or even on the bottom side in the same areas. If you look inside the caliper, you can see the area where fluid's going to come out of. So, just make sure that you completely empty that out into the recycling bucket before you recycle the caliper itself. Okay. So, now I'm just gonna pull this slider out of here. You want to make sure that there's plenty of lubricant all along here and then, of course, inside the area where the two pieces flow together. Super important. If you need some, now's the time to put it in there before you install this into the vehicle. Okay. So, that looks good. Now I'm just gonna take this, I'm going to put it in, and I'm gonna do the same thing to the other side. So, you should notice that your sliders can move in and out. If they don't slide, then you need a little bit more lubricant at this point. It's also a good idea to put a tiny bit of lubricant around the piston right here, the contact point where it's going to connect onto your pad. And then along this ear and this ear right here, also in the same areas where it's going to be contacting the pad, that's going to help with vibration dampening and noise reduction. Some people prefer to do this on the pad directly and they just coat the whole backside of the pad, which doesn't really make much sense because it's a lot of waste and it also accumulates a lot of debris.
Looking at your pads, you're going to notice there's a very big difference. This is going to be on the inside and this side will be on the outside with the ears. These little pins also face towards the top of the caliper, which is facing down right now. Push this down and slide that in. And then you would do the same to this right here. It should lock right in and it should not move around. Let's install this in the vehicle. It's a good idea to clean up this mating surface right here, where the caliper is going to be up near, and then this one right there. Once you're sure they're a nice smooth surface so the caliper can move around, because it does need to move around, you would just apply a thin amount of lubricant. Something to make sure that the metal doesn't, you know, build up any rust or rot or anything. Now it's time to install our cleaned and prepped caliper here. Let's put it right up on. Should slide over and should slide in nice and easy. If you notice the caliper did not want to slide in easy or it's stuck in these areas, you need to re-remove the caliper again and clean those areas. This feels good. It can move around. Push on those slider pins until they kind of seem like they fall into the holes. You can lift up or move around the caliper to line it up. And then, of course, just start it in and then do the same to the other one before you tighten either of them down. Now that we have them both started in, let's tighten them up.
Okay. That just bottomed out. At this point, I'm just going to take the ratchet and go a teeny bit more, and that's good right there. Do the same to the other one. Bottomed out, teeny bit more. Perfect. Now that both of those are nice and tight, we're going to move ahead to removing this orange plug right here. Don't discard it though because we're going to use it in the old caliper. There it is. That just kind of keeps out the debris and moisture so no contaminants make it inside the caliper before it gets to you. Now we're going to move along to installing our new banjo bolt and, of course, the new gaskets. Do not reuse your old gaskets. Take your banjo bolt, put one of the gaskets right on it. Go ahead and grab that hose, put the banjo bolt through like that, and then take your other gasket and put it back on the banjo bolt in between where the line is and the caliper is going to be. Now, we'll connect this in. Start it all in by hand to make sure there's no cross-threading. Now, we're going to tighten it up. Okay. It just bottomed out right there, you give it a teeny bit more. Give it a nice wiggle, make sure that it does not move around in any way. The reason why we tighten this up is because we wanted to make sure that we crush down those gaskets just a teeny bit. Obviously, we don't need to flatten them out to the point that they're going to crush and/or crack, we just wanted to give them that little bit. This feels great. Check your flex hose, make sure that it's not rubbing up against the upper control arm or anywhere near it, because as the suspension goes up and down, there's a potential that it could cause damage.
Let's remove this right here. Move along. So, now that we have the flex hose in here, you want to make sure that you gravity-bleed the system. To do that, you want to make sure that your master cylinder is full, of course, and then you're going to open up this bleeder screw and just watch as air comes out. As air finishes coming out, it should actually kind of turn into a solid amount of fluid and then we'll close it up and then we'll continue with the bleeding process. Looks like it's getting close. All right. So, the fluid's coming out. I'm gonna close this off. Okay. So, now we're gonna need a second person because they're gonna need to pump up the brake for us. They're going to pump it three to five times nice and slow. Then they're going to hold that brake pedal, they're going to let us know they're holding it, we'll open up the bleeder, we're gonna watch for air. Once we've done that and the fluid stops coming out, we're going to close it off. We'll bleed it a couple more times that way until we see no more air bubbles coming out. Okay. Just make sure this is tight. I've got my collection bucket. All right. Do you mind pumping up the brake? So, I'm watching that fluid. I saw a lot of fluid and very little bits of air. So, that's great. But we want to make sure that there's no air. Okay. Clear to pump.
That one looks really good. I didn't see very much air at all. Let's do it one more for good luck. Go ahead and pump. Oh yeah, this looks great. Okay. Let's close this off. Perfect. Clean up your mess. Make sure you put your bleeder screw cover back on there. That's very important. And then, of course, we'll get the wheel on there and torque it to manufacturer specifications. Let's get the wheel on here. Torque your lug nuts to 120 foot-pounds. Torqued. Let's grab that center cover, make sure you line up the holes with the lug nuts, or else you're going to know it when you go to bonk it on. Perfect.
Shop Products


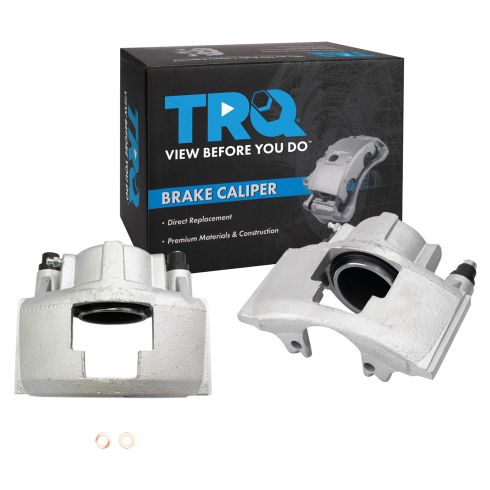
Chevrolet GMC Dodge Cadillac Front Driver & Passenger Side 2 Piece Brake Caliper Set TRQ CLA35382
Part Details:
- 2 Piece
- Hardware
- (1) Front Driver Side Brake Caliper
- (1) Front Passenger Side Brake Caliper
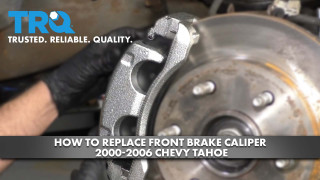
How to Replace Front Brake Caliper 2000-06 Chevy Tahoe
This video shows you how to a (front/rear)brake caliper on your 2000-2006 Chevy Tahoe.
