How to Replace Front ABS Sensor 4 Wheel Drive 2001-09 Ford Ranger
Created on: 2016-12-09
Learn how to replace the ABS sensor the right way with the steps from our experts in this how-to video
-
step 1 :Removing the Wheel
- Pry off the center cap with a flat blade screwdriver
- Remove the wheel lock with the wheel lock key
- Loosen the 19mm lug nuts with the vehicle on the ground
- Raise the vehicle with a floor jack
- Secure the vehicle on jack stands
- Remove the lug nuts
- Pull off the wheel
-
step 2 :Removing the Brake Backing Plate
- Remove the two 15mm bolts from the brake caliper bracket
- Hang the caliper aside with a bungee cord
- Pull off the brake rotor
- Remove the three 8mm bolts from the backing plate
-
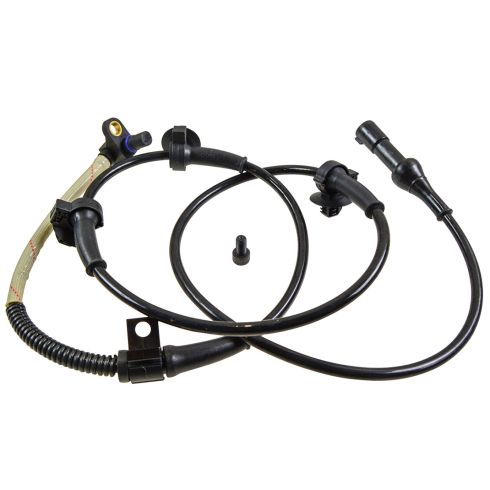
step 3 :Removing the ABS Sensor
- Remove the 5mm Allen bolt from the ABS sensor
- Pull the sensor out of the hub with pliers
- Disconnect the abs sensor wiring harness
- Remove the 8mm bolt from the sensor harness
- Pull off the ABS sensor
-
step 4 :Installing the ABS Sensor
- Put the ABS harness into place
- Fasten the ABS harness to the spindle with the 8mm bolt
- Connect the ABS wiring harness
- Insert the ABS sensor into the hub
- Fasten the 5mm Allen bolt for the ABS sensor
-
step 5 :Installing the Backing Plate
- Put the backing plate into place
- Install the three 8mm bolts for the backing plate
- Put the rotor into place
- Put an old axle nut on one wheel stud
- Thread a lug nut onto that wheel stud by hand to hold the rotor in place
- Remove the bungee cord from the caliper
- Put the caliper into place
- Start the two 15mm bolts for the caliper bracket
- Tighten the two 15mm bolts to 85 foot-pounds of torque
- Remove the placeholder lug not and axle nut
-
step 6 :Installing the Wheel
- Slide the wheel into place
- Start the lug nuts by hand
- Tighten the lug nuts preliminarily
- Lower the vehicle to the ground
- Tighten the lug nuts to 100 foot-pounds in a crossing or star pattern
- Reattach the center cap
Tools needed
-
Socket Extensions
Torque Wrench
15mm Socket
Jack Stands
19mm Socket
Trim Tool Set
5mm Hex Wrench
Flat Blade Screwdriver
8mm Socket
Bungee Cord
Slip-Joint Pliers
Ratchet
Floor Jack
1/2 Inch Breaker Bar
Transcription:
Hi, I'm Mike from 1A Auto. We're dedicated to delivering quality auto parts, expert customer service, fast and free shipping, all backed by our 100% satisfaction guarantee. Visit us at 1AAuto.com, your trusted source for quality auto parts.
In this video we're going to be working with our 2001 Ford Ranger 4-wheel drive. This vehicle is equipped with 4-wheel anti-lock braking or ABS. We're going to show you how to replace a front wheel speed sensor. If you like this video, please click subscribe, we have a ton more information on this truck as well as many other makes and models, and if you need this part for your vehicle, you can follow the link down in the description over to 1AAuto.com. Here are the items you'll need for this repair.
Using a taped flat-blade screwdriver, locate the relief cuts in the hub cap. Stick the screwdriver in, and pry out to release it from the wheel. This particular truck has a wheel lock on it, so we'll need the wheel lock key in order to remove it. Otherwise, the rest of the nuts come off with a 19 millimeter socket and breaker bar. Simply crack them loose for now, and then raise and support your vehicle and remove the lug nuts the rest of the way. Remove the wheel from the vehicle.
Remove the two 15 millimeter bolts securing the caliper bracket to the spindle. Be sure to crack both of these loose before removing either one fully. Using a bungee cord, mechanics wire, or zip tie, secure the entire caliper bracket and assembly up out of your way. Remove your rotor. Remove the three 8 millimeter bolts on the backing plate with a socket and ratchet.
Remove the Allen bolts securing your ABS sensor to the hub, this is a 5mm Allen bit or you can just use a regular Allen wrench. Our sensor's brand new so it's actually going to look a little easier than it usually is, but you can just grab these with a pair of pliers and work them back and forth, in and out. Go easy with them because you don't want to break the sensor off in there. Follow the ABS sensor wire, and right up here behind the front bumper is our connector. Simply push down and disconnect it. A great use for these trim tools available from 1A Auto is popping out the connectors. Simply push it underneath the pad on the bottom of the retainer, and pop them out. At the back of the spindle is an 8mm bolt securing the rest of the harness in place, we'll remove this with a socket and ratchet. Once the bolt is out, remove it from the vehicle.
Reinstall the ABS harness. We have the one 8mm bolts connecting the harness at the rear of the spindle here. Tighten that bolt down with an 8mm socket and ratchet. Reattach the harness along the frame. These connectors simply pop back in ... and reconnect the electrical connector at the end. Reinstall your ABS sensor and the 5mm Allen bolt.
Reinstall your backing plate, and start the 8 millimeter screws. Tighten up the 8 millimeter screws. Reinstall your rotor.
One trick I like to use is taking an old axle nut and placing it over one of the wheel studs, putting a lug nut on hand tight. This keeps the rotor upright while we install our caliper carrier and makes it that much easier. Unhang your caliper from whatever it is you hung it from. Reinstall all of it over the rotor. Reinstall your two 15 millimeter bolts. Tighten down the hardware with a socket and ratchet. Torque the bolts to 85 foot-pounds. Remove the lug nut and axle nut from your rotor.
Reinstall your wheel and tire. Start your lug nuts by hand. Torque the lug nuts to 100 foot pounds in a cross pattern. Reinstall your center cap, and you're good to go.
Thanks for watching. Visit us at 1AAuto.com for quality auto parts, fast and free shipping, and the best customer service in the industry.
Shop Products


How to Replace ABS Sensor 2002-05 Mercury Mountaineer
Watch this video for detailed instructions on how to replace the ABS sensor on your 02-05 Mercury Mountaineer.
