How to Replace Fog Lights 1997-98 Jeep Grand Cherokee
Created on: 2015-01-26
Jeep Grand Cherokees of the from 1993-98 are prewired for fog lights. You just need a new set of fog lights and a new switch from 1A Auto then follow this video.
-
step 1 :Carving Out the Bumper
- Trace around the square cutout on the lower part of the bumper with a razor
- Remove the square
-
step 2 :Removing the Grille
- Remove the four Phillips screws from the grille
- Tilt the griller forward
- Lift the grille up and off
-
step 3 :Removing the Lights
- Remove the 10mm bolt from each headlight
- Pull the headlights forward
- Disconnect the headlight wiring harness
- Remove the two T25 Torx bolts from each marker light
- Pull out the marker lights
- Twist the bulb sockets out of the marker lights
- Remove the two T25 bolt from each parking light
- Pull out the parking lights
- Twist the bulb sockets out of the parking lights
-
step 4 :Removing the Bumper Cover
- Pry the plastic clips out of the top of the bumper cover
- Pry the plastic clips out of the wheel well
- Pry the plastic clips out of the bottom of the bumper cover
- Pull the bumper cover forward and off
-
step 5 :Installing the New Fog Lights
- Insert the fog light into place
- Tighten the three 10mm bolts to the fog lights
- Repeat the process on the other side
- Connect the fog light wiring harness
-
step 6 :Installing the Bumper Cover
- Lift the bumper cover into place
- Push the inner fender behind the bumper cover
- Push in the bumper cover clips
- Push the plastic clips into the top of the bumper cover
- Push the plastic clips into the bottom of the bumper cover
- Push the plastic clips into the wheel well
-
step 7 :Installing the Lights
- Twist the bulb sockets into each parking light
- Push the parking lights into place
- Insert the two T25 bolts into each parking light
- Twist the bulb sockets into each marker light
- Insert the two T25 bolts into each marker light
- Connect each headlight wiring harness
- Push the headlights into place
- Insert the 10mm bolt into each headlight
-
step 8 :Installing the Grille
- Push the grille into place using the locating tabs
- Lean the grille into place
- Insert the four Phillips screws into the grille
-
step 9 :Removing the Console Panels
- Pull off the trim panel on the center console
- Pull off the trim panel on the side console
- Remove the Phillips screw along the switch panels
- Tilt the steering wheel down
- Remove the panel along the gauges
- Remove the three Phillips screws on the panel below the steering wheel
- Pull off the lower panel
-
step 10 :Removing the Headlight Switch Panel
- Remove the Phillips screws from the headlight switch
- Disconnect the headlight switch panel
-
step 11 :Installing the Headlight Switch Panel
- Connect the new headlight switch panel
- Insert the Phillips screws to the headlight switch
-
step 12 :Removing the Side Panel and Installing the Fuse
- Pull off the fuse panel covering
- Remove the two Phillips screws from the side panel
- Remove the side panel
- Insert a new fog light relay into the third missing relay
- Make sure a 20 amp fuse is in the fuse box
-
step 13 :Reinstalling the Side Panel
- Push on the side panel
- Insert the two Phillips screws to the side panel
- Push on the fuse panel covering
-
step 14 :Reinstalling the Console Panels
- Push the gauge panel into place
- Insert the screw along the switch panels
- Push the panel below the steering wheel into place
- Insert the three Phillips screws to the lower panel
- Push in the trim panels
Tools needed
-
Coarse Threaded Bolts (to replace rivets)
Hammer
Phillips Head Screwdriver
10mm Socket
Ratchet
T25 Torx Driver
Brought to you by 1AAuto.com, your source for quality replacement parts and the best service on the Internet.
Hi, I'm Mike from 1A Auto. I hope this how-to video helps you out, and next time you need parts for your vehicle, think of 1AAuto.com. Thanks.
In this video, we're going to show you how to add fog lights to a 1997 Jeep Grand Cherokee that does not already have fog lights installed. These vehicles do actually have all the wiring already done for the fog lights. The items you'll need for this is new fog lights from 1AAuto.com, a relay, at least six coarse thread screws, Phillips screwdriver, 10mm socket and ratchet, a hammer, a T25 Torx driver, a headlight switch with a fog light button on it, and a razor to cut holes in your old bumper for the fog lights, or a new bumper cover with the fog light holes already in it.
If you're using an old bumper, you just want to use a razor and just trace around this square cut out. You don't want to actually push the razor all the way through, there's no point in rushing it and causing a mess. You just want to keep scoring it all the way around and then just keep repeating that process and eventually the razor will poke through and you'll be able to punch that square out easily.
Now, to access the fog lights and remove the bumper cover, you're going to need to remove these four screws on the grille. Each of those are just Phillips. Tilt the grille forward and lift it up and out. Then remove the 10mm bolt above each of your headlights. Pull your headlights out and disconnect the harness on the back. Then remove this T25 screw right here, and then there's one down underneath your side marker light. You can actually just pry the T25 Torx driver underneath and then loosen that up. You'll be able to feel when it's loosened up, and then just remove the top one and the side marker light will pull out. You can just pull your bulb free.
Then remove this T25 screw, and you may have an additional T25 screw but ours was missing and it would have been just below that. Then you just want to twist out both of the sockets and your parking light will be free.
Now there are clips along the front of the bumper cover, just where the grille was, and you just got to pry up the center and pull those free. There are two more, and just repeat the process on those. Then remove the series of clips in the wheel wells and just like up top, they just pry out. You will also have a series of clips at the bottom of your bumper cover, but ours are all missing. Once you've removed all those, you can just pull the bumper cover forward and out.
At this point, if you have fog lights, you'd obviously unbolt them right here. We're actually adding fog lights to this vehicle, so we'll put it in place. These are self-tapping coarse thread bolts. We'll fast-forward as Mike does the rest of these and then you want to repeat the process on the other side. There are harnesses for the fog lights right up underneath. You've got to reach up under and pull them down. They're clipped up in, pull them down. You'll pull it down, you'll see it's just got this cap on it, so push the tab and pull the cap off. Then take the harness from your fog light and connect to the harness on the truck.
All right, so you can see my old bumper cover is broken, so we're going to be putting a new one on, but we just did this to show you. At this point, with the bumper cover off, if you wanted to you'd clean up these edges and make them look a little better if you wanted to. There's really no reason though. You can see as we put it on, bring the lights and stuff up out of the way, you've got to line up this bracket with a pin, make sure all of your harnesses are out of the way. You'd clip it on right there, make sure you clip that one on, on this side. You can see the fog lights poke right through like they're supposed to.
Now we're going to install a new bumper because our other one, as you saw, is in rough shape. You just want to transfer over the foam block inside the bumper, and then line up the bumper and push it into place. Make sure you tuck the inner fender underneath the bumper and that the top is clipped in. You'll see there's a clip on either side. Then replace this series of clips, and you just want to push in the bottom and then push the top down to lock them into place. We'll fast-forward as Mike replaces those. If the center gives you trouble and won't push down, you can use a hammer just to knock it down into place. Now Mike will replace the clips around the rest of the vehicle.
You can see we did actually buy some additional clips so we could replace the missing ones. Push the sockets back into the parking light, and then push that back into place, clipping in the left side first on the inside and then the back, and then replacing those two T25 screws. Then repeat the process on the other side. To put this in, the best thing is to have the screw in but all the way back, put into place, and then you've got to, basically, look right through here and get the screw into the hole. Once you've got it, it goes right in. We'll fast-forward as he tightens that up the rest of the way and then replaces the other T25 Torx screw and tightens that up as well.
You're going to reconnect the light and then make sure these sockets go onto the balls and push it in. Replace the 10mm bolt on either side and tighten it up.
Line up these four tabs on your grille with these four slots, and just push the tabs down into place. Then lean the grille back into place and we'll fast-forward as Mike replaces those four Phillips screws and tightens them up.
Now to install the headlight switch that has a fog light button on it, we just need to pull off these trim panels, and you'll see a series of Phillips screws. There's also some up here along the top, and then, over here, another trim panel. Just pull that off and some additional Phillips screws. We'll fast-forward as Mike remove all of those. Tilt the steering wheel down and then pull down on this top panel and get your fingers in there. Then just pull it forward. You can lift that up and out.
Then there are three Phillips screws down here and an additional one on the side. We're actually missing the three lower ones, so we'll just remove this one. Then you can pull this panel down and set aside. Now remove the Phillips screws that hold in your headlight switch, and we'll fast-forward as Mike does that. The switch out, and then lift up on the tab and pull out of the harness to disconnect it.
Take your new headlight switch with the fog light button, connect it, and push it back into place. Then replace those Phillips screws. Pull this out. You have access to some fuses, but there's also a screw here, and there should be a screw up here. Remove those and then this panel. There's also probably a bolt or some kind of speed nut on here, all missing on this vehicle, but then you pull this panel out. You're going to want to pull on your panel and take that out. You'll see three relays coming down and you want to insert a new relay for your fog lights here.
Fast-forward as Mike puts the panels back together. In your fuse box here, you want to make sure that there's a 20 amp fuse right here, and ours already had that installed. Now just test them out, and you can see our Jeep now has fog lights. You can put this panel back into place, put everything back in, and then replace all of those Phillips screws. Put your lower panel back into place and replace the Phillips screws. Then put these trim panels back in place, and you're all set.
We hope this video helps you out. Brought to you by www.1AAuto.com, your source for quality replacement parts and the best service on the Internet. Please feel free to call us toll-free, 888-844-3393. We're the company that's here for you on the Internet and in person.
Shop Products
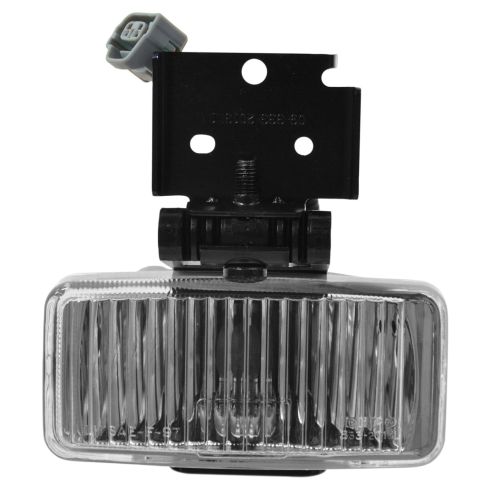
1997-98 Jeep Grand Cherokee Driver Side Fog Light TYC 19-5452-90
Part Details:
- Features and Benefits
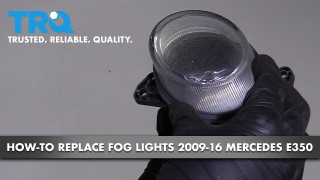
How To Replace Fog Lights 2009-16 Mercedes-Benz E350
Fog lights aim low to light up the road ahead when visibility conditions are foggy, rainy, and snowy. Unfortunately, they are also positioned low to the ground, putting them in harm’s way. If your light has become damaged, you can replace it with an engineered to fit TRQ part, and drive with confidence the next time bad weather strikes. How to install a new TRQ fog light on your 2009-16 Mercedes-Benz E350.
