How to Replace Fog Light Assemblies 2010-14 Subaru Outback
Created on: 2019-07-13
This video shows you how to remove the fog light assemblies on your 10-14 Subaru Outback. 1A Auto shows you step by step so you can do it yourself!
-
step 1 :Removing the Fog Light Assembly
- The removal and installation steps are the same for either side
- Remove the three push pin retainers securing the underbody shield to the bumper
- Pull the shield down to expose the rear of the fog light assembly
- Twist counter clockwise to remove the fog light bulb
- Remove the tow lower push pin retainers
- Remove the two upper 10 mm nuts
- Push the fog light assembly out the front to remove it
-
step 2 :Installing the Fog Light Assembly
- Insert the fog light assembly in through the front
- Reinstall the two 10 mm nuts
- Reinstall the two push pin retainers
- Reinstall the fog light bulb
- Tuck the shield above the bumper cover edge
- Reinstall the three push pin retainers to secure the shield to the bumper
Tools needed
-
Plastic Fastener Remover
10mm Socket
Ratchet
Hey friends, it's Len here at 1A Auto. Today I'm going to be showing you how to work on a 2013 Subaru Outback. We're going to show you how to remove the front fog lamp assemblies. It's going to be a very easy job. I want to be the guy that shows you how to do it. If you need any parts, you can always check us out at 1aauto.com, thanks.
So we've got some push clips. We've got one here, here, here, and then the same on the other side. Let's try to pull out the center, see if we can drop it down a little bit. These ones are definitely more packed with dirt than the tops, of course. It's giving me a little bit more of an issue.
Okay, got our last clip out, now we can go ahead. We're going to get up in here. This should just come down a little bit. Right up in here, you can see where the fog lamps are, the assemblies. We can go ahead and turn this. Here's our fog lamp bulb. If you wanted to replace the fog lamp bulb, all you do is just squeeze this little clip right here, disconnect it. There's our fog lamp bulb. We'll set this aside for now.
So if you were just going to do the fog lamp assembly, you can do this. Push clip, push clip, 10 millimeter, 10 millimeter. It's going to be hard to do the work on with the camera here and everything. So I'm just going to remove the bumper cover to show you, but to do it without taking it off, the whole bumper cover, that's all you'd do. Easy peasy.
Okay, so for the purpose of the video, like I told you, we're going to take the bumper off. Here it is. We can see what's going on. Push clip, push clip, 10, 10. Do them in whichever order you want. This right here is the adjustment. You can use a Phillips head screwdriver for that if you need to aim them up, down, whatever you need to do. I'm going to go ahead, use a small screwdriver. I'm just going to see if I could pry this out. Get it started. Use my little forky tool. That's what the push clip looks like. Set it aside. Do the same thing to the other one. Same as the first. Easy peasy, 10, 10. Leave that in a little bit. Take this one completely off. Okay. I'm going to hold the lens just so it doesn't hit the ground. There's our fog lamp assembly.
So now it's time to go ahead and reinstall this. Okay, we've got our little studs here. Those are just going to come up through the holes. Come through here. Bring her on up. Everything lined up. Start both these nuts. Going to leave them loose for now. I'm going to put it in my push clips. The reason why I left those loose is so I can move the fog lamp assembly around a little bit to line up these holes. Squeeze it, pushes in. I'm gonna tighten this up. There we are. Maybe use something like a wrench or a socket or whatever, but they're 10 millimeters and push clips. Easy peasy.
So here we are. We've got our fog lamp. Just going to connect it back in. This is an H11 bulb. Put it in under here. There it is, locked in, feels great. Let's tuck it in. Just going to go like that. Like that. There we are. Okay we'll do the same thing to the other side, and then we're going to go ahead and put in some push clips.
Got some push clips. I'm just going to go ahead and try to put them in, give a little twist if you have to, push in the center. These things are nice and clogged up with dirt and debris. There we are.
Thanks for watching. Visit 1aauto.com for quality auto parts shipped to your door, the place for DIY auto repair, and if you enjoyed this video, please click the subscribe button.
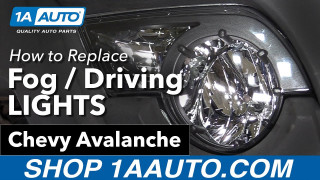
How to Replace Install Fog Driving Lights 2003-06 Chevy Avalanche Buy Quality Parts at 1A Auto
New Fog / Driving Light from 1AAuto.com How to install, repair, fix, change, or replace a broken, damaged, burned out, cracked, faded, cloudy or chipped fog light on 02, 03, 04, 05, 06 Chevy, Avalanche
