How to Replace Exterior Door Handle 2002-08 Dodge RAM 1500
Created on: 2020-10-13
This video shows you how to install a new TRQ door handle on your 2002-2009 Dodge Ram 1500.
Tools needed
-
Razor Blade / Gasket Scraper
Gloves
Phillips Head Screwdriver
10mm Socket
Trim Tool Set
Safety Glasses
Pocket Screwdriver
Looking at your door panel, you're gonna see your inner door handle. You wanna go ahead and remove that 10-millimeter headed bolt that's in there. Let's get the handle out of the way. Next, let's move along to getting this off right here. Let's our plastic trim tool and remove this master switch right here. There we are. Go ahead and pull on this tab, set this aside. Now we need to remove our four Philips head mounting screws. You'll have up here, one in the center where your handle was, and then two along the bottom. Grab your panel like this and carefully lift up. There we go. Now that that door panel is out of the way, let's continue on by getting this out of here. If you grab onto this white tab, push down, it's gonna unlock and then you can remove the rod from it.
Next, let's continue on by removing our two 10-millimeter mounting nuts. Grab onto the unit itself, draw it away from the door. Now, let's move along to removing our vapor barrier here. I like to use a tool that looks like this, made of plastic so I don't scratch my paint, and we're just going to try to get rid of this butyl tape here. Now that the vapor barrier is out of the way, we have a nice, clear view of the inside door handle area. I'm just gonna use this pocket screwdriver here. Press up against that and I'm gonna wiggle that. Okay. Now this one right here. There it is. Both those rods are off of there. Just pull on this a little bit, and then if you just go on ahead and just pull on the handle, it should wanna come right up and out of there. There is it, friends.
Now let's make our way over to the bench. We're going to remove the locking cylinder from the actual handle itself. We have to remove this Torx-headed bolt right here. Grab the lock cylinder, slide it out of there, grab our new handle, slide it right in. Get that in there nice and tight, give it a little tweak. Now it's gonna be time to get our new handle in here. Just keep in mind you wanna have the handle in the pulled position so this is tilted down. Tilt it in from the top, now I'm gonna line up those studs by looking in from the inside. There we are. That slides in perfectly. Let's go ahead and get our nuts back on here, snug them up.
So now it's gonna be time to get the rods back in. I'm gonna start with the farthest one from me with the pink lock. Just slide that in. And then once you have it slid into its area, go ahead and lock it in. There we are. That's locked in. Push that in. I'm just gonna use my pocket screwdriver. Try to use it as, like a lever. That one's locked in as well. Give them both a shake. You wanna make sure that they don't come unsecured because, obviously, your door handle and lock won't work right. This looks great. Awesome.
Before we go too much further, let's go ahead and give this a test. I'm just gonna use this screwdriver. I'm gonna come right inside the latch and I'm gonna pull back on it just like this which kinda makes it seem like I'm using the striker over there. Now I'm gonna apply forward pressure and I'm gonna pull on the door and see if it releases. That releases perfect. The door would've opened right there. Latched, released. Now let's get this vapor barrier back on here. You just wanna pay attention to this area right here because that's where the rod is. Pull that through, line it up with approximately where you got it all from, and then, of course, make sure it's stuck back on. Let's get this bracket back on there. We want this so it's facing down. Slide that right in there, lock it in, of course. Start on both your nuts, snug them up.
Now it's gonna be time to get our door panel back on, but before we can do that, let's get this little cover out of here. This is where that door lock is gonna be. That's gonna make it so much easier for us in the long run. Now let's put this up to the door, grab our wiring, make sure it comes through. Come up here, we want to come high. That way there, all those hooks can fit into their corresponding holes. I'm pushing at the same time as I'm letting this come down. Okay. Okay. I'm just gonna feel along the whole way, make sure I'm sitting completely up against the door. Let's grab this right here. I'm gonna go ahead and lift up on that door lock, pop this one in there. All right. Move along to our window switch here, lock this in. Okay. Make sure it's locked in. Perfect. Now, let's move along down here to putting in our handle.
So now we're gonna get our handle on here. I'm just gonna get my tool ready so it's already on the handle, put it in so it lines up with its spot, make sure that's snug. Perfect. Now it's gonna be time to put in our mounting screws. Let's go ahead up here. I'm gonna use the two larger ones first. One down here. Awesome.
Shop Products


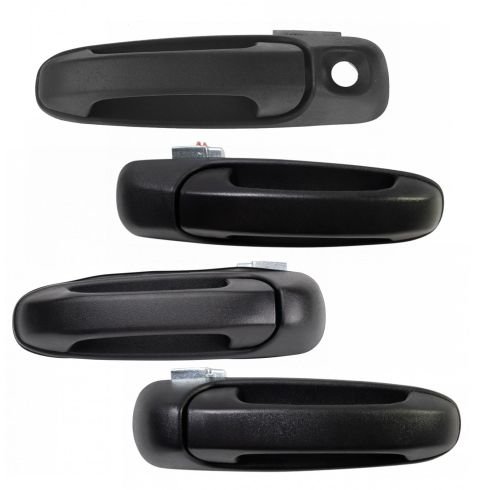
Dodge Ram Mitsubishi Front & Rear 4 Piece Exterior Door Handle Set TRQ DHA37253
Part Details:
- Textured
- 4 Piece
- Black
- (2) Rear Exterior Door Handles
- (2) Front Exterior Door Handles
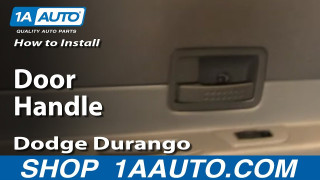
How To Replace Rear Door Handle 2004-09 Dodge Durango
How to repair, install, fix, change or replace a broken or snapped off exterior door handle on Dodge Durango model years 04, 05, 06, 07, 08, and 09.
