
How to Replace Exterior Door Handle 2000-07 Toyota Highlander
Created on: 2018-03-12
How to repair, install, fix, change or replace a broken or snapped off Exterior / Outside door handle on 01, 02, 03, 04, 05, 06, 07 Toyota Highlander.
-
step 1 :Removing the Door Panel
- Pry up the door pull with a trim tool
- Remove the Phillips screw from the door panel
- Pry open the trap door on the door handle
- Remove the Phillips screw from the door handle
- Pry out the trim from around the door handle
- Pry out the door panel with a trim tool
- Lift the door panel up off the window ledge
- Disconnect the wiring harness
-
step 2 :Removing the Interior Door Handle
- Remove the 10mm bolt from the interior door handle
- Slide the interior door handle out of the door
- Pop the lock cable out of the door handle
- Lift the cable ball out of the lock
- Pop the handle cable out of the door handle
- Lift the cable out of the handle
-
step 3 :Removing the Rear Exterior Door Lock Actuator
- Carefully remove the vapor barrier with a razor blade
- Remove the three T30 Torx screws from the door lock actuator
- Remove the 10mm bolt from the door lock actuator
- Disconnect the wiring harness
-
step 4 :Removing the Rear Exterior Door Handle
- Remove the T25 Torx bit from the exterior door handle
- Pry off the end cap from the exterior door handle
- Remove the T25 Torx screw from the exterior door handle
- On the outside of the door, push the door handle backwards
- Remove the rubber grommets
- Remove the second T25 Torx screw from the door handle on the inside of the door
- Remove the handle from inside the door
-
step 5 :Installing the Rear Exterior Door Handle
- Insert the rear door handle into the interior of the door
- Press the grommets into place
- Tighten the T25 Torx screw to the door handle
- Press on the end cap
- Slide on the door handle
- Tighten the T25 Torx screw to the handle
-
step 6 :Installing the Rear Door Lock Actuator
- Latch the door lock actuator into place
- Tighten the 10mm screw to the door lock actuator
- Tighten the three T25 Torx screws to the door lock actuator
- Connect the wiring harness
-
step 7 :Installing the Interior Door Handle
- Press the vapor barrier into place
- Hook the cable into the door handle
- Clip the cable on the door handle
- Insert the cable ball into the lock
- Pop the lock cable into the door handle
- Insert the door handle onto the door
- Tighten the 10mm bolt to the door handle
-
step 8 :Installing the Door Panel
- Connect the window switch
- Lift the door panel into place
- Tighten the Phillips head screw
- Press the interior door handle trim into place
- Tighten the Phillips screw to the door handle trim
- Press on the trap door
- Press the door pull into place
Tools needed
-
Razor Blade / Gasket Scraper
Socket Extensions
Flat Blade Screwdriver
Phillips Head Screwdriver
T30 Driver
10mm Socket
Ratchet
Trim Tool Set
T25 Torx Driver
Hi, I’m Mike from 1A Auto. We’ve been selling auto parts for over 30 years!
To remove the grab handle pocket, take our plastic prying tool. You can get these from 1AAuto.com. You go underneath gently, and kind of push it in and catch the metal tab. Push it in and then up, and it should pull right out. You might need to do the same thing on this side, but sometimes it'll pop right up. There's two metal tabs there—it comes right out. Now remove the Phillips head screw that's inside here, using a Phillips head screwdriver.
Take that right out. Open up this little cover here to get the screw that's behind it using a small flat bladed screwdriver. Just pop it open. It's a Phillips head screw in here, remove that. Pop this cover off so you can actually go up here with the plastic prying tool. Kind of pry it up, and it's going to pry off the bottom the same way. And then it's going to pull out this way, unhook, probably have to open up this lever. So you're unhooking it from there too.
Door trim is clipped into the metal part of the door, so I'm going to need to get in here. And pull it from the clips. If you can't get your fingers underneath here, use the plastic prying tool. Can wedge the plastic prying tool in between the plastic and the metal, find your way in here, and slide down. I like to start at the bottom. Use a plastic prying tool, a bigger one.
Find your way underneath like that and then just pry out. Go along the edge, and then once you can get your hands in there, then you can start to pull out the rest of the clips. What's going to happen is it's going to lift up like this and the top of the door clips over the metal part. We'll lift it straight up. Now you need to unplug. This is the power window switch so you're going to have to reach under here. Find the lock. It’s on this side, push it in, and pull it out.
To remove the inside door handle there's a single 10 millimeter bolt here. Use our 10 millimeter socket extension and ratchet to remove this bolt. Actually a self-tapping bolt. Put that aside. Push this back, and it will unhook from the door panel. Has these two hooks here. Now we can unclip, this is lock cable, the white one and the door pull handle's the green one.
Start with lock one. Put your finger and thumb like that, and just pop it straight up and then unhook it. And with the green one, do the same thing. Pop it up and then unhook it from the handle and take the handle out.
To remove the vapor barrier—it's stuck on with this butyl tape here. It's sort of this black gluey substance that's forever sticky. So you can peel it and then take a razor blade so you don't tear the plastic. You can cut the black butyl tape, and then pull the plastic away. And this stuff is so sticky that if you're careful, you can reuse this vapor barrier without a problem. You can stick it right back to this stuff. So just go along the whole edge and do this.
Just need to unplug the speaker. Push in the lock, pull it out, and feed it through the opening in the tape. Feed it through the opening in the vapor barrier and then continue peeling it. Down to the end, doing my best to peel it off without totally destroying it. If it rips or tears a little bit not really a big deal, it will re-stick to this stuff. And so just carefully put this aside somewhere where you can reuse it.
Dual lock actuator is located up inside here. You don't have to unclip the door handle from the door lock actuator, it just kind of slides over it. When we unbolt and remove the door lock actuator, it will slide out from underneath door handle. Use a T30 Torx bit to remove the three T30 Torx screws that are holding in the door lock actuator. Remove this 10 millimeter bolt here that's holding in the door lock actuator. Using a 10 millimeter socket ratchet extension. Door lock actuator is loose, but I can see a clip here that it's connected, so I'm going to push in on the two tabs, help push the clip through the door opening and slide the door lock actuator out the door.
Whoops, I got it caught it around the window wrench handle. Now that I can get to it it's easier to unplug it. To unplug the door lock actuator, take a small or a narrow flat bladed screwdriver, push it into this opening here, and then gently pry outwards and at the same time pull up on the plug to unplug it. Use a T25 Torx bit and loosen the Torx screw back side of the door handle. It is captured, so it won't fall into the door. Remove this cap.
I'm going to use a plastic prying tool and put that aside. Loosen the screw on the other side of the handle. This is also captured T25 Torx. Sitting right in there. Push the door handle backwards and pull it out. Pull these little rubber grommets out of here. That screw's still attached. That screw actually holds in the plastic brackets inside the door panel. Pull out this grommet. Removing a screw in here. Pull the handle out.
This is the interior part. Place our door handle support. That goes inside the door panel. Put it back into position. Now it has a couple hooks: one is broken but one is still good. Going to hook it back there on the outside. Push this white grommet through so it holds it in position where I want it and then our rubber grommet here has a metal insert with threads that pops in there and I'm going to hold it in place so it doesn't fall.
Use the T25 Torx bit and just the extension to tighten the screw in. I'm going to tighten the screw into this grommet. It doesn't have to be crazy tight. That’ll do it there. Make sure that you reinstall this grommet. There's a couple little tabs on it and push it in place.
Take the door handle. It's going to slide into here and then go forward. Lock it in place. Reinstall this cap. So it has a thread, threaded insert that's going to be held in with that screw there. This is going to pop in. T25 Torx bit and extension, and I'm going to go through here and I'm going to hold the cap on the outside while I tighten this. And just tightening by hand is fine.
This is going to sit inside the door panel like this. There is a white forked piece that's on the door handle summit. It’s going to slide over this. So as you maneuver this into place, going to go in this way. You have to maneuver it past the window channel. It's a little tricky to get in there, but once you get it you're fine. So there's this clip here, this push clip, going to put it up into place. I'm also going to try to make sure it goes, it should slide right into the white forked piece. And bring this back. There's the push clip. That will hold it in place for me temporarily.
We're over that lever. So make sure that the child lock comes out of this little grommet here. You just have to double check that it's not engaged or engaged if you want it. Get this screw started. Hold it in place where I want it. I'll start the T30 Torx screws. So I'm going to install the three of those. Tighten them up. Once you feel them getting tight, just stop. Tighten the 10 millimeter bolt here. Plug the electrical connector back in. It'll click when it locks in place.
To reuse your vapor barrier, you can see that these two holes match up with these two holes here and then these two holes here match up with these here. Don't worry about it if it's a little torn up. You can still use it. We're going to guide these wires through this opening so we can get to them afterwards, and then these will go on the outside of it. I'm going to start it right here. Stick it right back into that butyl tape and just push it right in all the way around. It should re-stick, this stuff's like super sticky. Those go on this side just like that. Goes on much easier than taking it off.
Reconnect the door handle. This white cable will go on the top so these grooves that match these grooves over here and we'll just hook this up. This is for the door lock and then push it in place. And the one for the pull handle. Get that part, and you push it through. And it hooks in, and then push the green into there to lock it so it won't come out. And get this lined up. These two hooks here are going to hook into the panel just like that.
Reinstall that self-tapping 10 millimeter screw. Get it lined up. Looks like it's tight. There's our door handle. One of your door clips stays stuck in the door. You take your clip puller tool and just put it in here, pop it out and push that back into the door panel and reuse it. These clips sit in here just like this so just find the one that's missing. Put them back in place, just slide it in. Now you can reinstall the door panel. Plug in our window switch. Just goes up from the bottoms, it's keyed, it only goes in one way. The lock is kind of facing the outside, goes in it will click when it locks into place. Lift up our door panel, the top is curved, it's going to hang on the door panel just like that so start it up top.
This doesn't matter if the window's up or down for this. Sits all the way down because that should go over the pull handle freely. Get it lined up. Start to push it back in on the clips. We'll reinstall the Phillips head screw.
Reinstall this trim cover, it does have a hook so you have to lift out this handle and slide it in and then kind of hook it and then it's got these tabs on both top and bottom that will push in and over the plastic. Reinstall the screw. There we go. Push the door back in. Reinstall the little pull handle. There's an arrow, points outwards so when you flip it this way the arrow will be pointing this way. Just push it right back into place.
Thanks for watching. Visit us at 1AAuto.com for quality auto parts, fast and free shipping, and the best customer service in the industry.
Shop Products


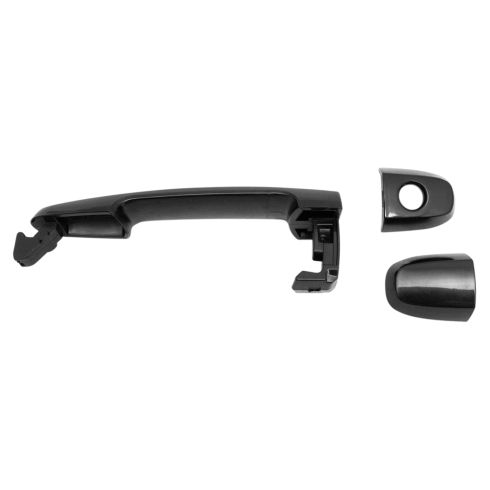
Toyota Lexus Pontiac Scion Exterior Door Handle TRQ DHA49226
Part Details:
- Plastic
- Paint to Match
- Smooth
- Black

How to Replace Exterior Door Handle 1998-2004 GMC Sonoma
How to repair, install, fix, change or replace a broken or snapped off exterior door handle on GMC Sonoma model years 98, 99, 00, 01, 02, 03, and 04.
