How to Replace Exterior Door Handle 1998-2004 Chevy S10
Created on: 2010-02-15
Check out this video to learn how you can replace the exterior door handle on your Chevy S10 pickup. Do it yourself with this 1A Auto video.
-
step 1 :Removing the Door Panel
- Using a paperclip pry out the clip behind the window crank.
- Remove the Phillips screw behind the door handle.
- Remove the door handle bezel.
- Remove the two 10mm bolts under the door pull.
- Use a putty knife to pry out the clips around the door panel.
- Lift the door panel up and off.
- Pull back the water shield.
-
step 2 :Removing the Exterior Door Handle
- Make sure the window is all the way up.
- Remove the plastic cap on the outside edge of the door.
- Remove the two 10mm bolts on the backside of the door handle.
- Reach up on the inside of the door and push the rod out of the clip.
- Pull the door handle out and disconnect the other rod.
- Pull the door handle out.
-
step 3 :Replacing the Exterior Door Handle
- Put the door handle up into place.
- Replace the two 10mm bolts.
- Reconnect the rods to the back of the handle.
- Replace the plastic cap.
-
step 4 :Replacing the Door Panel
- Line up the door panel and push it into place.
- Hit the clips in around the door panel.
- Replace the door handle bezel
- Replace the two 10mm bolts.
- Replace the Phillips screw.
- Put the clip back into place on the window crank and push the crank into place.
Tools needed
-
Flat Blade Screwdriver
Phillips Head Screwdriver
Putty Knife
Paper Clip
7mm Socket
10mm Socket
Ratchet
Brought to you by 1AAuto.com. Your source for quality replacement parts and the best service on the internet.
Hi. I'm Mike Green. I'm one of the owners of 1A Auto. I want to help you save time and money repairing and maintaining your vehicle. I'm going to use my 20 plus years' experience restoring and repairing cars and trucks like this to show you the correct way to install parts from 1AAuto.com. The right parts installed correctly: That's going to save you time and money. Thank you and enjoy the video.
In this video, we'll be replacing a door handle, an exterior door handle on a 2001 S-10 Pickup. Same procedure for S-10s, S-15 Pickup, Blazers, Jimmys, front door anyways. The tools you are going to need: If your truck has manual windows, you'll need a window crank removal tool or two paper clips, Philips screwdriver, door panel and clip removal tool or a putty knife and a regular screw driver, 7mm socket and 10mm socket. You do have to remove the door panel, so I'm going to show you that really quickly, go fast motion. Keep in mind we do have a video that's specifically for door panel removal. Just look up S-10 door panel on our channel.
Here we go. Going through the door panel. Remove it with the right tool or remove it with paper clips. Three bolts or one screw and three bolts. Phillips screw for the door handle. Trim plate: remove that. Pull off that trim plate. Remove the two bolts underneath the door pull. Please don't try and work this fast at home. Anyways, I'll stop cracking jokes. Here's the door panel from the back. Show you the kind of ten clips. Basically, you want to put your putty knife or your clip tool in there. Find the clips and then make sure you're prying and putting pressure where the clips are so you don't end up breaking your door panel.
After you've removed all the clips, or gotten the clips away from the door, the door panel just pulls out and that's obviously where you would disconnect your power windows and door locks if you had those. To get to the door handle, you pull the water shield away and then roll up your window. Remove this little trim cap that's on the outside and then you'll see inside there's two 10mm bolts. There and kind of you can see in there. You're going to want to remove those 10mm bolts. Unbolting and bolting on the door handle is not the hardest part. You'll see the tougher part is releasing the rods that connect the door handle to the latch and the door lock to the lock mechanism. There's one of the bolts out. Then, remove the other bolt. There's the other bolt.
We'll change angles here. You pull the door handle away and then I'm going to disconnect the clip that you can hopefully see my finger working in back there. Disconnect the clip for the rod that goes into the back of the lock. It's a little bit difficult to do. You just got to reach your finger in there and pull it away. What I'll do is I'll change angles and you'll be able to see. You could probably do this from the inside of the door. I wasn't able to do it but you can see the clip right there in the middle of the hole. I'm just going to reach in there and flip the rod out. That's what I was struggling to do on the other side. I just couldn't get the rod to come out of the hole. Now that you can the rod just pop out right there.
Up higher is the rod that connects the door handle to the latch mechanism. Not really a good way to film it. Hopefully, you can see my hand just working in there. You basically push the clip back and then the rod comes back and out. Once they're disconnected, fairly easily comes out. You can see that's where the rod goes for the handle and that's where the rod goes for the door locks.
Going to put it back in. We are going to bolt it in. I was not able to. Some of the vehicles I've worked with you can actually remove the door handle from the door most of the way and then disconnect and reconnect the lock and the handle rods and I thought maybe that would be that case on this one, but I could not figure out a way to easily connect those rods before or while the handle is still disconnected. Basically, I resorted to bolting it in first and then contorting myself to reach the rods and get them all into the right place and locked in place. You'll see what I mean in a minute. I'm tightening up. Those bolts you don't have to have too tight. They are going into a plastic handle. You don't have to be that aggressive, just make sure they're tight. You can see this one was pretty easy. This was a rod going into the lock. You can see I reach in with my left hand and get in there and then get the locking tab on it.
The other one I couldn't really film clearly, but what I filmed for you is basically the way I contorted myself to reach up in. You can see with my right hand I'm reaching up in, grabbing that handle, or grabbing the rod, and then with my left hand, I'm moving the door handle up and down until I was able to get the rod in, and that's it. The process is not that difficult. The hardest thing is getting those rods disconnected and reconnected.
Now, I'm putting the door handle back on. Again, we're in fast motion. If you want to see the detailed video of this, like I said, do a search for S-10 door panel on our channel and you'll be able to see that. Don't hesitate to check out our channel for other ones. I have S-10 lights and tailgate handle and we'll be, hopefully have the whole selection of our products we'll have installed videos for.
Once you get the door panel back on, then you're all set.
We hope this helps you out. This video was brought to you by www.1AAuto.com. Your source for quality replacement parts and the best service on the internet. Call us toll free 888-844-3393. We're the company that's here for you on the internet and in person. Thank you very much.
Shop Products


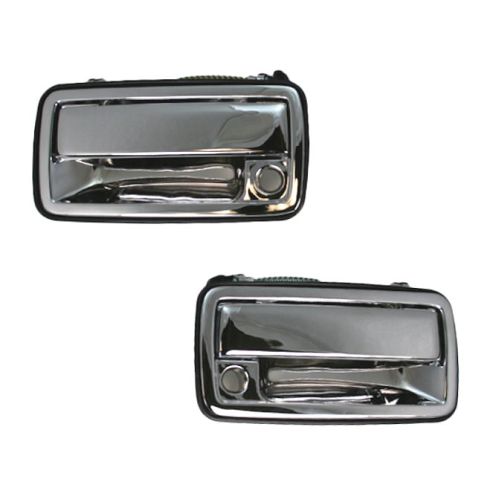
Chevrolet GMC Olds Isuzu Front Driver & Passenger Side 2 Piece Exterior Door Handle Set TRQ DHA69320
Part Details:
- 2 Piece
- Chrome
- (1) Front Driver Side Exterior Door Handle
- (1) Front Passenger Side Exterior Door Handle
How To Replace Front Door Handle 2002-07 Jeep Liberty
How to repair, install, fix, change or replace a broken or snapped off interior door handle on Jeep Liberty, years 02, 03, 04, 05, 06, and 07.
