How to Replace Exterior Door Handle 1995-2005 Pontiac Sunfire
Created on: 2010-06-03
How to repair, install, fix, change or replace a broken or snapped off exterior door handle. This process is the same for any Cavalier or Sunfire years 95, 96, 97, 98, 99, 00, 01, 02, 03, 04, and 05.
-
step 1 :Removing the Exterior Door Handle
- Drill out the rivets on the outside door handle
- Remove the three T30 screws from the lock assembly
- Pull the outside door handle out
- Pop the green clip off from the lock rod
-
step 2 :Installing the New Exterior Door Handle
- Insert the door handle rod onto the door handle clip
- Insert the lock mechanism into place
- Tighten the three T30 screws to the lock assembly
- Tighten two small coarse thread screws to the door handle with a flat blade screwdriver
Tools needed
-
1/8 Inch Drill Bit
Coarse Threaded Bolts (to replace rivets)
Flat Blade Screwdriver
T30 Driver
Brought to you by 1AAuto.com, your source for quality replacement parts and the best service on the Internet.
Hi, I'm Mike from 1A Auto. I hope this how-to video helps you out, and next time you need parts for your vehicle, think of 1AAuto.com. Thanks.
Hi, I'm Mike Green. I'm one of the owners of 1A Auto. I want to help you save time and money repairing or maintaining your vehicle. I'm going to use my 20-plus years experience restoring and repairing cars and trucks like this to show you the correct way to install parts from 1AAuto.com. The right parts installed correctly: that's going to save you time and money. Thank you and enjoy the video.
In this video, we'll show you how to replace the door handle on this two-door 1997 Pontiac Sunfire. The procedure is that generally the same for all two-door and four-door, some slight differences might be in some of the hardware. The tools you'll need are a drill with a 1/8 inch drill bit, a flat blade screwdriver, a T30 Torx driver, and two small coarse thread screws.
To replace your exterior door handle, you'll want to start by opening window so you can reach into the car and open the door with the inside door handle if you need to. You want to lift up and drill out these rivets here. Now once you have those drilled out, these should break off here.
Once you have your rivets out, what you might want to do is remove these three T30 screws.
Now, as you see as I remove this last one, the lock mechanism will actually drop down. Now you have the flexibility to pull your handle up and out. Then you can see right here, basically, you just got to force your handle right off, and then you want to be careful not to lose that rod down in the door, you want to keep it right there.
What you want to get is some little coarse thread screws like this that'll go in, unless that's, of course, you have a rivet gun and rivets so you can attach like the original was. You can see mine did go behind there, so I'll just hold it there. You might need to just take a Ball-peen hammer and kind of straighten out those holes a little bit.
Then once you have that all set, install the new handle just like you took it out. Get the handle up in there, and now, before you attach the handle, you're going to want to get this lock mechanism back up. Kind of by fishing it up with your finger like that and you can get one bolt in there and then push it down so you can get the other bolts in. Now these should be snug, but they don't have to be really tight.
Now you can test it. We'll use our screws. Now if you can, you might want to find something that has a little less of a head than that because it might interfere with your fingernails as you're reaching underneath, but these will work very well. There you go. That's how you do it.
We hope this video helps you out. Brought to you by www.1AAuto.com, your source for quality replacement parts and the best service on the Internet. Please feel free to call us toll-free, 888-844-3393. We're the company that's here for you on the Internet and in person.
Shop Products

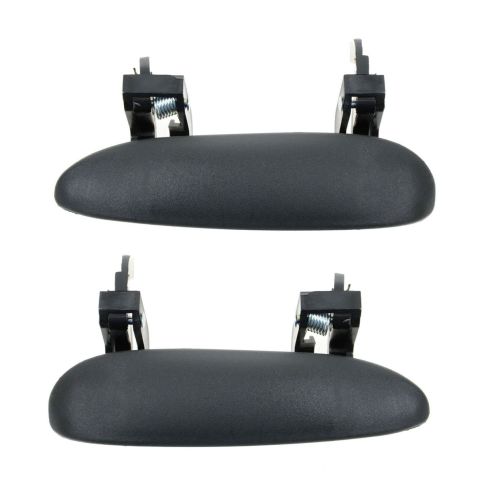
1995-05 Chevrolet Cavalier Pontiac Sunfire Front Driver & Passenger Side 2 Piece Exterior Door Handle Set TRQ DHA36159
Part Details:
- 2 Piece
- (1) Front Driver Side Exterior Door Handle
- (1) Front Passenger Side Exterior Door Handle
- Black

How to Replace Rear Exterior Door Handle 2001-05 BMW 325 Xi
Check out this video if you need to replace the door handle on your 01-05 BMW 3 Series. 1A Auto shows you how to do it, step by step!

