How to Replace Exterior Door Handle 1992-2011 Mercury Grand Marquis
Created on: 2012-05-22
Exterior door handle broken? This video will show you how to replace it yourself on the 92-11 Mercury Grand Marquis
-
step 1 :Removing the Door Panel
- Pry the switch panel trim piece with a flat blade screwdriver
- Disconnect the mirror switch wiring harness
- Disconnect the window switch wiring harnesses
- Disconnect the door lock wiring harness
- Remove the caps from the pull handle
- Pry the bezel from the door handle with a flat blade screwdriver
- Remove the Phillips screws from the pull handle and side and bottom of the door
- Lift the door panel up and off
- Disconnect the trunk switch wiring harness
- Carefully peel off the water shield
-
step 2 :Removing the Outside Door Handle
- Remove the yellow clip from the door lever
- Knock the rivets out from the outside door handle with a hammer and punch
- Drill the rivet away with a 3/8 drill bit
- Unlatch and remove the outside door handle
- Knock the pieces of the rivet out with a hammer and shave the rivet with a 3/8 drill
-
step 3 :Installing the New Outside Door Handle
- Twist the door lever to the door handle
- Insert the door handle into the door
- Feed the Phillips screws with locknuts into the door handle
- Tighten the Phillips screws with a Phillips screwdriver and wrench
- Reconnect the door lever to the yellow clip
-
step 4 :Reinstalling the Door Panel
- Put the water shield into place
- Lift the door panel into place
- Connect the trunk switch wiring harness
- Push in the door panel clips
- Insert and tighten the two Phillips screws at the pull handle
- Insert and tighten the two Phillips screws at the bottom of the door panel
- Connect the window switch wiring harnesses
- Push in the window switch panel
- Push on the trim piece inside the door handle
Tools needed
-
Adjustable Wrench
Impact Screwdriver
Hammer
Flat Blade Screwdriver
Phillips Head Screwdriver
Center Punch
Drill
3/8 Inch Drill Bit
Flashlight
Brought to you by 1AAuto.com, your source for quality replacement parts and the best service on the Internet.
Hi, I'm Mike from 1A Auto. I hope this how-to video helps you out, and next time you need parts for your vehicle, think of 1AAuto.com. Thanks.
In this video we're going to show you how to replace a rear outside door handle on this 2000 Grand Marquis. It's pretty much the same as any 1998 to 2011 Grand Marquis, as well as the Ford Crown Victoria although there may be some differences in how you remove and re-install the door panel. You'll need a flat blade screwdriver, a Phillips screwdriver, a hammer and punch, a drill with a 3/8 drill bit, a flashlight, two small bolts with a Phillips head and lock nuts, and a wrench to hold the locknuts.
Okay, use a flat blade screwdriver and come under here and carefully pry this up. Pry it up here and pull it right out. Okay, and now you'll need a Phillips screwdriver. Just carefully remove these two Phillips screws. Use your flat blade screwdriver and go right in here. You can see a tab on the side. Pry up and pull down on one side and turn it over, same thing right over here. Pry up. Okay, now you want to use your flat blade screwdriver and pry down on the top of this bezel, and then it comes out, and then there's two little cover lids here. Just pry at the bottom. Use the bottom, that way if you accidentally scratch something it's less likely to show.
Now, there are four screws, Phillips screws to remove here and here, and then one down here. Just speed up the film here as I remove those four Phillips screws. Once those screws are out, lift up on your panel. You have to shake it a little bit to get it out, and then pull your switch through, and the panel comes off. You slowly and carefully pull up your water shield. Be careful not to rip it or stretch it too much, and pull that up so you can access the inside of the door. Come in here and pull that off and pull this rod out.
Right in here underneath there's going to be two rivets. You want to punch the middle of the rivets right out. That's what the rivets look like punched out. Now use a drill with a 3/8 inch drill bit, and drill out the center of the rivets. As you can see me doing here, and then I'll speed up as I drill out the second one. It comes off. Before you put the new handle in, make sure that you knock the piece of the rivet out. What I do here is just use a drill to shave down the rivet basically to the surface of the door, and then again hit it with my punch and it comes right out.
Okay, if your door should shut, no worries. Actually, just reach in here with your finger and push down on the little lever and open it up. Take this lever, put it right in, twist it down, and put that in. Put your handle right up. Open it and put it in. Shove the door handle in. You want to use a couple of small Phillips screws with lock nuts, and just take the Phillips and feed the screws through the handle into the door. Yes, I got that one in. Reach in behind, hold the screw here, and reach in behind and thread the nut on this side.
Okay, I'm going to speed it up here. I take the second screw, put it through the hole, start the lock nut on the other side, and then might suggest getting a helper, as I do here. He's actually just turning the screwdriver while I hold on to the lock nut on the other side with a wrench. Back inside, push your rod up. Push the rod up as high as you can with the socket in place. Put in this one. Make sure the door is unlocked.
Okay, now carefully put your water shield back in place and stick it on there as best you can. Put the panel back in and make sure you feed your switch through the hole in the insulation here. It clicks, just go right into the door and put it in place. Make sure that your lock button goes up and in. Push it again, the door, and down, and on. Pull your switch through.
Okay, and I'll speed up again as I put the four screws back in. The two longest screws are the ones that go way down at the bottom and right under the door handle, and then the kind of shorter pinhead screws go into the door-pull. Fast-forward again as I put the Phillips screws in and tighten them up for the switch.
We hope this video helps you out. Brought to you by www.1AAuto.com, your source for quality replacement parts and the best service on the Internet. Please feel free to call us toll-free, 888-844-3393. We're the company that's here for you on the Internet and in person.
Shop Products
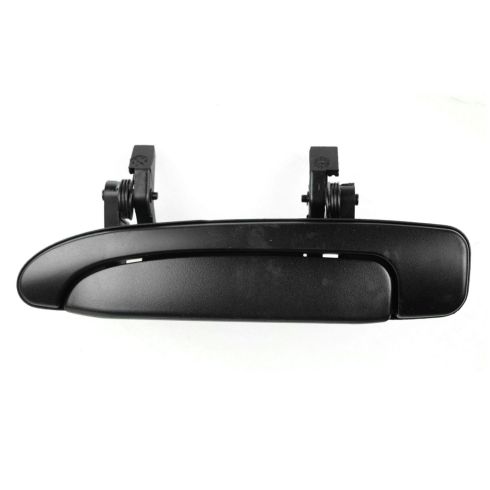
Ford Mercury Rear Driver Side Exterior Door Handle TRQ DHA48799
Part Details:
- Black
- Plastic
- Smooth
- Yes

How to Replace Exterior Door Handle 1998-2004 GMC Sonoma
How to repair, install, fix, change or replace a broken or snapped off exterior door handle on GMC Sonoma model years 98, 99, 00, 01, 02, 03, and 04.
