How To Replace Exhaust Tailpipe 1996-99 Subaru Legacy
Created on: 2011-09-06
Learn how to replace the muffler in your 96-99 Subaru Legacy Outback by watching this 1A Auto video.
-
step 1 :Removing the Tailpipe and Muffler
- Lift the car.
- Spray rust penetrant on the two nuts at the end of the tailpipe.
- Remove the 9/16 bolts from the end of the tailpipe with the socket and wrench.
- Use a screwdriver to pry the end of the tail pipe free.
- Put the bolts back in without the nuts.
- Push the hangers off of the muffler. Pull the bolts out and pull the muffler and tailpipe free.
-
step 2 :Installing the New Muffler and Tailpipe
- Spray rust penetrant on the hangers and bolts.
- Put the tailpipe hanger on first.
- Put the muffler hangers in place.
- Put the bolt through and hang the gasket on the bolt.
- Twist the gasket up into place and insert the other bolt.
- Line the tail pipe onto the bolts and thread the nuts.
- Tighten the nuts making sure the gasket stays centered. Tighten to 25 - 30 ft/lbs.
Tools needed
-
Flat Blade Screwdriver
Rust Penetrant
Jack Stands
9/16 Inch Wrench
Ratchet
9/16 Inch Socket
Brought to you by 1AAuto.com, your source for quality replacement parts and the best service on the internet. Hi, I'm Mike Green. I'm one of the owners of 1A Auto. I want to help you save time and money repairing and maintaining your vehicle. I'm going to use my 20-plus years of experience repairing and restoring cars and trucks like this to show you the correct way to install parts from 1AAuto.com. The right parts installed correctly, that's going to save you time and money. Thank you and enjoy the video.
In this video, I'm going to replace the tailpipe and muffler on the Subaru Legacy Wagon. Tools you'll need are jack and jack stand, some penetrating oil and a wrench and socket and ratchet, it was 9/16"� on this vehicle although I'm pretty sure the bolt was replaced so that size may not be the same for your vehicle. I also used a razor blade and scraper tool but you may not need that on yours.
Okay, just go up underneath and you can see where our problem is, right here. There's a bracket, it's rotted on and it's broken so that's causing a pretty good sized hole. This is pretty easy. You need to jack your car up some. You're going to put some penetrating oil here on these two bolts and then there's just a series of hangers, one here where that bracket is broken and then two back here. Okay, when lifting up your Subaru, you can do it from here which is right under the control arms, also right under here where those notches are. You can lift it and if you want to jack it in the middle, you can jack it right from here temporarily and put the jack stands on the side. Also, here or here you can lift it up.
Okay, first thing I'm going to do is come under here with penetrating, spray those up really good. Okay, on this car, these are 9/16"�, I can't say that's probably the case, the bolts may have been changed before. Set the wrench on there. First I'm going to close out the other wrench and that should come apart pretty easily. We'll fast forward here as I remove those bolts. These came apart pretty easy on this car. I believe this is how they're all done with two bolts which is the best thing. Hopefully they all come apart easily if you break the bolts off, that's simple enough, you just get bolts to replace the one you break.
Put your screwdriver right between there, take it apart. What I'm going to do now is lift this back and put one of the bolts just to kind of hold it in place. Over here, push it there and off, pull it down. Push this hangar off. Hold the assembly to pull that bolt out. Right here the old hangar is broken, pull that out. At some point, this car is apart and they used some kind of gas cement on the end. I'm just going to use a razor blade scraper and scrape that off. Okay, here's the old pipe and a new muffler pipe from 1A Auto. You see it has a nice chrome exhaust tip. I just kept the bubble wrap on there for now during installation.
Before installation, put a little bit of penetrating oil or oil or whatever just to make it easy. Also spray it up on the hangar. Put the assembly up in. Concentrate on the front hangar first. Pop it on there, now the back. Take the bolt through. So it kind of a hangs the gasket on there like that. Put that bolt through. Push that up in and hold it there first. Put that up in. Okay, at this point, I got both bolts in there with the nut started and now I'm just using my ratchet and wrench. I tightened up one side till it's almost seated. I get it just tight enough so it's just holding the gasket in place but I can still move the gasket around then make sure you center the gasket, make sure it's not dropped down too far, too high and then tighten up that other bolt on the other side and then tighten them both up and you don't have to have them incredibly tight. You want to have them probably about 25 to 30 foot-pounds, enough to really hold but you don't want to break them.
We hope this helps you out. Brought to you by www.1AAuto.com, your source for quality replacement parts and the best service on the internet. Please feel free to call us toll-free, 888-844-3393. We're the company that serves you on the internet and in person.
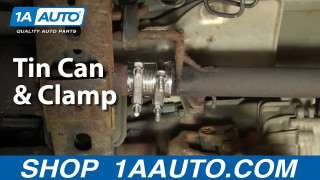
How To Temporarily Fix Exhaust Leak - Tin Can Clamps
Check out this lifehack fix for your leaky exhaust until you have time to do a full replacement!
