How to Replace Exhaust Manifold Without Cat 1997-2001 Toyota Camry
Created on: 2016-11-29
How to remove the front pipe without the catalytic convertor on 98 Toyota Camry
-
step 1 :Removing the Oxygen Sensor
- Remove the five 12mm bolts from the upper heat shield
- Remove the 14mm bolts from the exhaust manifold
- Remove the clamp from the O2 sensor and radiator hose
- Disconnect the O2 sensor connector
- Remove the O2 sensor from the manifold
- Remove the O2 sensor
-
step 2 :Removing the Exhaust Manifold
- Remove the 14mm nut from the passenger side of the manifold
- Remove the 14mm nuts from the bracket on the manifold/front pipe flange
- Remove the three 14mm nuts on the front pipe flange on the bottom of the exhaust manifold
- Remove the 14mm bolt from the exhaust manifold brace
- Remove the exhaust manifold
- Remove the gasket
-
Do not spray any cleaners onto the engine and do not use any abrasive cleaner
step 3 :Installing the Exhaust Manifold
- Spray brake cleaner onto a paper towel
- Wipe down the surface on the cylinder head
- Insert the new exhaust gasket onto the cylinder head
- Clean off the front pipe flange
- Insert a gasket onto the front pipe
- Insert the exhaust manifold into place
- Tighten the hardware onto the manifold
- Lay the brace onto the stud on the bottom of the manifold
- Tighten the three 14mm nuts on the studs for the front pipe flange
- Tighten the 14mm bolt to the brace
- Tighten the 14mm bolts to the bracket
-
step 4 :Reinstalling the Oxygen Sensor
- Insert the O2 sensor into the manifold
- Reconnect the electrical connector
- Reinstall the plastic retainer onto the radiator hose
- Reinstall the head shield
- Tighten the 12mm bolts to the heat shield
Tools needed
-
14mm Wrench
12mm Socket
Socket Extensions
14mm Socket
Rust Penetrant
Jack Stands
Brake Parts Cleaner
Gloves
Paper Towels
O2 Sensor Socket
Ratchet
Wire Brush
Floor Jack
12mm Wrench
Hi, I'm Mike from 1AAuto. We've been selling auto parts for over 30 years! We're dedicated to delivering quality auto parts, expert customer service, and fast and free shipping, all backed by our 100% satisfaction guarantee. We've created thousands of videos to help you install our parts with confidence. That saves you time and money, so visit us at 1AAuto.com, your trusted source for quality auto parts.
In this video, we're going to be working with out 1998 Toyota Camry 2.2-liter, 4-cylinder. We're going to show you how to remove and replace your exhaust manifold. This particular one does not have the catalytic converter in the manifold, however these steps should be fairly similar for that style cat as well.
If you like this video, please click subscribe. We have a ton more information on this and many other vehicles. If you need parts for your car, you can follow the link down in the description over to 1aauto.com.
Here are the items you'll need for this repair: 12-14mm sockets, ratchet, socket extensions, 12mm wrench, 14mm wrench, wire brush, rust penetrant, gloves, O2 sensor socket, brake cleaner, paper towels, jack, jack stands
Open the hood, and secure the hood prop. There are five 12 millimeter bolts securing the upper heat shield onto our exhaust manifold. We're going to spray those with some penetrating oil to help try to free them up, however it's not super important because in changing the manifold, we can change the heat shield over as long as we get the heads off the bolts when they break.
These bolts tend to break because they get really hot and then cool down very frequently every time you turn the vehicle on and off. These have been in here for just about 18 years now, so it's safe to assume that they're probably in there pretty tight. We'll take them out, if we can, with a 12 millimeter socket ratchet and extension. Once the last bolt's out, remove the heat shield from the manifold.
Now, the nuts and studs that secure the manifold onto the head are pretty rusty. We have one down here under the alternator, two at the top, one in this corner, and two more underneath the heat shield in the center. The best way to remove these is with heat. It can be a little tricky getting in there with a torch, or you may not have a torch at home, so the best way to do it is to heat them up naturally by running the engine, letting it get up to temp, and then carefully removing the bolts so you don't burn yourself. Be sure to use a long extension to keep your hands away from the hot exhaust, but it is crucial that you remove these bolts while they are hot, because it makes them a lot easier to remove, and you don't want to break bolts off in the cylinder head because those are very difficult to remove.
You may consider wearing some protective gloves since your hands are going to be so close to the hot exhaust, and you don't want to risk getting burned. Move the teeth off of this clamp that secures the O2 sensor wire in place. You see they just kind of interlock there. Unplug the O2 sensor connector. Use an O2 sensor socket to remove the oxygen sensor from the manifold.
Again, the exhaust is hot, so be careful not to hurt yourself with that. Remove the oxygen sensor from the manifold. Remove the 14 millimeter nut on the passenger's side of the manifold with a 14 millimeter socket ratchet and extension. Remove the 14 millimeter nut on this side of the exhaust manifold here at the driver's side, and loosen this one so we can hang the bracket out of the way. For this, we use a 14 millimeter socket and ratchet. Just a couple of turns and the bracket should fall right out of your way.
Raise and support your vehicle. We're using a lift to make it easier to show you, but this job can easily be done in the driveway on a jack and jack stands.
Remove the three millimeter nuts on the front pipe flange at the bottom of the exhaust manifold with a 14 millimeter socket, extension, and ratchet. Using a 14 millimeter wrench, remove the bolt securing the exhaust manifold bracket in on the passenger's side. You can't really get at this with a ratchet unfortunately, but if you have a ratcheting wrench, now is a great opportunity to use it. You can go ahead and remove the bracket from the exhaust.
Now you can wait until your exhaust manifold cools down before removing it, but we're going to use a pair of welding gloves to take it off since it's still a little hot. Simply pull back and lift up to remove the manifold from the vehicle. Remove the gasket from the head and toss that out since we can't reuse it. Our kit comes with a new one.
If you're reusing your old exhaust manifold for any reason, you want to make sure you clean all the old rust and corrosion off of the mating surface to the cylinder head. This can be done a few different ways. You can use a cookie wheel, some sand paper, or just a good size steel wired brush to get all that corrosion off of there. Spray some Brake Cleaner onto a clean rag or paper towel. Wipe down the mating surface on the cylinder head. You want to do the best you can here, but you don't really want to use anything abrasive, or spray any cleaners directly onto it because there's a risk of it getting down into the cylinder head and damaging the valves or something worse inside of the engine.
Make sure you get all of your paper towel shreds out of there too. Install your new exhaust gasket onto the cylinder head. If you're reusing your old front pipe, ours has been changed recently, you want to make sure you clean that surface off before installing your new gasket. Reinstall your exhaust manifold onto the cylinder head as well as into the three studs on the up pipe. It's usually easiest to do the up pipe first.
Reinstall your hardware onto the manifold. In our case, we had four out of the six 14 millimeter nuts come off of the studs, but on the two bottom center ones under the heat shield, the stud came out with the nut. That's perfectly fine. We just have to make sure that we reinstall those into the same holes they came out of.
Once all the hardware's back in, go ahead and tighten it down with a 14 millimeter socket, ratchet, and extension. Because of the material these gaskets are made out of, you want to make sure you get the hardware down as tight as you can safely. Reinstall the brace onto the stud at the bottom of the manifold. Don't tighten the nut down on it yet because we'll want to make sure that the up pipe is tightened to the manifold.
Reinstall the three 14 millimeter nuts on the studs for the up pipe. You may have to start tightening one down a little to settle the other ones in before you can get them started. Line up the bracket to the manifold. Reinstall the 14 millimeter bolt. Get that down as tight as you can by hand. Just remember we'll have to finish tightening it up with a wrench. Make sure you tighten the bolt down using a 14 millimeter wrench.
Reinstall the 14 millimeter nut onto the stud. Tighten that down with a socket, ratchet, and extension. Reposition the bracket on the driver's side. Once you've got the bolt started into the exhaust manifold, you can tighten down both bolts with a 14 millimeter socket and ratchet. Reinstall the O2 sensor into the bung on the bottom of the manifold. Tighten it down with your O2 sensor socket.
Reconnect the electrical connector. Reinstall the plastic retainer on the line. It simply clicks back together. Reinstall the heat shield and start all 5 12 millimeter bolts by hand. Once the bolts have been started, tighten them down with a 12 millimeter socket, ratchet, and extension.
Thanks for watching. Visit us at 1AAuto.com for quality auto parts, fast and free shipping, and the best customer service in the industry.
Shop Products
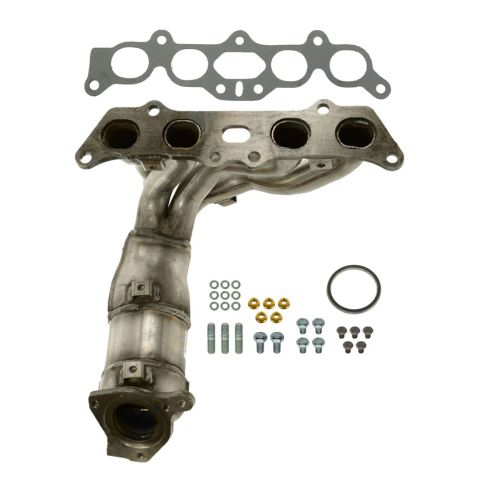
Toyota Camry Solara Exhaust Manifold Catalytic Converter Assembly Dorman OE Solutions 674-975
Part Details:
- EPA Certified
- No
- No

How to Replace Catalytic Converters 2000-06 Chevy Suburban 1500
Our experts in this how-to video will show you how to replace a cracked, clogged, or corroded catalytic converter on the 00-06 Chevy Suburban 1500
