How to Replace Engine Oil Pan 2004-07 Toyota Highlander L4 2-4L
Created on: 2018-01-30
New Engine Oil Pan from 1AAuto.com How to repair, install, fix, change or replace a rusted or damaged oil pan on 04, 05, 06, 07 Toyota Highlander L4 2.4L
-
step 1 :Draining the Oil
- Raise the vehicle on jack stands
- Have a drain pan ready
- Remove the 14mm bolt from the drain
- Drain the oil
- Twist on the 14mm drain bolt
- Tighten the bolt with a 15mm wrench or socket and ratchet
-
step 2 :Removing the Oil Pan
- Remove the fourteen 10mm bolts from the oil pan
- Have a drain pan ready
- Remove the oil pan
- If the oil pan is stuck, tap it with a dead blow
- Pry the oil pan down and out with a hammer and pry bar
-
step 3 :Installing the Oil Pan
- Remove gasket adhesive with a razor blade from the mating surface
- Place RTV along the edge of the new oil pan
- Insert the oil pan into place
- Tighten the fourteen 10mm bolts to the oil pan
- Let the gasket dry for an hour
-
step 4 :Removing the Oil Filter
- Remove the oil filter with an oil filter wrench
- Clean the area with a rag
-
step 5 :Installing the Oil Filter
- Place a layer of oil around the rim of the oil filter
- Twist the oil filter into place
-
step 6 :Servicing the Oil
- Remove the oil cap
- Place a funnel into the oil fill
- Replace the oil to the recommended amount
- Replace the oil cap
- Start the vehicle
- Let the engine run for a few seconds
- Turn the vehicle off
- Check the oil level with the dipstick
Tools needed
-
Razor Blade / Gasket Scraper
14mm Wrench
Funnel
Socket Extensions
14mm Socket
Pry Bar
Jack Stands
Engine Oil
Gloves
Dead Blow Hammer
Oil Filter Wrench
Paper Towels
10mm Socket
Drain Pan
Ratchet
Floor Jack
Swivel
Hi, I’m Mike from 1A Auto. We’ve been selling auto parts for over 30 years!
To check your oil pan for leaks, you're going to have to raise and support your vehicle. Where underneath, we're going to inspect it, and we can actually see there is oil along the edge. This particular type of oil pan and engine combination uses a Gray RTV sealant as the gasket. It's probably started to deteriorate and that's causing the leaks around the edge, and you can see the leaks all around the edge between the engine block and the oil pan. It's really bad on this side. That's just all oil.
Drain plug is 14 millimeter. You can use a 14 millimeter box wrench, and loosen it, and drain the oil. I've got my drain pan ready. Got it loose. Drain the oil. Now that it's all drained, reinstall the drain plug. Use a 10 millimeter socket extension and ratchet to remove the fourteen 10 millimeter bolts and nuts that are holding on the oil pan. I'll just start right where I can get to one. There's some rust on them. Kind of knock it off, and you shouldn't have too much torque to them because they're very small.
Take that one out. Put it aside. Just repeat this for all of them. Go all the way around the pan. A couple of these bolts are a little bit hard to reach straight on. I'm going to use a universal joint, 10 millimeter on there, put some electrical tape around it. It makes them a little stiffer and easier to work with. Just kind of feed it in there and just remove it the same way. Yeah, it was a stud. If the stud comes out attached to the nut, don't worry about it, that's fine, and reuse it just like this.
Now, the oil pan's now just stuck to the engine block with the RTV silicon. I'm going to try to tap it with a dead blow. It might loosen it, it might not. Give it a couple taps. Sometimes it's easier just to go right to a pry bar. Just going to take a pry bar, there's a nice little spot here, and in between the seam of that and the oil pan, and you'll take a hammer and just tap it in. You do want to be careful doing this. Try to go in at a flat angle so you don't mar up the surface where the gasket needs to go, and the RTV will fill most gaps, but you don't want to make a huge gouge in it if you don't have to. I kind of got it started.
I'm going to take the larger pry bar. I've got it in there. Twist it. There we go. Now grab it. It's a little stuck on the front still. Take the smaller pry bar, get it in here, and there we go. Got to work on getting this out of here. Can just maneuver it a bit. Go this way, put it down past the oil pickup, and there we have it. There's still some oil in here, so be careful when you lower this. I'm going to dump this into our drain bucket and dispose of it properly.
I'm going to use a brand new razor blade and just very carefully go on the edge here as flat as can be to the surface. I don't want to put any extra marks in it, and just remove all the extra, or all the old RTV silicon, and this can be a long process. You just have to clean this and get it down to a nice shiny aluminum. I'm not going to worry too much if I miss a spot. I'm going to come back later and clean it again. If you get in here there's some dried stuff there, you're going to pull it down. Just going to go along. It's a messy job. There's going to be oil dripping. Just do this around the whole edge of the sealing surface fuel pan.
I'm going to take some brake parts cleaner and just kind of spray it in here and a little bit of emery clothe. Just clean this down. Clean off all the old material. I want to get it nice and clean, just like that, all the way around so that the new RTV has a good surface to seal to.
Here's our old pan from our vehicle, and our brand new one from 1AAuto.com. It's an exact match. This will fit great and work great in our vehicle. It doesn't come with a gasket. You’ll need to use gray RTV silicone, but, otherwise, it comes with a drain plug too. It's ready to be installed.
We need to add Gray RTV to the sealing edge of our brand new oil pan. Get some here. Just going to start putting it right along the edge. I like to go on the inside of the holes with a nice bead. I'm just going to clean up a little bit of this extra. Just wipe it with a rag. I'll just get some of this that fell into the pan, clean that up, and a little bit over here.
This stuff can be pretty messy, gloves are definitely recommended. With that on there, now we're ready to reinstall it in the car. Just make sure that your sealing surface is clean and dry. While I was dealing with the oil pan out of the car, a little bit of oil dripped down onto the surface I already cleaned. I'm just going to wipe it down. You can use a little bit of brake parts cleaner on the rag. Just make sure it's nice and clean and not oily. We've got it in the correct orientation.
The dipstick was pointing down here. I actually pushed the dipstick up to get it out of the way. We're going to slide this up over the exhaust, at the same time just get it up just in place. I'm going to get it up and I can see the holes. Get lined up. I'm going to hold it. I'm going to get this bolt caught here, just because it was easy to get to with my fingers, and just thread it in so I know that part of the pan's not going to fall down. We'll grab another one and on the other side here where I can get my fingers to real easily I'll put one in.
Now I'll just go around the pan and keep installing the little bolts. This one that had the stud on it, I'm going to put it back where I found it. It was probably something for when the engine came down the assembly line it was easy to install and light up with these little studs on there. I'm not tightening these all the way right now. I'm just bringing them up and then stopping. Put this bolt in here. Now I'm just going to crisscross and tighten these bolts down on the pan. Start on one side, go to the other side, and tighten it down. Now just follow this all the way around. Now you just let the RTV silicon gasket material, just let that dry for about an hour, and then you can refill the car with oil. Also, wipe down any oil that dripped on the exhaust. Use an oil filter socket modern extension.
We're going to remove the oil filter. Pull the socket out of here. Now it's stuck to the oil filter. I'll have to get it off afterwards. Got our drain pan ready. We're going to make sure that the oil filter gasket went off with the old oil filter, because we don't want to double gasket it. There is a gasket on here and if the old one is still there, it can cause a leak. Just going to take a little bit of the oil that's right here, put it right around the O-ring, and reach up, and just spin it on. We'll just do it hand tight. No need to use that oil filter wrench. Just as tight as you can go by hand. Perfect.
Now I'm just going to wipe down any oil that spilled. To refill the oil, I'm going to open the oil cap. Actually says on it the recommended weight, 5W30. The vehicle takes four quarts of oil. Put our funnel in there. This container is five quarts, so when it gets down to this bottom line I'll pull the dipstick and double-check it. All right, getting close to four quarts. Just going to finish it off. All right, so it's got four quarts of oil in there.
Take the funnel out, reinstall the oil cap, and wipe down the oil I spilled. Pull the dipstick and just check the oil level. Wipe it off. Put the dipstick back in. It's hard to see because it's nice and clean, but it is right there at the full mark. Now I'm just going to start it and check for any leaks. Then I can shut it off. Then when you're done, just look underneath to make sure there's no oil leaking. That's just from earlier. It dropped on the ground, I got some kitty litter there to dry it up.
Thanks for watching. Visit us at 1AAuto.com for quality auto parts, fast and free shipping, and the best customer service in the industry.
Shop Products

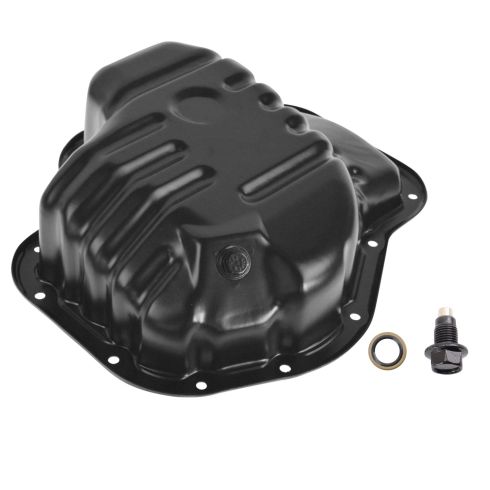
Toyota Highlander Rav4 Magnetic Engine Oil Pan with Magnetic Drain Plug TRQ OPA78490
Part Details:
- (1) Magnetic Engine Oil Drain Plug
- (1) Engine Oil Pan

How to Perform an Oil Change 2013-19 Mazda 3
How to change the oil on 13, 14, 15, 16, 17, 18, 19 Mazda 3
