How to Replace Engine Knock Sensor 1992-2001 Toyota Camry
Created on: 2016-09-20
Check out this video on how to replace the engine knock sensor on your 92-01 Toyota Camry with expert instructions from the mechanics at 1A Auto.
-
step 1 :Removing the Engine Knock Sensor
- Raise and support the vehicle on a jack and jack stands
- Disconnect the electrical connector
- Remove the sensor with a 27mm socket and ratchet
-
step 2 :Installing the Engine Knock Sensor
- Tighten the sensor with a 27mm socket and ratchet
- Connect the electrical connector
Tools needed
-
27mm socket
Ratchet
Brought to you by 1AAuto.com, your source for quality replacement parts and the best service on the Internet.
Hi, I'm Mike from 1A Auto. I hope this how-to video helps you out, and next time you need parts for your vehicle, think of 1AAuto.com. Thanks.
In this video, we're going to be working with our 1998 Toyota Camry. We're going to show you how to remove and replace your knock sensor on the back side of the engine.
This part senses pre-ignition or spark knock inside of the motor, which means there's an issue with compression, ignition timing, fuel mixture, something that's causing the air fuel inside of your cylinder to go off before it was supposed to. This is detrimental to the engine and all of it's internal components and can cause catastrophic engine failure. Your knock sensor picks up on this little vibration or noise that you normally wouldn't hear inside of the car and de-tunes the engine accordingly to make sure that it runs within safe parameters.
If you like this video, please click subscribe. We have a ton more info on this car, as well as many other makes and models. If you want this part for your vehicle, it's available from 1AAuto.com. You can follow the link down in the description.
The only item we'll need for this repair is a 27 millimeter socket and ratchet. We're doing this on a lift, but this can easily be done at home with a jack and jack stand.
If you raise and support the front of the vehicle, you can find the sensor below the intake manifold on the back side of the engine. You can reach up between the CV axle and the exhaust. Push down on the tab. Remove the electrical connector. Use a 27 millimeter socket and ratchet.
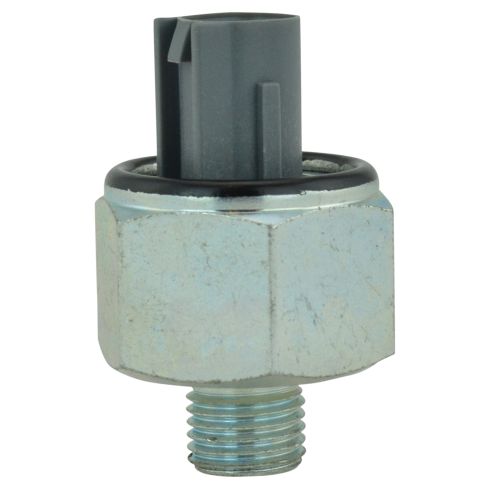
Here we have our old knock sensor that we removed from the vehicle; and our new knock sensor from 1AAuto.com. As you can see, we have the same single wire connector at the top. We have the same threads on the sensor end here. We have the same 27 millimeter hex for our wrench. So, if your knock sensor has gone bad and is causing the check engine light on your vehicle, this new part from 1A Auto is going to go in, direct fit, just like your original equipment, and fix you up right.
Install your new knock sensor into the threads on the back the motor. Bring it down as tight as you can by hand. Then we'll finishing snugging it up with a 27 millimeter socket and ratchet. Reconnect the electrical connector, and you're good to go.
Thanks for tuning in. We hope this video helped you out. Next time you need parts for your car, please visit 1AAuto.com. Also check out our other helpful how-to and diagnosis videos.
Shop Products


How to Replace Engine Knock Sensor 2000-06 Chevy Suburban SUV
Learn how to stop that pinging noise in your engine. The experts at 1A Auto show how to replace the engine knock sensor in your 00-06 Chevy Silverado, Suburban or Tahoe; or GMC Sierra or Yukon.
