How To Replace Emergency Brake Release Cable 1992-2000 Chevy Tahoe
Created on: 2020-12-30
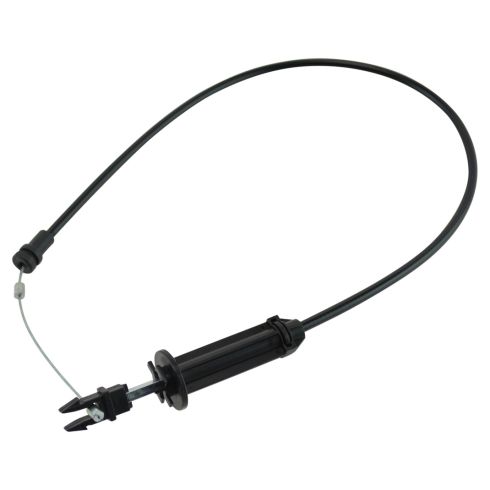
This video shows you how to install a new brake release cable for your 1992-2000 Chevy Tahoe.
Tools needed
-
Needle nose pliers
Trim Tool Set
Pliers
Pocket Screwdriver
Okay, friends. To get started on replacing our emergency release cable, you obviously need to first see where it's gonna lead down to. Leads down to the lever that's located right on your e-brake mechanism. It's gonna be easiest to go ahead and remove this by cutting this cable right here. So I'm gonna cut this. And then at this point, I can grab onto this handle and pull it right out of here.
The next thing that we're gonna need to do is push on the squeeze tabs. There's gonna be one on each side of the handle itself. We'll get this apart and we'll set the handle aside. The next thing we're gonna do is use a nice flat screwdriver like this. I'm just gonna push on this tab and I'm gonna try to separate the two.
There we are. Hold on to this and dispose of the rest of this. Now let's grab onto the rest of that cable. As we push it towards the firewall, you're gonna see that there's an area where it slides right out. Now, let's just use a nice pair of needle-nose pliers. We're gonna grab onto this piece, give it a little twist clockwise so it lines up, and then let's pop it right out of there.
So, now looking from the back side here, you're gonna see that you have a little clippy do, there's gonna be two ears. If just grab it with some flyers, grab onto those two ears and you should slide this up. I'll pop right up and out of there. Now we need to continue on by removing this from its mounting area. Usually, you can just try to pry on that and you can pop right out.
Now let's grab that cable and get it out of here. There it is friends. All right. So now looking at this clip right here, you're gonna see that it has a locking tab. Just come right under it with a screwdriver you're gonna be able to separate it. We'll set this aside, hold onto this, make sure it's still in good locking condition and let's grab our new cable. So we've at our new cable, let's go ahead and make a nice little loop with it. We're gonna put back on our clip and, of course, make sure we lock it in.
Now, let's get this up and into the truck. Now, looking at this, obviously, you want this area right here to be facing out towards where the handle's gonna be. And obviously, we want the other end going down towards where it belongs in the actual e-brake mechanism. Put this open in here. When you put it in, you want your loop to be facing up towards the top of the vehicle, not facing down towards the floorboard. You don't want that coming down near your feet.
I'm gonna put the end through the plate and then we'll snug it up. All right. So now that that's on there, let's grab our needle-nose pliers and lock it in. Okay. So that's locked in. We have our ears facing side to side. So now it's gonna be time to get our little clip back on here. You wanna make sure it's facing in the right direction. Essentially, when we have this piton inside the hole, we wanna have it so this area right here, lines up with the e-brake mechanism.
Okay. So I have that locked in. So now that the clips in, let's continue on by putting on the end of our e-brake release cable down into the lever itself, and then, of course, we'll bring this up and we're gonna latch it in right here. Make sure it's completely secured so we can't fall off of there. This looks great. Let's get our handle on there. Let's get the handle on here. Go ahead and line it up with those prongs. Give it a nice little push. Make sure it's completely secured. Let's test the e-brake. All right. It releases perfectly.
Shop Products

How to Replace Parking Brake Release Handle 2007-14 Chevy Suburban
New Parking Brake Release Handle from 1AAuto.com How to replace a broken, cracked, snapped, or loose parking brake release handle on 09 Chevy Suburban.
