How to Replace Electric Fuel Pump 1996-2006 Ford Taurus
Created on: 2014-05-14
Learn how to replace the fuel pump in your 96-06 Ford Taurus or Mercury Sable. The experts from 1A Auto will show you in this step by step video.
-
step 1 :Removing the Fuel Pump Relay
- Start the engine
- Remove the fuel pump relay from the fuse box
- Let the engine stall out
- Turn the engine off
-
step 2 :Disconnecting the Fuel Lines
- Jack the vehicle as high as possible
- Disconnect the two fuel lines from the fuel filter
- Place a drip pan underneath the fuel filter and pull the fuel lines free
- Let the hoses drain
- Release the hose clamps from the fuel tank filler tubes, let them slide back, and pry up the yellow clip
- Remove the fuel line hose with penetrating oil
- Remove the additional fuel line fittings and hoses
-
step 3 :Removing the Fuel Tank
- Disconnect the fuel pump electrical connector with a flat blade screwdriver
- Place a block of wood on a jack and jack up the gas tank
- Remove the 13mm bolts holding in the gas tank straps with an extension or impact wrench
- Pull back the gas tank strap
- Remove the pin with a flat blade screwdriver or pliers
-
step 4 :Removing the Fuel Pump Sender
- Remove any debris with a broom
- Remove the module retaining ring with a flat blade screwdriver and hammer
- Pull the harness free from the hose to slide the ring off
- Use a flat blade screwdriver to pry up around the outside of the fuel pump
- Let it drain and remove the rest of the way
- Drain out some of the gas
- Use a container and funnel to recover any unused fuel in the tank
-
step 5 :Disconnecting the Fuel Pump
- Disconnect the Fuel Pump Harness
- Remove the two 3/16 bolts on the fuel pump sender plastic cap
- Remove the fuel pump sender plastic cap
- Remove the three 3/16 on the fuel pump sender
- Lift the fuel pump up and out
-
step 6 :Preparing the Fuel Pump Sender
- Insert the new fuel pump into the sender unit
- Replace the top and replace and tighten the three 3/16 bolts
- Attach the plastic cap
- Replace and tighten the 3/16 bolts that hold the plastic cap
- Reconnect the fuel pump harness
-
step 7 :Installing the New Fuel Pump
- Push the fuel pump unit into place
- Twist the cap
- Insert the gasket
- Push the fuel pump sending unit into place, making sure the arrow is facing the same direction
- Slide the module retaining ring over the harnesses
- Apply pressure to the sending unit, twist the ring into place with a hammer and flat blade
- Re-clip the harnesses on the fuel tank bracket
- File the gas tank strap pins if rusty
-
step 8 :Reattaching the Fuel Tank
- Reattach the passenger's side gas tank strap (the longer one)
- Place the pin in the strap
- Push the gas tank back up
- Put the jack underneath the gas tank to hold its place
- Replace the gas tank strap with the 13mm bolt
- Reattach the driver's side gas tank strap
- Reconnect the harness onto the fuel filter
-
step 9 :Reattaching the Fuel Line
- Reconnect the fuel pump electrical connector
- Reconnect the hoses onto the fuel filter and replace the clips
- Reconnect each of the hoses
- Tighten the fuel tank filler tube hose clamps, let them slide back, and re-attach the yellow clip
- Replace and tighten the hose clamps
- Remove the jack
-
step 10 :Restarting the Car
- Replace the fuel pump relay
- Close the fuse box cover
- Restart the engine, let it stall out, restart a second time
Tools needed
-
13mm Socket
Hammer
Socket Extensions
Flat Blade Screwdriver
3/16 Inch Socket
Jack Stands
Vise-Grips
Bent Nose Pliers
Drain Pan
Ratchet
Brought to you by 1AAuto.com, your source for quality replacement parts and the best service on the Internet.
Hi, I'm Don from 1A Auto. I hope this how-to video helps you out, and the next time you need a part for your vehicle, think of 1AAuto.com. Thanks.
In this video, we're going to show you how to replace the fuel tank on this 2001 Ford Taurus. You're going to need a new fuel tank from 1AAuto.com, a flat blade screwdriver, a drip pan, two pairs of pliers, 13mm socket and a ratchet with an extension, a file, a vice, a hammer, jack and jack stands, and depending on the condition of your vehicle, you may also need a damaged bolt removal tool and an impact wrench.
Start off by starting your car, and then go to your fuse box and remove this fuel pump relay. Your car should stall out. Now, turn your car off. We're going to disconnect these two fuel lines from the fuel filter, pry down on the tabs, and then pull them free. While Don's doing that, in order to prepare for this, you can see that we have it on the lift, but doing it with just jack and jack stands is okay, too. You just want to jack the vehicle up as high as you can so that you can have a lot of room to get the tank out from underneath. Now, put your drip pan underneath your fuel filter here, and pull those hoses free. Just let that drain for a second. Now, loosen up these two hose clamps, and slide those clamps back. We'll fast-forward as Don does this.
Now, just pry up this yellow clip and once you get it pried up most of the way it's easier to just remove it by hand. We'll fast forward as Don just works these hoses free. You can see he does use some penetrating oil to help, you don't need to but it definitely does make it a bit easier. Then, just pull this hose free as well. With that hose free, there's actually another hose coming into it that you want to disconnect. Lastly, on the front passenger side corner of the tank, there's a harness. You just push in the tab and disconnect the harness. Put a block of wood on a jack and then just jack up your gas tank.
Then, you want to remove the bolts holding in the gas tank straps. There's a 13mm on both. Using a 13mm socket and ratchet with an extension or using an impact wrench and a 13mm socket, you just want to remove that bolt. When we go to remove this one, we have a bit of a problem with it. As you can see, it's completely rounded so to remove it, we're going to need to use this damaged bolt removal tool, and you just put it into a socket and use an impact wrench, and those teeth will bite into the bolt and help pull it free. Just push it up into place and use your impact wrench to remove it. We'll fast-forward as Don does this.
Now, pull back the gas tank strap, and there's a pin that holds this end in, and you can remove it one of two ways. You can either use a flat blade screwdriver to push it up and into the hole, or you can use a small pair of pliers. Once you can see the pin at the edge of the hole, and once you can see the pin through the hole, then you just use your pliers and pull the pin out. We'll just fast-forward as Don does this on the other strap. Actually, having your car down on the driveway on jack stands with a jack underneath is easier.
You can see because of fuel in the tank we've got two people holding the tank. Pull out the jack, and then we shift it down and out, and then pull it right down. Remove any debris with a broom or compressed air works well as well. With a screwdriver and a hammer, and just remove that ring. To get the ring off, you're going to need to pull this harness free. Just disconnect it, pull it from that clip, and then slide the ring over these harnesses.
Now, use a flat blade screwdriver to pry up around the outside of the fuel pump sender. You want to make sure you remember which way the arrow on the fuel pump sender is facing for when you go to install it onto your new fuel tank. That sender will pull up, and you want to just let it drain for a second, and then remove it the rest of the way. Now, you can just drain out some of the gas that's inside of this. Just use a container and a funnel, and now you can recover any unused fuel.
Now, just push the tab on this harness and disconnect it. Then remove these two 3/16 bolts. We'll just fast-forward as Don does that. Now, lift this up and out, and then remove these three 3/16 bolts. Lift the top of the sender unit up and off, and then lift your fuel pump out, put your new fuel pump into place, put the top of the sender unit back down, and replace those three 3/16 bolts. Push this back down into place and replace the two 3/16 bolts that hold it.
Then, you want to push your fuel pump sending unit back into place, making sure that the arrow is facing the same way that it was on your old fuel tank. Once you have it pushed down into place, slide the ring over your harnesses, and while applying pressure to the sending unit, just push that ring into place and twist it back. Then, use your hammer and flat blade screwdriver to completely twist it back into place. Then, re-clip this harness into the bracket here and reconnect it up here. Re-clip your harness and reconnect it. This harness, just run it underneath those tubes and push that clip into that hole on the side of the gas tank. Our pins for our gas tank straps were a little bit rusty, so we just filed them down a little bit. Then, you want to take your two gas tank straps, the long one goes on the passenger's side, the shorter one on the driver's side. We just put the passenger's side up into place, and slide that pin in.
Push the gas tank back up. Put the jack back underneath the gas tank to hold it into place. We'll fast forward as Don replaces that gas tank strap, replaces the 13mm bolt, and tightens it up. Now, put the driver's side gas tank strap back into place and slide that pin in, and then replace the 13mm bolt over here and tighten it up. Reconnect this harness, and slide these two hoses back onto your fuel filter, and replace those two clips. Now, you just want to reconnect all of these hoses, and we'll fast forward as Don does that. Make sure you replace that yellow clip to hold that hose into place. Make sure you get this upper hose too.
Now, replace those hose clamps and tighten them back up. Now, you can remove the jack that's underneath the gas tank. Replace your fuel pump relay, put the fuse box lid back into place, and start your car. The first time, it'll probably stall out because it's still re-priming everything. The second time, you should be all set.
We hope this video helps you out. Brought to you by www.1AAuto.com, your source for quality replacement parts and the best service on the Internet. Please feel free to call us toll-free, 888-844-3393. We're the company that's here for you on the Internet and in person.
Shop Products
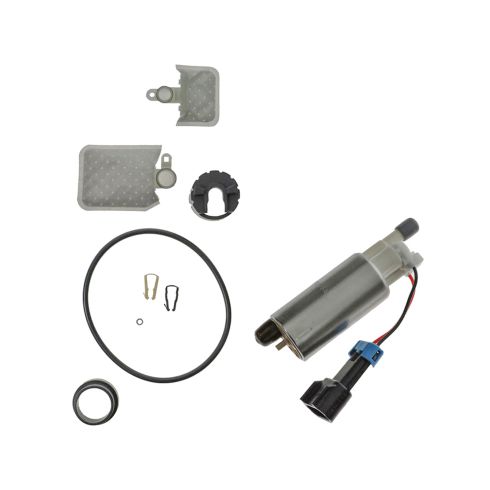
Ford Taurus Mercury Sable Electric Fuel Pump TRQ FPA62103
Part Details:
- No
- Gas
- Yes
- 79.8 PSI
- No
- Yes
- 125 PSI
- 37 gph
- 34 gph
- 50.19 gph
- Strainer
- 1
- 0.35 in
- Hose Barb
- Internal

How to Replace Fuel Pump Relay 2009-12 Ford Escape
How to replace a bad, broken, or failing fuel pump relay on 09, 10, 11, 12 Ford Escape
