How To Replace EGR Valve 1992-2000 Chevy Tahoe
Created on: 2020-12-30
This video shows you how to install a new EGR valve in your 1992-2000 Chevy Tahoe.
Tools needed
-
Torque Wrench
Gloves
Safety Glasses
Okay, friends. The first thing we have to do to get started on our job is to remove our negative battery terminal from the battery. Once that's off, we're just gonna set it so it's very far away from the terminal end. Now, we can move along. Now, the next thing we need to do is locate the EGR valve. That's gonna be right here in between your alternator and your AC compressor. Looking at it, you're gonna be able to see that there's a wiring harness that goes to it. If you pull on this tab and then draw this up in a way, that come right off.
Once it's off, make sure you don't see any funny colors on the connector and then set it aside. After that's off of there, you're gonna see that there's two mounting bolts. There's gonna be one located right down here, and then there's gonna be one located up in this area right here. I'm just gonna use a 10-millimeter with a swivel extension, put it on there, and we'll remove it. One thing that I like to mention before we go ahead and take it off is just to take note of the direction in which the EGR valve is. If you put in your EGR valve in the wrong direction or upside down, it's not gonna function properly.
Let's just grab onto that. We'll carefully pull it up and out of here. There's our two bolts, here's our EGR valve. Now, looking down in here, you can see where the gasket still is. We need to make sure we get that out of there. We're gonna recycle that. And then you need to clean this area right here so we have a nice, clean mating surface for our brand new gasket and new EGR valve. To clean up the surface, you could try to use a nice flat blade like this. That will get off the majority of the heavy stuff. And then after that, just wipe it down with a nice clean rag. Okay, friends. Now it's gonna be time to install our brand new EGR valve.
Before we go ahead and install it though, I just wanna mention about the gasket itself. You're gonna see on one side, it has a little bump up where the holes are, and on the other side, it's the opposite. You wanna make sure that you have the side with the bumping out facing towards the engine, and then the side that's the opposite facing towards the EGR valve itself. So, we'll go ahead and put this up against the EGR valve just like that. So, we have the bumps getting ready to go towards the engine. We're gonna line up our holes and then, of course, we're gonna make sure that we have the EGR facing in the right direction as when we removed it because if we put it in upside down like I said before, the engine is not gonna run right and the EGR valve isn't gonna function properly.
Typically, it's gonna be easiest to start this by just starting in the bolt like this. That way there when you're putting it in, you can have both hands and you don't have to worry about losing the gasket. Starting both of your bolts by hand and then we'll snug them up and torque them all to manufacturer's specifications. Once you have both bolts snugged up, just double-check to make sure the gasket is sitting perfectly, it didn't fall out in any way. Now, let's just go ahead and torque these. We're gonna do this in two sequences. The first round is gonna be 89 inch-pounds. And then we'll go back around and we'll retorque them both to 18 foot-pounds.
Now, at this point, we're gonna reconnect in our connector. Perfect. Double-check to make sure your wiring isn't hanging around. If it is, just try to secure it in some way so it can't flop around. So, now let's just go ahead and reconnect that negative battery terminal. All right. So, that's nice and snug. Let's give the wire a nice wiggle and make sure it's 100% secured.
Shop Products
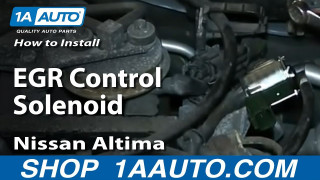
How to Replace EGR Control Solenoid Valve 1998-2001 Nissan Altima
Check out this video teaching you how replace the EGR control solenoid valve on your 98-01 Nissan Altima.
