How to Replace E-Brake Cable 2000-04 Ford Focus
Created on: 2018-08-08
How to replace a broken or failing emergency brake cable to the 01 Ford Focus
Tools needed
-
15/16 Inch Wrench
Hammer
Socket Extensions
Flat Blade Screwdriver
Phillips Head Screwdriver
Rust Penetrant
Channel-Lock Pliers
Needle nose pliers
1/2 Inch Breaker Bar
Complete Metric Socket Set
Hi! I'm Mike from 1A Auto. We've been selling auto parts for over 30 years.
So, I'm going to take this tire off. Some of the caps have come off of this vehicle. So, normally it's a 19 millimeter socket, we've used to take these off, but because the caps are missing. I'm going to use a 18 millimeter socket and a breaker bar. I'm going to breaker these free. So, if your caps are missing just grab an 18 mill instead of a 19. And, this last one has the cap so I'll switch to a 19. Alright, I'm just going to use a 18 millimeter sockets and a ratchet. Just make sure these are lose. Yup, and I can take these off by hand. And we're going to take the tire off. It's on there really tight. So, we're going to put a lug nut on. I'm going to take a large sledge hammer and I'm going to hit the tire from the back side. You can use a dead blow. There you go.
I'm going to take this lug nut off and pull the tire off. Alright, now we're going to have to take this cap off and I'm going to use a straight screw driver. Just tap it with a hammer. Get in there, we'll have to pry it. Pry it back a little bit. We'll try to adjust that back when we go to reinstall it. We can tap that back in place. And, there's a nut right there, we're going to have to take that nut off. We're going to take this nut off. We're going to use a 30 millimeter socket and we're going to use a breaker bar to break it loose. Once it's loose, we're going to switch over to a ratchet. Take that nut off and you can grab the drum, just rock it back and forth, go back and forth with it, and pull it right off. So, in this assembly we should have a cable that comes in here and attaches to this lever right here. This is what activates the parking brake assembly. So, that piece is missing completely. So, we're going to have to install a new one. And, the process for removing the drum would be the same on the driver's side.
Okay. So, we want to pull this heat shield down so that we can gain access to the parking brake cables. Before I do that, these are pretty rusty so I'm going to use a little bit of rust penetrant on these retainers just to make it easier to take them off. All these over here. I don't think we have to go this far, but I'll get these just in case and we'll let that soak for a little while. So, I'm going to use some channel lock pliers to try to remove these retainers. Just loosen them up. Alright. So, I'm going to use a 15, 16th wrench and that seems to work pretty good. Loosen that up, do the same for the other ones. There we go. I'll take this shield and pull it off the studs. Should be able to roll it down. There we go. And, we don't have to take the front shield off. We'll just take that one off and we can access our cables right here. Alright. So, this is pretty tight right here. So, what we're going to do is we're going to drop the vehicle down so we can loosen this up and take some of the tension off so we have more room to play.
So, we're just going to loosen this up. We've got a 10 millimeter socket, extension, and a ratchet. Once we get all the new cables on and stuff we're going to retension it. Alright. That will give us some slack. So, that's good right there. We use a screw driver to pry some of this foam away right here. So, what I'm going to do is this is where the cable is. I just twist this and pull that through, just like that. It's like a little teeth, just go through the center there. Now I'm going to loosen up this side of the cable. I'm going to use some needle nose pliers to squeeze these little tabs, pull this through. There's a slot and I'll do the same for this one. Just squeeze that, pull it through, pull it down. Just like that. Before I pull the cable out of these retainers, I'm going to go way back here and we're going to disconnect the cable on this side. Before I pull the cable out of these retainers, I'm going to go way back here, and we're going to disconnect the cable on this side. Come over on the other side.
There's small bolts right there and we're going to take that out. We're going to take this bolt out and use a 7 millimeter socket and a ratchet. We can grab the cable and pull straight through. So, next we're going to take this bracket off, it comes with the new cable. We're going to use at Phillips head screw driver to take this screw out. So, our screw is chipped out so we're going to just drill it out. Alright. So, we made it through. Alright, we've got the head off. Now I'm going to take a pry bar just to pry this down. There we go. Got that off. So, the new bracket has a screw it it so it's go a little piece that goes in there that holds it in and then you screw it in. And so, I'm just going to take and tap this up, and get that out of the way. It should be in there. So, I'm able to grab the old one with a magnet. So, that's pretty much how it goes. I'm just going to remove this from here, and there, and here. It actually might be easier to take this off this bracket and slide it this way just like that. We'll do the same for the other side.
Okay. So, if your vehicle still had this attached, this would be on the e-brake show right there. You would want to pry it up and pop this part out that hole. And then you would take some needle nose pliers, push down on these tabs, and that will slide that out. But then, on this part, if this wasn't so rusty, what you would want to do is take a screw driver, pull that tab up. And then, take a little file or a little chisel and a hammer, and push that little thing through there. And then, it will come out. But, ours is really rusty. So, what we're going to do is we're just going to cut it right here to get the cable out completely. Just like that. You could try to use some cutters, but generally these cables are on there pretty good and it's pretty hard to cut through them. [inaudible 00:11:38] works the best.
There's a couple of different ways you can do this repair when replacing the parking brake cables. For us, the easiest thing for us to do is to remove the center console and disconnect the handle from the actual cable. Pull this cup holder out. There's supposed to be a screw right there, but it's missing on this vehicle. So, we'll pull this one out over here. I'll take this Phillip's head screw out. Pull that one out. Over here on the back is a Philip's head screw right here. Take that Phillip's head screw out. Alright. So, there's a little cover right here. I'm just going to pull this cover off. You can use a trim tool and just use your hands to pull that off. There's two Phillip's head screws right here. Take those out. And then, that arm rest comes off. Alright. So, I'm going to lift this up. I'm just going to pull the parking brake handle up. And then, lift this up, I'm just going to twist it. Just like that. Pull this out of my way.
Alright, I'm just going to disconnect this electrical connector. Just grab it up, pull it up, just like that, and remove these 10 millimeter bolts right here. Use the 10 millimeter socket or extension and a ratchet. Pull that bolt out. Just put that down and I'll pull this bolt out. Now that bolt is out. We can slide this over. Alright. So, we're going to install this new cable. The one that this little extra rubber is the passenger side. So, to install this I am going to take this out of the bracket like that 'cause it'll be easier to send it through all this area. So, we're going to send this side over here. Get this lined up over there. Before I position that in the right spot, I'm going to slide this end over here. It's going to come through there. Send that through there just like that. And then, this can get lined up into there. Let's send this tab through here.
Take a little screwdriver and I'll just tap it up there. Not too hard, but just get it in position. And I can tighten this down. Before I slide that into those clips, I'm just going to slide this in over here. Just like that, push that in. And then, I will do the same for the other side. Alright. So, now I'm going to tighten this bolt up. This is a 8 millimeter. Just snug that up. Right here, I'm going to put this 7 millimeter bolt. Get that lined up. Use my socket and my ratchet to snug it up. Alright. So, next we're going to install these pieces. So, on the back side, where the drum is, there's a little hole and I'm going to slip this through that hole. And then, there's a little lock tab, push that in all the way. Just using a straight head screw driver to help me push it in. Lock it in place. Just take my screw driver and a hammer just to tap it in. And that's locked in.
Next, we have to install this piece onto the parking brake lever, right here. So, we'll pull this out, slide this into the hole. Just like that. Now line that up. Keep pulling. Pull this part of the cable out. Alright. So, now we're going to link these two together. Slide this little retainer in there. And then, we can slide this in here, and we can just grab it and pull till it locks in, and that's all set. We're going to do the same for the other side. Alright. So, now we're going to connect this up underneath. Slide this this way and then we can twist it sideways. We can connect this passenger side cable into there. That's going to stay like that. Just like that. This is the cable right here. So, I'm going to put this little washer here. And then, we can put this nut. Alright, we've got that started. We can take the handle. Alright. So, we've got this lined up. We've got the bolt underneath here. Alright. Now, snug this up. Alright, that's started. We're going to try to get the other bolt in the front side.
So, we've got the front one lined up. Now, we're going to snug that one down. We're going to snug the rear one down. Tighten that snug and this one snug. Now our cables are all hooked up. Just put everything else back together and slide this cover back on. Just twist that and pull up the parking brake handle. Get the seat belts out of your way and that's all set. Push that down. Now we're going to install this arm rest. There's some tabs that you need to line up underneath here. So, slide in like that. And take our Phillip's head screws, and get that one started, and then we'll get this one started. The Phillip's head screw, get that lined up down here. Snug that down. Get this trim cover and line this up right here. Lock it in place. And, take this Phillip's head screw, and tighten this one here. And, you should have another Phillip's head screw there, but this vehicle doesn't have it. Put this cup holder cover on and this cup holder cover on.
You may have to adjust the brakes when you're doing this repair. I'm just going to take a screw driver and set them back. Just take it and loosen that there and that's going to adjust the brakes. Just like that. Alright. So, the retainers that hold these cables on broke off because of the age of the vehicle. So, I'm just going to use some cable ties and I'm going to resecure this. So, just flip this upside down. Bring that up and I'll just do that with the other ones as well. Alright. As you can see our brake cables are all in position and we're just going to try them out. Go ahead and pull the lever, and that's how the ebrake actually works. It is going to pull on this lever, which is going to push on this bar here, which is going to push on this shoe out, and stop the drums from spinning.
Take our drum, just line everything up, make sure it spins, it's spinning nicely. If it's too tight, you're going to want to pull it off and adjust that automatic tensioner again. And then, we're going to install our nut. Alright, now we're going to snug this nut up before we torque it. We just want to keep spinning the bearing once in a while so that seats properly. Alright. That's pretty good. I'm going to torque it now. So, we're going to torque this. We're going to use a torque wrench, a 30 millimeter socket. We're going to, like I said, keep spinning it once in a while as we're torquing it. We're going to torque this to a 173 foot pounds. Sometimes this is kind of difficult to do. That's spinning good. So, our cap when we pried it, it bent the cap a little bit. So, I'm just going to use a hammer and just bend it back a little bit. A little bit more. That's pretty good. I'm going to take a hammer and just tap it back in. This is just a dust cap. Just to keep the elements out of that bearing area. And we'll do the same procedure for the other side.
Now we're going to reinstall this heat shield since all the cables are installed. Slide it over the exhaust like that. Line all the holes up. Install these retainers. We're just going to snug these down with a 15, 16th's socket and a ratchet. Just snug, nothing too tight. I'm not going to be able to fit it in there. Alright. That's installed and secure. Now we're going to reinstall the wheel. Line that up. Start these lug nuts. Now, I'm going to snug these lug nuts up. We'll drop it down and torque it. Alright. Now I'm going to torque the lug nuts. Because we don't have any caps on ours, ours are 18 millimeter. I'm going to use a torque wrench. We actually sell these torque wrenches at 1AAuto.com. I'm going to torque this to 98 foot pounds, in a star pattern. And the reason I'm going to do it in a star pattern or a cross pattern is it will tighten the wheel evenly and we're good to go. You want to remember after you do this procedure, you're going to want to pump the brake pedal. That's going to reset the self adjusters to where they're supposed to be. Make sure it feels good. And then, you're going to check your tension on your ebrake. Make sure it works. If You have to adjust, you can pull that boot off again and tighten that 10 millimeter screw accordingly.
Thanks for watching. Visit us at 1AAuto.com for quality auto parts, fast and free shipping, and the best customer service in the industry.
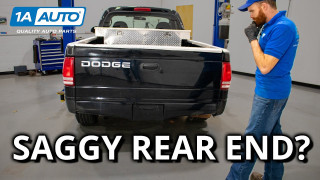
Truck Leaning Sagging or Uneven How to Inspect Leaf Spring Suspensions
If you hear clunking or creaking noises when you load the bed or drive around, or if your truck has a lean to it, check out this video.
