How to Replace Drivers Side Rear Window Regulator 2007-17 Ford Expedition
Created on: 2020-12-10
This video shows you how to replace the window regulator on your 2007-2017 Ford Expedition.
Tools needed
-
Gloves
Ratchet
Trim Tool Set
Safety Glasses
Pocket Screwdriver
Pick
Okay, friends. To get started on our window regulator, first, we're gonna need to get off our door panel. To do that, you're gonna see that you have a secret hatch right here. We'll just pop that. Then behind there, you can see that there's a screw. We're gonna remove that screw. After that, we'll move over to here, there's another panel. Let's go ahead and open this up as well. And you can see that there's two more screws. Let's remove all three of those.
The next thing we need to do is use a nice plastic trim tool. We're gonna come right inside this area and just pop this out. Set this aside. Let's remove our lower bolts now. Now, let's remove our side mounting screws. Now, let's just make sure that our window is in the fully up position. After that, we're gonna grab onto our door panel, lift it straight up, and we're gonna carefully remove it from the door. Just remember that there is wiring that leads to the back of it and that goes to the window switch. Squeeze on this little tab right here and then we'll draw this out. Check to make sure you don't see any funny colors, and we'll set this aside.
All right, now it's gonna be time to remove the speaker. You're gonna see that you have four mounting bolts. Let's remove all of them and then remove the wiring from the back. Looking at the back of the speaker, you can see there's a little squeeze tab. Squeeze that and draw this away. No funny colors, set it aside. Let's move along to removing our plastic vapor barrier here. Just be careful for the black stuff on the back. That's called butyl tape and it's very sticky. It'll get stuck on your clothes and it will make a mess.
Set this aside. Now we're just gonna put multiple strips of tape going along the window. That's gonna help keep the window up while we continue on by removing the rest of our regulator. Next, we're gonna remove the two bolts that hold the window to the regulator. There's one located right here and there's one inside this hole right there. Just loosen those up enough to the point where it releases the window.
Now, the next thing we wanna do is take a nice pocket screwdriver. We're gonna come right in between this area, gently pry and separate these two pieces. The next thing we need to do is come underneath this top gear right here and try to pry, that way there we can grab onto this handle and pop it off of here. After that, we're gonna take the cable right out of the handle. We'll set this aside. Let's follow the cable down to this mounting point, set this aside.
Now, let's start removing some wiring. Using a small forky tool, we're just gonna come right underneath this area here and just try to unsecure this from the window regulator assembly. Now let's remove this connector here, squeeze the tab, draw it right off. Come up to this connector, squeeze the tab, draw that off as well. We've got some more anchor points. That over there. I'm gonna leave this one on the door because it's not gonna bother us any.
Just kind of pay attention to the direction that all of your cables were in. Some of them run across the outside of the window regulator. Some of them run across the inside aspect. Just try to keep that in mind. Come right up here, have that off of there. On the backside of this one, it comes around the back. You can see that there's an anchor point back there. You can either try to take it off now or, of course, when the window regulator starts coming out, you might have a better access to it. It's out of here. The next thing we're gonna do is remove our three mounting bolts that hold our motor to the window regulator.
Now, the next thing we wanna do is carefully reach up and inside here. We wanna essentially grab onto the hook areas that are holding on to the window and just draw it down and away from the window. Watch your fingers for any pinch points. There we are. Now let's remove our eight mounting bolts that hold the window regulator to the door. All right, let's wheel this down. Here we are. Let's move this up. Remove this last screw completely.
There it is, friends. Okay, friends, now it's time to get our brand new window regulator in here. Let's go ahead and carefully slide this down. Something that I want you to pay attention to is this back area right here is gonna go behind the door and this forward area is gonna go on the front of the door. Slide this in. There we are.
At this point, we can start in our mounting screws. We'll get them all started and then we'll snug them up. Snug them up. So, now that everything's bolted in, we're gonna grab onto the area that's supposed to touch up against the window, and you're gonna see that you have these two little hooky dos. And essentially, the way that those are gonna go so the window slides in between them, and then you're gonna tighten up this bolt right here.
I'm just gonna grab this. I'll slide it right up, put it around both sides of that window in there, and like I said, snug it up. When you tighten this, it's very important to make sure that you don't use any impact tools because you don't want any vibration to potentially break the glass. All right, now it's time to get our window motor in here. We wanna line up our three mounting holes with the larger holes that are on the window regulator. That's on here. Starting all three of your bolts before you snug them up.
Now let's get our wiring back on here. Let's grab our speaker wire and then this larger one as well. I'm gonna put these bolts through here, just like that. Okay. Larger one's gonna come up through this hole right here. We'll line this up. We've got our mounting right here. It's gonna clip in there once you latch this up. Let's connect back in our window motor. Let's get this into this hole right over here. Let's go ahead and make sure that we secure this wire for the speaker behind here.
If you were to look inside this squared area, you should find a round hole. Just slide it right in there. Make sure that's secure. Let's take this wire and put it up under there. Now we're gonna take this cable, start in here. We're gonna start this in here in one second. First, we're gonna put on the handle, that cable through there, bring this around. You wanna make sure that your spring is facing in this direction away from the handle.
When we start this on, we're gonna put this little tab inside here and then we're gonna press this tab in right there. Take this, push it right in there, make sure it's secure. You do not want this to fall out. Just make sure that your handle retracts like it should. If it doesn't, then your spring's in the wrong position. Now we're gonna take off all of our window tape and we're gonna test the window motor. Now the next thing we're gonna wanna do is have the key in the on position. We're gonna reconnect in our window switch and then we'll test to make sure the window functions properly. Perfect.
Now with the key out of the truck and the door panel removed again, let's put back on our vapor barrier. We're gonna take our windows switch wire and we're gonna come right through the hole in the vapor barrier right here. After that, let's get our handle through here. And then, of course, we'll just line this up with the exact area that we removed it from. Let's get our speaker wire back attached. It's kind of hard to get my fingers in here. Listen for the click. Now let's start in all of our screws and snug them up. There we are. They're all nice and snug. Let's grab that door panel.
Now it's gonna be time to install our door panel. Something that I wanna mention real quick from the backside is you have a lot of hooks on the door panel itself. And then on the door, you're gonna find the areas where all those hooks need to line up with and then slide into. So just pay attention to that. Aside from that, let's get our window switch hooked back in. Okay. We've got our lock. The lock needs to go inside here, obviously. So we're just gonna come up nice and high, start that in.
Now I'm gonna press this forward or up against the door, trying to make sure that I get all those hooks in. Once they're all in, just slide it down, a couple of nice box, and then feel all the way around just to make sure that it's completely seated, completely up against the door itself. This feels great. So let's start mounting it in with the screws. Let's grab this little panel, slide this on here. We've got our three longer screws. You're gonna have one here and then two inside this handle. Let's install them all. Let's get in our two lower screws. Side screw. I'll just close all of our covers. Get this one right here. You're gonna notice looking at the back of it, you have a little hooky do. That's gonna be facing towards the rear of the door. Pop that out. Perfect.
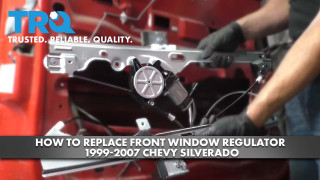
How to Replace Front Window Regulator 1999-2007 Chevy Silverado
This video shows you how to install a new window regulator on your 1999-07 Chevy Silverado.
