How to Replace Door Lock Actuator 2002-10 Mercury Mountaineer
Created on: 2014-10-09
Replace the rear door lock actuator on your 02-05 Mercury Mountaineer or Ford Explorer after learning how from this 1A Auto video!
-
step 1 :Removing the Door Panel
- Pry off the door handle bezel
- Pry up the window switch panel
- Disconnect the window switch wiring harnesses
- Remove the 7mm bolt in the door pull
- Remove the 7mm bolt on the bottom of the door panel
- Pry out the door panel
- Lift the door panel up and off
- Carefully peel off the water shield
-
step 2 :Removing the Door Handle
- Pry off the door lock rod from the yellow clip near the lock assembly
- Lift the yellow clip on the interior door handle
- Remove the 6mm bolt from the door handle
- Slide the door handle forward
- Push the latch cable off the door handle
-
step 3 :Removing the Door Lock Assembly
- Disconnect the door handle latch cable from the clips on the door
- Remove the three T27 Torx bolts from the lock assembly
- Lift the assembly up and disconnect the door handle rod from the yellow clip
- Pull the assembly out from the door
- Disconnect the two wiring harnesses from the assembly
-
step 4 :Removing the Door Lock Actuator
- Pry the tab on the actuator with a flat blade screwdriver
- Slide the actuator off
-
step 5 :Installing the Door Lock Actuator
- Align the slots on the actuator with the slots on the assembly
- Align the arm on the actuator with the hole on the assembly
- Slide the actuator in place
-
step 6 :Reinstalling the Door Lock Assembly
- Connect the two harnesses to the actuator
- Push the door handle lock rod into the yellow clip
- Push the lock assembly into place
- Tighten the three T27 Torx bolts into the latch
- Push the bracket into place
- Tighten the two T27 Torx bolts to the bracket
-
step 7 :Reinstalling the Door Handle
- Clip the latch cable to the door handle
- Hold the lock button in the unlocked position
- Push the lock rod into the yellow clip
- Clip the door handle rod in the yellow clip near the assembly
- Slide the door handle back
- Tighten the 6mm bolt to the door handle
-
step 8 :Reinstalling the Door Panel
- Put the water shield into place
- Lift the door panel into place
- Push in the door panel clips
- Insert the 7mm bolt to the bottom of the door panel
- Insert the 7mm bolt in the door pull
- Connect the window switch wiring harness
- Push in the window switch panel
- Push in the door handle bezel
Tools needed
-
Flat Blade Screwdriver
T27 Torx Driver
6mm Socket
7mm Socket
Ratchet
Brought to you by 1AAuto.com, your source for quality replacement parts and the best service on the Internet.
Hi, I'm Mike from 1A Auto. I hope this how-to video helps you out, and next time you need parts for your vehicle, think of 1AAuto.com. Thanks.
In this video, we're going to show you how to replace a rear door lock actuator on this 2003 Mercury Mountaineer. It's the same part and similar process on these Mountaineers from 2002 to 2010 and it's the same years on the Ford Explorer. We show you on the driver side but the passenger side is a similar procedure. The items you'll need for this is a new rear door lock actuator from 1AAuto.com, a flat blade screwdriver, a 6mm and 7mm socket and ratchet and a T27 Torx bit.
Start off by prying out on the bottom of this panel and then pulling out to release the clips. Then slide it towards the front of the car and off the door handle. Now roll this panel out while pulling up on the front. Slide it forward and then just push the tab on this harness and disconnect it. Then remove this 7mm bolt and this 7mm bolt right here. Now lift your door panel up and out and your door panel's free. Peel back your water shield in this top corner and you can see Mike uses a razor blade to help separate the adhesive.
Now, using a flat blade screwdriver, just pry this clip open and then pull the door handle rod free. To give you more room while you're trying to remove the exterior door handle, we recommend you just lift up this yellow clip on the back of the interior door handle and pull your lock rod free. Remove the 6mm bolt underneath your interior door handle. Slide the door handle forward and just push this cable out and disconnect the cable. Then just pull the cable through your water shield.
Using a flat blade screwdriver, push in the tabs on this clip and pull the cable from the door. Then remove these three T27 bolts. We'll just fast-forward as Mike does that. Pull the door lock actuator towards the opening and then just lift up on this yellow clip and pull the rod free. Push the tabs on these harnesses to disconnect them.
With your assembly out, the actuator just slides on here, so take your screwdriver and just pry a little bit to make sure it's moving some. There's actually a tab right in, put your screwdriver in and twist. While you're twisting, work the actuator off. Actually if you lock this back up, it gives you a little extra room and the actuator comes right off.
There's a tab here and a tab here on the actuator, so they go into this slot and into this slot. Then there's an arm here. You have to make sure that goes into here, so put it into place and start sliding it on. Then make sure that your actuator goes into where it should here. Let's see here, I don't have it down quite far enough to push it down on there. Make sure that arm's going in and squeeze it on and slide it on.
Make sure that's open and I'm going to reconnect my harnesses here. The grey one goes here and this one goes right here. Put this in the door and then take my door handle rod or my lock rod actually, oops, I got to put it into the door and lock it in place. Bring your assembly up, take, carefully, outside door handle rod, and make sure it doesn't get caught up in there. Let's see. There we go. We'll fast-forward as Mike finishes replacing those bolts and then tightens them up.
Pull the cable back through your water shield. Then take your interior door handle and reclip the cable into the handle. Then just push that cable back into the bracket and then push in the tabs on the door handle and then slide the door handle back. We'll just fast-forward as Mike replaces that 6mm bolt and tightens it up.
All right so you want to make sure that your door is in the unlocked position. Back is locked. This way is unlocked. Then you want to hold your lock and unlock switch. Basically, here because that's unlocked, that's locked so hold it in the unlocked position. Pull it forward, make sure it's unlocked, put into your clip, and you can see and just lock the clip down. Reclip the door handle rod and just close the yellow clip over it.
Now push your water shield back into place. The door handle is held in by all these hooks, so if you take the water shield for any reason just make sure that everything is lined up so the hooks can go in easily. You can actually hook the bottom ones on first, just push the panel up, you may have to move it up a little bit, make sure it goes against the door all the way, and slide it down. Now replace those two 7mm bolts and tighten them up. The top one helps if you feed it back into place with an extension. Reconnect the harness and this tab slides in first. Take this panel and just slide it behind your door handle. Push those tabs back into place. Push the clips back in on the front.
We hope this video helps you out. Brought to you by www.1AAuto.com, your source for quality replacement parts and the best service on the Internet. Please feel free to call us toll-free, 888-844-3393. We're the company that's here for you on the Internet and in person.
Shop Products


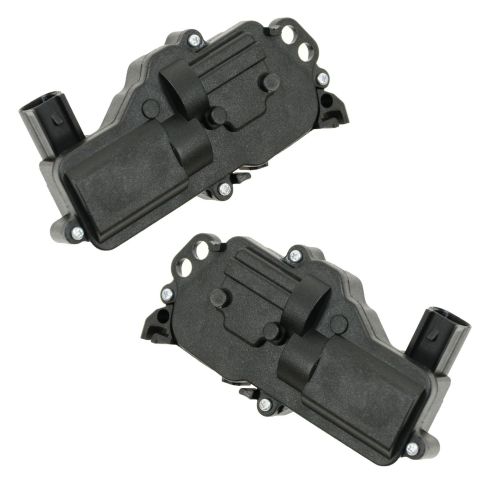
Ford Lincoln Mercury Driver & Passenger Side Door Lock Actuator 2 Piece Set DIY Solutions BSS00196
Part Details:
- 2 Piece Set
- (1) Passenger Side Door Lock Actuator
- (1) Driver Side Door Lock Actuator
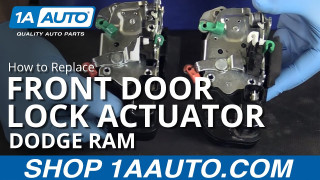
How to Replace Front Door Lock Actuator 2003-08 Dodge Ram
Watch this in-depth video on how to replace the front door lock actuator on your 03-08 Dodge Ram.
