How to Replace Door Lock Actuator 1999-2004 Honda Odyssey
Created on: 2013-01-30
Watch this video to learn how to replace the rear power door lock actuator on your 99-04 Honda Odyssey.
-
step 1 :Removing the Door Panel
- Pry off the trim piece inside the door pull with a flat blade screwdriver
- Remove the Phillips head screw inside the door pull
- Remove the Phillips head screw inside the door handle
- Pull up the window switch panel and remove the harnesses
- Pull the door handle forward and out
- Pull the lock rod up and out from the inside door handle
- Pry off the trim piece at the front top corner of the door panel with a flat blade screwdriver
- Release the clips all around from the door panel by pulling out
- Pull the door panel up and off
- Disconnect the speaker harness
-
step 2 :Removing the Door Handle
- Pull the water shield down
- Remove the plug in the door with a flat blade screw driver
- Remove three 10mm bolts inside the door with a ratchet and socket extension
- Shift the exterior handle bracket
- Remove the Phillips screw from the lock rod clip and disconnect the lock rod
- One hand on the inside, one on the outside, rotate the bracket until the handle removes
- Disconnect the lock from the door handle
- Remove the bushing from the lock rod with a flat blade screwdriver
-
step 3 :Removing the Lock Assembly
- Remove the 10mm bolt from the lower inside of the door
- Pull the window track down and out
- Squeeze the tabs from the door lock actuator plugs and pull them out
- Remove the three Phillips screws from the lock latch
- Remove the screw from the door lock button
- Pull the guide from the lock
- Pull the latch assembly forward, undo the clip
- Remove the inside door handle rod and pull the latch assembly out
-
step 4 :Preparing the Lock Actuator
- Remove the four Phillips screws from the latch assembly
- Pull the actuator off
- Line up the new actuator with the lever onto the post underneath
- Once lined up with the actuator, screw the Phillips screws in
-
step 5 :Installing the Lock Assembly
- Put the lock button up through the door
- Pul the lock button back forward and reconnect the latch rod
- Lock the clip on the latch rod
- Place the assembly back in the door and tighten the three Phillips screws
- Insert and tighten the door lock button screw
- Reconnect the door lock actuator plugs
- Reconnect the harness to the door switch panel
- Test the lock assembly
-
step 6 :Reinstalling the Door Handle
- Install the window track
- Tighten the 10mm window track bolt
- Snap the lock rod into the door lock handle with pliers
- Place the rear end first, slide the handle around the tab, slide and rotate the handle in
- Slide the handle forward to reconnect the screw and lock rod
- Tighten the three 10mm bolts on the inside of the door
- Replace the cap, unlock the door, test the door handle
- Replace the water shield
-
step 7 :Reinstalling the Door Panel
- Reconnect the speaker harness
- Connect the clips all around from the door panel by pulling out
- Push in the trim piece at the front top corner of the door panel
- Pull the lock rod up and out from the inside door panel
- Push in the door handle
- Push in the window switch panel and remove the harnesses
- Replace the Phillips head screw inside the door handle
- Replace the Phillips head screw inside the door pull
- Push the trim piece inside the door pull
Tools needed
-
Socket Extensions
Flat Blade Screwdriver
Phillips Head Screwdriver
Ratchet
Flashlight
Brought to you by 1AAuto.com, your source for quality replacement parts and the best service on the Internet.
Hi, I'm Mike from 1A Auto. I hope this how-to video helps you out, and next time you need parts for your vehicle, think of 1AAuto.com. Thanks.
In this video, I'm going to be showing you how to replace a door lock actuator for one of the front doors on this 2003 Honda Odyssey. We're going to show you the front driver's door, but the passenger's side would be the same. It's the same procedure for any '99 to '04 Odyssey. Tools you'll need: a new door lock actuator from 1AAuto.com, a Philips screwdriver, small and regular size flat blade screwdrivers, 10mm socket with a ratchet extension, some pliers, a short Philips screw driver, a flashlight, and a Philips driver socket and ratchet. You'll see what I mean in the video.
Let's start with a small screwdriver, and if you look into this cup here, there's a little trap door, pry up and you can see a Philips screw there. There would be another trap door here, it's missing on this vehicle, but there's a Philips screw there. Remove these two Philips screws. Then they pull up, and then back, and pull it out and there's two connectors. They both have these little tabs right in the middle top here on this blue one. Press it down. Then this brown one, press down, and pull it out. The door handle pulls forward then out.
Again, there's a clip here on a rod. Just push that clip here with your finger or the screwdriver. Push that clip around, pull the rod up and out, and then there is a connector here, pull that off, and a small screwdriver right up here. Pull this out a little bit. Work your screwdriver underneath to pry it out. Pull that up here at the bottom, and work your finger underneath, and pull firmly. Raise the clips. You're probably not going to release, if the door panel has never been off, it may be a little difficult to release, but release those clips and lift your handle up then off. Your speaker is connected right down here and there are two tabs on each side. Just squeeze the connector and pull it off.
In the upper corner, there's a little plug. Just pop it out with a flat blade screwdriver and then pull your wire shield down so you can access the inside of the door. There's also a small plug on the door to remove. Now, inside, you got a couple of 10mm bolts: one there, one right up here, and then through this hole. We took the cap off. Kind of hard to see it, but if you look in there-
Let's see if I can show it to you. There it is! The 10mm bold there. Use an extension, a ratchet, and socket. Now, I'll just speed it up here as I remove those three bolts. Now, we grab the handle from both sides, on the bracket a little, shift it over. After that, you've got two steps here. You need to use a short screwdriver to remover this Philips screw, and then you just reach in here with your finger or screwdriver, push this clip off, and pull this rod out. Here's just some quick footage of how you pop that clip off. You use a short screwdriver to remove that screw right out and you can see this rod is disconnected.
Start by using one hand on the outside, one on the inside, and pull it forward. Get the top out, and then rotate the bracket up, and keep pushing it out until you can look at the handle right out. Now, use a flat blade screwdriver and disconnect the rod from the door handle. Use a small flat blade screwdriver, and you're going to want to get the bushing off of the rod. You're basically prying apart that bushing and then pulling it also with your fingers until you can get that little bushing off. Now, take that bushing that you removed from the rod and snap it into your door handle. At this point, there's going to be a 10mm bolt down low. Remove that. Reach inside and the window track pulls down, then out.
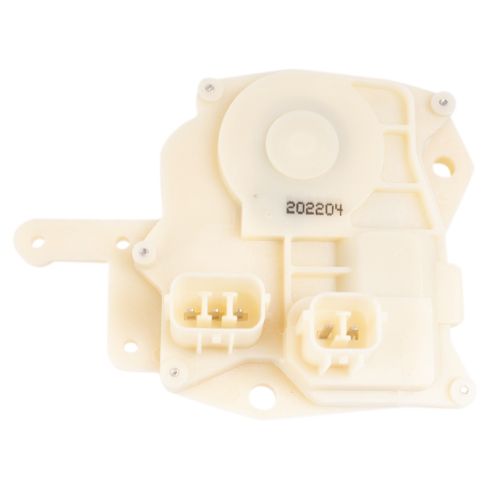
Then inside there are two plugs. They both have tabs on them. It can be a little difficult to squeeze those tabs. Work them up, down, and pull off and they'll come out. Once you have those unplugged, you'll need a Philips driver bit and a ratchet, and remove the three screws that hold the latch. Okay, and I'm going to apologize, we didn't get the next two steps so as I'm taking those screws out. I'll explain them to you slowly. If you lock button, there is a plastic guide behind it. There's a screw up near where the door lock button is. Remove that screw and then that guide pulls out. Once you have those three screws out, pull the latch assembly forward. You'll see a small orange clip, undo that clip, remove your inside door handle rod, and then pull the latch assembly out. Remove those four screws. I'm going to fast-forward it here. Once you get those off, the white plastic comes apart, and then the actuator pulls off. Our plastic is actually broken so we're trying to show you the best we can how it works, but there's your actuator off.
With the new actuator from 1A Auto, just reverse the procedure. Make sure you line up the other secondary lever on the post that's underneath, and then, start your first screw on that, it connects the lever to the actuator. Once you get that screw in put your shield back on and screw the other three in. Now here, we're putting the latch mechanism back in. Make sure you get your lock button up through correctly on the door, and then get it back into place. Just make sure everything is out of the way, and then you'll pull it back, forward, and reconnect that inside latch rod. Change the position here. You can see, just put that latch right in, lock the clip on, and then push it back into place. Just fast-forwarding here as we work the latch mechanism back in place.
Start the three screws in. Make sure you don't pinch any wires. Make sure all the rods and stuff are on the right place. Start the three screws in and tighten them up with your Philips bit and ratchet. Now, put the guide back up in. You have to put it in place and then push it into place where it connects to the latch mechanism, and then put the screw in to hold it. Then reconnect the two leads that connect to the door lock actuator, and then we'll be ready to test it. Plug in the blue connector and cycle your switch. Now, put your window track back in, look up through the door handle, and you'll be able to see where that window tracks. It slides up into the track in the door. Once you get that place, we're out of focus a little bit there. Just fast-forward here as I put that 10mm bolt in and tighten it up.
Now, start putting the door handle back in by snapping that rod into the handle first. You might need pliers to snap it in. We installed the door with the bottom rear end first and then the rest of the bottom down in. Then you need to slide it so that this will surround the tab in the door. Once you get it there, slide it back and rotate it into place. Now that it's all in, you need to slide it forward to get the two pieces on the back done. It's hard to film so I'm just going to show you where to put this screw back in with the electric connection here, and we're going to put this rod back in, and lock the clip onto it. We'll just keep fast-forwarding until this part.
Now we're in the homestretch. Just use your socket, and we put the bolts into the socket, load them in there, and then start all the bolts on. You want to make sure you start all the three bolts at first and make sure they're going in correctly and then tighten them up. When you tighten them nice and firm, you don't want to over tighten them because you could actually break the door handle if you make them too tight. Then put all the cap back on, and make sure you unlock the door, and then pull shield up a little bit, and shut the door and open it to make sure everything is all set.
I'm just going to fast-forward through putting the door panel back on. It's pretty easy. Make sure you plug your speaker back in, hang the window up, make sure the door lock is through, make sure the harness is through, put the pins in place, and then put the door handle back in place, and the window switch. Make sure you reconnect the window switch. Couple screws to hold things in place, and a couple trap doors, and you should be all set. If you want to see the door handle put back together in regular speed, just check our other videos for the Honda Odyssey door panel installation.
We hope this video helps you out. Brought to you by www.1AAuto.com, your source for quality replacement parts and the best service on the Internet. Please feel free to call us toll-free, 888-844-3393. We're the company that's here for you on the Internet and in person.
Shop Products
Honda Accord Civic CR-V Odyssey Front Driver Side Power Door Lock Actuator TRQ BDA33414
Part Details:
- Power
- Integrated Latch
How to Replace Door Lock Actuator Integrated Latch 2006-11 Chevy Impala
Follow along to see how you can replace the rear power door lock actuator as well as the integrated latch on your 06-11 Chevy Impala.
