How to Replace Door Check 2007-14 Toyota FJ Cruiser
Created on: 2019-08-07
Check out this 1A Auto video to learn how to replace the door check on your 07-14 Toyota FJ Cruiser.
-
step 1 :Removing the Door Panel
- Pry the master power window switch trim panel up and remove it
- Disconnect the master power window switch electrical connector
- Pry open the screw cap behind the door latch handle
- Remove the Phillips screw behind the door latch handle
- Pry open the screw cap behind the door pull handle
- Remove the Phillips screw behind the door pull handle
- Remove the push pin retainer at the far right edge of the door panel
- Pry the door panel from the bottom and pull it outward
- Lift the door panel up to remove it
- Disconnect the door lock cable
- Disconnect the door latch cable
-
step 2 :Removing the Door Speaker
- Disconnect the speaker electrical connector
- Remove the four combination 10 mm Phillips screws
- Remove the speaker by pulling out the bottom and then down
-
step 3 :Removing the Door Check
- When the check is removed, the door will be able to open further than intended, be careful not to damage the door or vehicle body
- Remove the two 10 mm nuts securing the door check in the door
- Remove the 10 mm bolt securing the door check arm to the body
- Remove the door check from inside the door
-
step 4 :Installing the Door Check
- Insert the door check into the door and pass the arm through the opening
- Install the 10 mm bolt loosely to hold the arm in place
- Install the two 10 mm nuts on the door check mounting studs
- Tighten the 10 mm bolt and the two 10 mm nuts
-
step 5 :Installing the Door Speaker
- Insert the door speaker into the door with the top tab first
- Secure the speaker with the four combination 10 mm Phillips screws
- Reconnect the speaker electrical connector
-
step 6 :Installing the Door Panel
- Make sure any push clips that came off the door panel are retuned to their place
- Reconnect the door latch cable
- Reconnect the door lock cable
- Slide the door panel into place
- Press the panel in
- Reinstall the Phillips screw behind the door pull handle
- Close the screw cap behind the door pull handle
- Reinstall the Phillips screw behind the door latch handle
- Close the screw cap behind the door latch handle
- Reinstall the push pin retainer at the far right of the door panel
- Reconnect the power window switch panel electrical connector
- Push the power window switch panel into position
- Test the door latch handle, power lock, and power window functions
Tools needed
-
Socket Extensions
Phillips Head Screwdriver
10mm Socket
Ratchet
Trim Tool Set
Pocket Screwdriver
Hey friends, it's Len here at 1A Auto. Today, I'm working on our 2007 Toyota FJ Cruiser. I'm going to be removing the right front door check. It's going to be fairly simple. I want to show you how to do it. If you need any parts, you can always check us out at 1AAuto.com.
Okay, so here we go. The way we're going to start, we're going to come right along here. You can use a trim panel tool if you want. The problem with those is they're just really not the sharpest to try to be able to get in between and pop it up. So it's good to start with something small like a pocket screwdriver if you can.
Next, we're going to grab the wiring for this right here. This is your lock. This is the wiring for your window. Now's a great time to make sure that your window is completely up. It is, so that's good. We'll go ahead and squeeze this little connector right here. Pull this down, hopefully. There we go. Take a peek inside our connector. I don't see any funny colors. Looks like it's good to go. We'll move ahead to the next one. This one's got a little squeeze connector right on that side. Just squeeze it and pull. Take a peek. No funny colors in there.
Okay. So now what we're going to do, we're going to open up this little door right here and this little door under here. Behind those, there's Phillips head screws hiding. Okay? So we'll just get these popped up. There we are. Pops right out. All right. We'll use our Phillips head screwdriver. Remove the top screw. There we are. The silver one. Different color. Black. It also feels like it's a little bit longer. It is. Just a teeny bit longer. So, silver on the top, black along the bottom.
You've got this little clip right here. These are super simple. All you do is just take your little trim tool or a pocket screwdriver, whatever you've got, push in the center just like that. Okay? Pocket screwdriver. Slides right out. To reset it, we're just going to push this through so that end's sticking out. This is going to be ready to go back in now. We'll set this aside with our screws.
We're going to take our trim tool. It's plastic. It's not going to mar any paint. Come along the side here, right like this. Give it a little pry. Come down along, pry it. Now, I can grab it with my fingers. There we go. We'll pull this up. Cables come right out, but the white one, should be right up along the top, and this green one goes down along the bottom. So we'll remember that for when we reinstall.
When we unbolt this, it's going to want to come out through the door panel. Okay? So let's be preemptive. We'll get the speaker out of the way. To do that, let's see. I'm going to grab right here. Pocket screwdriver, just try and push in on that. There's a little tab right up along the side. Essentially, I just pushed right there and then lifted up and out. We'll take a peek. Looks good.
We've got four 10-millimeter bolts going around the speaker. That's what our bolts look like. They're all the same. The speaker itself, you want to grab from the bottom, pull out on the bottom and then down. The reason why I said that is because of this right here. You've got yourself a little hooky-doo. If you were trying to pull from the top, eeeeeeeehhh, not coming out. Okay? Just down and out. Easy peasy. We'll set this aside.
All right. So we've got a 10, a 10, and a 10. Something to think about is this is the door check. It makes sure that the door can't swing out further than what it's supposed to. Okay? So, when we go ahead and take this out, these two bolts, it's really not going to do too much of anything because there's a plate on the inside that's up against the door. When we remove this right here though, the door's going to be able to swing. It's not going to go very far because the hinges do have a stop on them as well, but we do want to make sure that we're not pushing too much because if we push too much, who knows what kind of damage we can do? I don't want to cause any damage. I'm here to fix things.
I'm going to start with these. Like I said, 10-millimeter. It's not very tight, so when I put it back together, I'm not going to have to reef on it. I know that they don't go in super tight. Okay. Got my two fastening nuts there. Set that aside. I'm going to switch to my electric tool here. Now, I'm going to hold the door. See if I can get this one to break free. Holy moly. Maybe I shouldn't have switched to my electric tool yet. They really wanted to make sure that one wasn't going to come loose on anybody. Okay.
I'm holding my door. Like I said, at this point, the door can do all sorts of funny things that I don't want it to do, so I'm going to continue holding the door. Now, I'm going to reach up inside, I can grab it, pull it right on through. Woops. There we go. And there's our door check. Easy peasy.
Okay, so it's time to install our door check. We're going to go up and inside, through our hole that's right here, and we're going to put these studs through the holes that are right in there. Going up and in. I've got my window regulator in there in the way. That's okay. I'm sure I can go in. It came out, so. Let's see if we can get it just the right angle here. Got this thing flipped. Here we are. Let's try this now. Oh, yeah. That's what I'm talking about. Okay. Just find where our studs are here. I can't see them. There's one. Come on stud number two. There you go. Down there. Cool beans.
All right. Going to find our bolt. Hold the door so it lines up here. Okay. Now, I can release the door. Just double check. Make sure it looks like it's going good.
A lot of people like to use grease on these. You could totally grease it if you want. It's your prerogative. You do you, boo boo. This is super tight, so I'm going to grab a ratchet and extension real quick. Got my extension on my 10. There we are. Nice and tight. Tight.
We've got our two nuts. Put it on here. One on here. Okay. Let's go ahead, tighten these up. That one's bottomed out. Bottomed out teeny bit. Teeny bit. These two weren't terribly tight when I removed them, so I'm not worried about cranking them down. This one, on the other hand, was super tight. So I want to make sure that I tighten that down pretty good.
All right. So let's get our speaker in here. Just going to bring this up. Slide it in. We've got our four coarse-threaded bolts. These also have a Phillips head on them, so if you didn't have access to a 10-millimeter, you can go ahead and use the Phillips head, but I guess at this point, you would obviously have access to a 10-millimeter. I mean, 10, 10, 10, 10, so. I guess I didn't really need to say that. Tight. Tight. Tight. Tight.
Grab our electrical connector. We're going to listen for a click. Give it a nice little tug. It's not going anywhere.
Okay, so we're going to get these connected in. We'll start with the bottom one which is the green. You're going to go right in the hole there, bring it around, and then slide that right into there. We'll do the same for the white. Bring it around, slide it right in there. Both of these are locked in. You want to make sure they're in as far as they can go so they can't come loose.
Now, we're going to hang our door panel. The top of the door panel has a little hook that sits right up on top of this. Goes right across. Okay? So just bring it up, set it up on there, bring it down. Now, you're clear to release. Grab our wiring harness here, bring it out. Okay? Make sure we're down. We're just going to make our way around, giving it a couple of bonks. Okay? Bonk. Bonk, bonk. There we are. Easy peasy.
We got our little clip. We're going to push using the outside. Once it's in, we'll push in the center locking point. Here we are. Now, I'm going to push in the center. You've got your little hook right here. That goes underneath the backside there. So, essentially, once we get this connected in, you're going to go backside and then the forward side. We'll connect this in. Feels good. This one. Feels good. Bring it down, put the hooky-doo side down. Good to go.
Let's grab some screws and we'll finish up. Silver one on the top. Very nice. We'll close our little flap there. Snug. There we are. All right.
We're going to make sure that the doors are unlocked, and we're going to test it. I've got my key just in case. That feels good. All right. Off we go.
Thanks for watching. Visit 1AAuto.com for quality auto parts shipped to your door. The play for DIY auto repair. If you enjoyed this video, please, click the subscribe button.
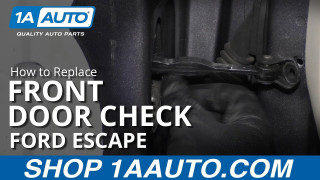
How to Replace Front Door Check 2008-12 Ford Escape
How to replace a front door window check in a 2012 Ford Escapeon '08, '09, '10, '11, or '12 Ford Escapes.
