How to Replace Distributor Rotor 1999-2000 Chevy Tahoe
Created on: 2021-01-18
This video shows you how to install a new ignition rotor in your 1992-2000 Chevy Tahoe.
Tools needed
-
Torque Wrench
Flat Blade Screwdriver
Drill
10mm Socket
All right friends. To get started, we need to obviously access the rear area of the engine. To get to that, let's get this right out of the way. There's gonna be a 10-millimeter headed bolt straight down right here. Go ahead and remove that. Ours is broken so we're not necessarily worried about it. After that, we're gonna loosen up this clamp and get this right off. Set this aside. To get to the rotor on this, you're gonna have to remove the cap. To do that, you're gonna find that there's two mounting bolts. There's one on the back side and there's one over on the front side. Let's go ahead and loosen those right up and we'll get the cap out of the way. Okay. Now that both those screws are loose, let's go ahead and get those right out of the way and then we'll continue on. Go ahead and grab onto that cap, lift it straight up and then set it aside. So now that we have the cap out of the way, we have a nice clear view of our rotor right here. We need to remove both of our mounting screws.
Now with both those screws out of there, we can go ahead and grab on to that rotor and get it out of there. All right. Now it's gonna be time to install our brand new rotor. We wanna make sure that we align this with the exact same way that it came off. Let's start in both those bolts and then we'll go ahead and snug them up. Keep in mind that these are very small bolts and they don't require very much torque. Now that they're both bottomed out, I'm just gonna give them a little bit extra of a turn. Perfect. Give it a nice shake. Make sure it's completely on there. That looks great. Let's get that cap back on. Now it's gonna be time to get the cap back up on here. Let's go ahead and carefully slide it up and over. Line up your bolt holes and then start in both the bolts. After you get both your bolts in there, go ahead and snug them up and then we'll torque them to 21 inch-pounds. Okay friends, now it's time to get this back on here. Just something I'm gonna mention real quick is you're gonna have your clamp and then over on this side you should have that mounting bolt. Ours was broken so I don't necessarily have the bolt, but I'm just gonna go ahead and slide this right on here. Line it up so the mounting bolt's here. Go ahead and start that in. We're gonna move along to snugging this up.
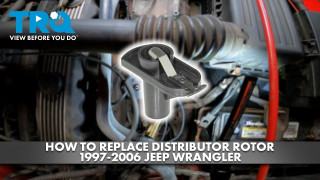
How to Replace Distributor Rotor 1997-2006 Jeep Wrangler
This video shows you how to install a new distributor rotor from TRQ on your 1997-2006 Jeep Wrangler.
