How to Replace Distributor Cap Rotor Kit 1995-97 Honda Accord
Created on: 2010-09-21
This video shows you how to replace the distributor cap and rotor on your 95-97 Honda Accord.
-
step 1 :Removing the Distributor Cap and Rotor
- Use an 8mm wrench to remove the two bolts
- Remove the 8mm bolt anchoring the rotor.
-
step 2 :Installing the New Rotor and Distributor Cap
- Bolt in the new rotor with an 8 mm wrench
- Install the new cap, transferring the wires one at a time to their corresponding places on the new cap.
- Bolt in the cap with your 8mm wrench or Phillips screwdriver.
Tools needed
-
Phillips Head Screwdriver
8mm Wrench
Brought to you by 1AAuto.com, your source for quality replacement parts and the best service on the Internet.
Hi, I'm Mike Green. I'm one of the owners of 1A Auto. I want to help you save time and money repairing or maintaining your vehicle. I'm going to use my 20 plus years experience restoring and repairing cars and trucks like this to show you the correct way to install parts from 1AAuto.com. The right parts installed correctly, that's going to save you time and money. Thank you, and enjoy the video.
In this video, we'll be showing you how to replace the distributor cap and rotor on this '95 Accord with a V6, same as a lot of Honda V6's, and Honda Acura V-6's for this era.
Tools you'll need are either a Phillips screwdriver or an 8-millimeter wrench. Replacing the cap and rotor on this Honda V6, it's a pretty easy procedure. The cap is held on with either an 8-millimeter bolt. Also, you could use a Phillips screwdriver. You want to remove this bolt and then kind of down and underneath a little bit. There is another bolt. You can use again either an 8-millimeter or a Phillips screwdriver. Move these bolts, and notice I'm not just pulling off the wires. You don't want to do that. You have to make sure that you put the wires back on in the same place. What I like to do is I take the old cap off first. Take the cap and pull it over to the side like this.
Your rotor is then held on by an 8-millimeter bolt here, and if you can't get to it, what you can do is you can crank your engine a little bit and change the position of the rotor so it's easier to remove it. What I'm going to do is remove this wire here first from the middle of the distributor cap. Now I have that bolt facing right up. I can use the Phillips screwdriver. I remove it. It takes a little bit of shaking it, and it will pull off. Obviously, my new rotor goes back on. You can see here's my old rotor. It's got this burn mark. Kind of clean it off, but the new one's all nice and new. Slide it on nice and tight. Put our bolt back in.
How I do the cap is there are actually numbers on the caps, so I line it up and I can see I've got a five here and a five here, but if you buy a cap that doesn't have the numbers, all I do is I put it right next to each other. I can see my bolt is here, my bolt is here, so then I just start to transfer the wires from this one to this. I'm going to take my bolts out of this one. This one over to this one, then this one over to this one, right in order so that way I'm taking it from the old cap and putting it back on in the same order with the new cap. With each wire, just pushing them in, make it so they click, then I move this old cap out of the way, put the new cap down in place. Put in the two new bolts that came with the cap. I connect my center coil wire, and we should be all set.
If you replace the cap and the rotor and you're also replacing the plugs at the same time, what I suggest you do is do them separately. Do the cap in order like this. Hook up your old plugs. Before that, replace your plugs and new plug wires one at a time so that you can just disconnect and reconnect. People sometimes make the mistake of just taking everything apart and then doing everything at once, and sometimes you can be unsure of which wires go to which location, and that can cause some big problems if you go to start it up and it's not all put together correctly.
We hope this helps you out. Brought to you by www.1AAuto.com, your source for quality replacement parts and the best service on the Internet. Please feel free to call us toll-free, 888-844-3393. We're the company that's here for you on the Internet and in person.
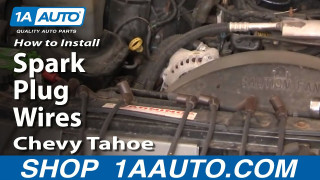
How to Replace Spark Plug Wire Set 96-00 Chevy Tahoe
Learn how to change the spark plug wires on your 96-00 Chevy Tahoe, equipped with the Vortec 5700, in this video from 1A Auto.
