How to Replace Distributor 1996-99 GMC Sierra K1500 Truck
Created on: 2017-03-16
Watch this video to learn how to fix your ignition if you have engine stumbling or rough idling. The experts at 1A Auto will show you how to replace the distributor in your 96 GMC Sierra.
-
step 1 :Disconnecting the Battery
- Disconnect the negative battery cable with an 8mm wrench
-
step 2 :Removing the Air Intake
- Loosen the throttle body thumbscrew by hand
- Disconnect the breather hose from the throttle body
- Disconnect the mass airflow sensor
- Disconnect the intake air temperature sensor
- Label the sensors with painter's tape and a marker
- Unclip the air box tabs
- Lift off the air box cover
- Pull the air intake up and out
-
step 3 :Removing the Distributor Cap
- Pull the spark plug wires off the spark plugs
- Unclip the wiring retainers with a flat blade screwdriver
- Disconnect the spark plug wire from the ignition coil
- Remove the two T20 Torx screws from the distributor
- Lift the distributor cap up and out
-
step 4 :Setting the Engine Timing
- Make sure the engine is at top dead center compression
- Attach a 16mm socket and ratchet to the crankshaft pulley bolt
- Turn the crankshaft clockwise until the notch lines up with the notch on the timing cover
- Make sure both lifters for cylinder one are down
-
step 5 :Removing the Distributor
- Loosen the 13mm bolt from the distributor hold-down plate
- Remove the hold-down plate from the distributor
- Disconnect the distributor electrical connector
- Pull the distributor up and out
-
step 6 :Preparing the New Distributor
- Remove the two T20 torx screws from the new distributor cap
- Separate the new cap from the new distributor
- Remove the two T10 Torx screws from the distributor rotor
- Remove the rotor from the distributor
- Line up the 8 on the on distributor with the notch on the housing
-
step 7 :Installing the Distributor
- Set the distributor into place with the flat part of the housing facing the engine
- Start the 13mm bolt into the distributor hold-down
- Install the rotor onto the distributor
- Tighten the two T10 bolts for the rotor
- Connect the distributor electrical connector
-
step 8 :Installing the Distributor Cap
- Put the distributor cap into place
- Fasten the two T20 screws into the distributor cap
- Connect the spark plug wire to the ignition coil and the distributor
- Remove the spark plug wires from the old distributor
- Install the spark plug wires onto the new distributor in the same order
- Connect the wires to the spark plugs in the correct order
- Clip the wires into their retainers
-
step 9 :Connecting the Battery
- Reconnect the negative battery cable with an 8mm wrench
Tools needed
-
13mm Socket
Socket Extensions
16mm Wrench
16mm Socket
8mm Wrench
T10 Torx Driver
Flat Blade Screwdriver
T20 Driver
8mm Socket
Ratchet
Flashlight
Marker / Writing Utensil
13mm Wrench
Hi, I'm Mike from 1A Auto. We've been selling auto parts for over 30 years. We're dedicated to delivering quality auto parts, expert customer service, fast and free shipping, all backed by our 100% satisfaction guarantee. Visit us at 1AAuto.com, your trusted source for quality auto parts.
Remove the negative post from your battery using a five-sixteenths or an eight millimeter wrench. Be very careful: this wrench isn't long enough, but if you have a longer one you may be able to hit the positive battery terminal with it. You want to be very careful you don't do that. Remove the terminal and isolate it from the battery.
Now to give us a little more access to the other side we'll undo the thumbscrew on top of the throttle body. Pop that off, disconnect the breather hose, undo the mass airflow, and intake air temp sensors. Where we're going to be disconnecting so many wires here, I went ahead and labeled all of them with painters tape. You can choose to do that or take pictures, there's a variety of ways to do it. Undo the latches on the airbox, lift it up, remove your air filter and take the entire intake set up off the truck.
Remove the spark plug wires from the spark plugs. Don't worry about where these go right now because the distributor is marked with the positions of all the plug wires and we'll show you the firing order when we put it back together. Be sure to open up all the wire looms and release the plug wires from them. We'll repeat these steps on the opposite side.
Disconnect the plug wire from the ignition coil as well. Remove the two T20 Torx screws, one here and one on the backside of the distributor. We'll do this using a T20 Torx bit, a ratchet, and an extension. Now these are not captured so what I like to do is loosen them up pretty much all the way and then lift up on the distributor cap and bring that out nice and smooth and level so we're careful not to lose those screws.
Before removing your distributor be sure that the engine is at top dead center compression. This means that the vehicle's distributor will be in the correct timing placement, so when we align the timing marks and reinstall it later it will go in hassle free.
This is a very important part of the engine's timing which will allow us to set our distributor in the correct place. It's a good time to show you what TDC is and why we use it. On the driver's side of the timing cover there's this little ear with a notch in it. We use a 16 millimeter socket and ratchet on the center bolt of the crank pulley to rotate it. This is a bit more difficult with the engine assembled because you'll have compression you need to deal with. Rotate it clockwise only, nice and smooth and slow, and you'll see a notch on the crank pulley. This notch right there tells us that our piston is at top dead center. This means that the number one piston is at its highest point in the cylinder bore. You can see that this is actually almost flush with the deck of the block at this point. The other important part is that we're going to want that on top dead center compression. Now if the engine was together, right in those last few degrees before I got that line marked up with the crank, it would get really tight because of the compression in the motor. If you don't feel that compression when rotating it, it means that cylinder number one is in its intake stroke, which is not what we're after for timing. However where there's no compression due to the head being off right now, another easy way to check is both our lifters are down. You can see what one looks like when it's up, here. These are part of what open the valves in the vehicle, so if they're both down both our valves are closed, our piston would be at the top of the bore, and our engine would be in its compression stroke on cylinder number one.
Using a 13 millimeter wrench, loosen the bolt on the distributor hold down plate which is below the distributor on the passenger side of the motor. Now they do make special distributor wrenches for this which are nice to have, but you can get by with a regular wrench, it's just a little more time consuming. Remove the hold down bracket from the distributor, disconnect the electrical connector on the back of your distributor, and carefully wiggle the assembly up and out of the back of the engine.
Using a T20 Torx socket ratchet and extension, remove the two T20 Torx screws from your new distributor cap if it came as one piece. Now these are not captured so you want to be very careful not to lose them. Once those screws are loose remove your cap. Then using a T10 Torx, either screwdriver or bit, remove the two Torx screws in the center of the rotor. Once again these are not captured, so be very careful not to lose these. Remove your rotor from the distributor.
Once we've removed the cap and rotor from our new distributor, the correct way to align one of these, we'll line up the eight in this window with the notch in the housing. This will also leave the side of this window lined up with the edge of the cam sensor riser there. We'll then set it so that this is just about flush to the back of the engine. You can move it a little way one way or the other. Drop it in, line up our tab and start our bolt a few threads by hand to keep it in place until we start our engine and fine tune it.
Set the distributor in with the flat portion of the housing facing the front of the engine. If your timing marks are correct it should drop right into place. Start the 13 millimeter bolt into the hold down on your distributor. Now we're going to put this down snug but not fully tight just yet because we want to make sure the truck runs and runs right.
We'll now install the rotor onto the distributor and tighten down the two T10 Torx screws. Now when you're in time that tab should be facing roughly towards cylinder one which is going to be the driver's front and it is now. Now what we're doing here is just a rough timing or base timing. So this should be enough to get the vehicle running. However with these distributors you do need a scan tool in order to get them dialed in perfectly. Plug in the cam position sensor on the back of the distributor now as it's going to be a lot harder to get out once we put the cap on.
Reinstall the distributor cap then tighten down your two T20 Torx screws for the T20 Torx bit, ratchet and extension, or Torx screwdriver, whichever you prefer. Just don't put these down too tight because they're only going into plastic and these are notorious for breaking. Place the coil plug back onto the ignition coil, and then the passenger rear on the distributor is marked C for your coil, so we'll reinstall that line there. The rest of them are pretty self-explanatory. It goes six, four, two, eight on the passenger side. We'll reinstall those wires in the same order and then connect them to the corresponding spark plug. Remember the passenger bank at the front is cylinder two followed by four, six, eight. While the driver's side starts with cylinder one and goes three, five, seven. Once all the wires are plugged in we'll route them along to their appropriate plugs. Now your distributor cap is marked on the opposite side so repeat this process and install the wires over there as well.
Reconnect your negative battery terminal and tighten it back down with an eight millimeter socket and ratchet or an eight millimeter wrench
Thanks for watching. Visit us at 1AAuto.com for quality auto parts, fast and free shipping, and the best customer service in the industry.
Shop Products


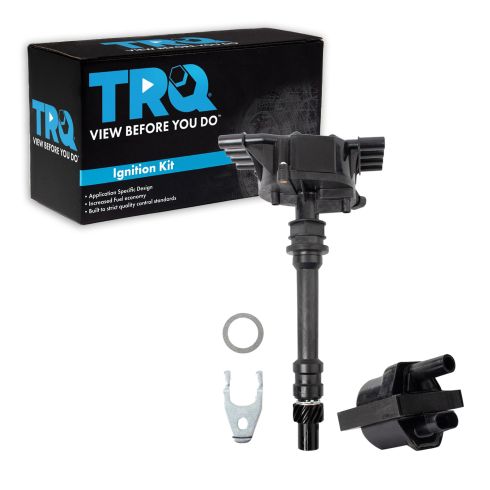
Chevrolet GMC Cadillac 2 Piece Ignition Kit TRQ TKA05163
Part Details:
- 2 Piece
- Black
- (1) Distributor
- (1) Ignition Coil
- Direct Replacement

How to Replace Distributor 1996-2000 Nissan Pathfinder
How to repair, install, fix, change or replace a bad or broken ignition distributor on 00 Nissan Pathfinder
