How to Replace Differential Damper 2003-11 Honda Element
Created on: 2018-12-28
How to replace a differential damper on 03, 04, 05, 06, 07, 08, 09, 10, 11 Honda Element
-
step 1 :Removing the Rear Differential Damper
- Press the damper into the rubber bushing
- Remove the 14mm bolts from the damper
- Remove the damper
-
step 2 :Installing the Rear Differential Damper
- Insert anti-seize into the damper
- Insert the damper into place
- Tighten the 14mm bolts to the damper
Tools needed
-
14mm Socket
Ratchet
Hi, I’m Mike from 1A Auto. We’ve been selling auto parts for over 30 years!
Hey, everyone, Sue here from 1A Auto. Today on our '06 Honda Element, we're gonna be installing a rear differential dynamic damper. If you need this part or any other part for your car, click on the link below, and head on over to 1aauto.com.
So here is the damper that we're gonna be taking out. The rubber portion's completely gone. It's just bouncing around, you can see that. It's mounted on the back of the dif. It's for basically when you're out on the highway or at high RPMs, when this differential's spinning, it picks up any vibrations, so you don't feel it in the vehicle when you get on the road.
The mounting bolt is right over here, it's one bolt. It looks like a 14-millimeter socket. I'm gonna use my half-inch so that I can at least break it free. It's doing that because of all the rust on the tip. It looks like it's still the original damper. I've already sprayed it, but I'm just gonna keep spraying it.
There we go. I don't think we need to take the bolt all the way out. You can if you want to, examine the threads. This damper will come right out this way. There we go. That's making some noise.
Here we have our new differential dynamic damper from 1A Auto. It comes with the welded mounting mat, the rubber seal on both ends. It has the bracket. Here's the factory one that we just took off. It's completely broken. They look identical. They have the same holding marks. Pin on this one broke off. There's the guide pin, and there's the balance shaft.
So if you need this part, or any other part for your car, click on the link below, head on over to 1aauto.com. I'm just going to put a little nevers, anti-seize, thread anti-seize. I'm gonna bring this back and guide it up, and see the tab right here. That's gonna go in the mounting. There's a slot on the side of that bracket. So bring it up, guide that in, bring your bolt through the other side.
Grab your 14-millimeter socket. I just held it, make sure you hold it tight so that that guide pin stays in that slot. Just tighten it down. Now with the new damper installed, you can see that the bushing's not broken. There'll be no more rattle or vibration.
Thanks for watching. Visit us at 1aauto.com for quality auto parts, fast and free shipping, and the best customer service in the industry.
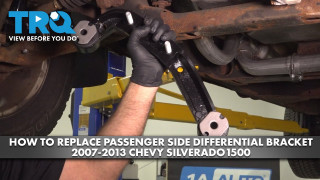
How to Replace Passenger Side Differential Bracket 2007-2013 Chevrolet Silverado 1500
This video shows you how to install a passenger side differential bracket on your 2007-2013 Chevrolet Silverado 1500.
