How to Replace CV Axle Shaft 2000-03 Nissan Maxima
Created on: 2013-05-12
This video will show the steps for reaching and replacing the cv axle, including torque specs during reinstall
-
It's recommended to seek an alignment after completing this repair
step 1 :Removing the Wheel
- Loosen the lug nut covers with a 22mm socket
- Pry off the center cap with a flat blade screwdriver
- Loosen the lug nuts with the vehicle on the ground
- Raise the vehicle with a floor jack
- Secure the vehicle on jack stands
- Remove the lug nuts
- Pull off the wheel
-
step 2 :Removing the Hub Nut and Stabilizer Link
- Remove the cotter pin on the end of the axle with pliers
- Remove the 32mm hub nut bolt with a breaker bar and pipe for leverage while an assistant presses the brakes, or just use an impact wrench
- If the hub is stuck, tighten the hub nut and hit the nut with a hammer to loosen the hub
- Loosen the 15mm nut from the lower stabilizer link with a breaker bar and pipe
- Hold the link rod with a 14mm wrench
- Remove the 15mm nut
-
step 3 :Removing the Lower Control Arm
- Remove the two 20mm bolts on the bracket at the rear of the control arm
- Remove the four 20mm bolts on the front of the control arm
-
step 4 :Removing the Axle
- Pull the axle out of the hub
- Remove the three 12mm bolts on the bracket holding the axle
- Place a drain pan beneath the axle
- Pry out the axle from the engine side with a pry bar and a hammer
- Let any fluid drain out
- Remove the axle shaft
-
step 5 :Installing the New Axle
- Add anti-seize lubricant to the shaft
- Insert the axle into place
- Replace the bracket
- Insert the three 12mm bolts on the bracket holding the axle and tighten them evenly
- Add some grease to the end of the axle and press it into the hub
-
step 6 :Reinstalling the Lower Control Arm
- Insert the lower control arm into place
- Insert the six 20mm bolts
- Torque the 20mm bolts to 12- foot-pounds
-
step 7 :Reinstalling the Stabilizer Link and Hub Nut
- Insert the stabilizer link through the control arm
- Hold the stabilizer shaft with a 14mm wrench
- Tighten the 15mm nut
- Tighten the 32mm hub nut
- Have an assistant hold the brakes
- Torque the hub nut to 217 foot-pounds
- Insert and bend the cotter pin into place with needle nose pliers
-
step 8 :Refilling the Transmission Fluid
- Remove the 10mm Allen filler plug
- Insert a hose to the end of the bottle
- Insert the hose to the filler plug
- Replace the transmission fluid until it leaks out the side
-
step 9 :Reattaching the Wheel
- Slide the wheel into place
- Start the lug nuts by hand
- Tighten the lug nuts preliminarily
- Lower the vehicle to the ground
- Tighten the lug nuts to 100 foot-pounds in a crossing or star pattern
Tools needed
-
14mm Wrench
12mm Socket
A Piece of Pipe (for leverage)
Torque Wrench
Hammer
15mm Socket
Pry Bar
Jack Stands
3/8 Inch Drive Ratchet
3/8 Inch Breaker Bar
10mm Allen Wrench
Gear Oil
32mm Socket
Rubber Vacuum Hose
Drain Pan
Floor Jack
Flashlight
Assistant
Needle nose pliers
3/8 Inch Impact Gun
22mm Socket
Brought to you by 1AAuto.com, your source for quality replacement parts and the best service on the Internet.
Hi, I'm Don from 1A Auto. I hope this how-to video helps you out, and the next time you need a part for your vehicle, think of 1AAuto.com. Thanks.
In this video, we're going to show you how to replace the right hand axle on this 2003 Nissan Maxima. The procedure's pretty much the same for any of this era Maxima, as well as the infinity I30. In the video we do use a lift, it helps us get better angles to film. It's a pretty tough repair if you're doing it with jack and jack stands in your driveway, but it can be done once you know how to do it. It's half the battle. You'll need new axle from 1A Auto, jack and jack stands, 12mm, 15mm, 22mm, and 32mm sockets, 32mm is probably something you'll have to buy special, ratchet and pipe for some extra leverage some of these bolts as you'll see are very tight, 14mm wrench, pry bar, hammer, catch pan, torque wrench, and some gear lube either GL4 rated if it's a manual transmission or ATF if you have an automatic transmission.
Start off by removing the wheel. You're going to want a 22mm socket and ratchet or breaker bar, or your tire iron. You'll probably want to start with the wheel on the ground, loosen the lug nuts, then raise and secure the vehicle with jack stands. Then remove the wheel and the tire.
Removing the cotter pin from the end of the axle. Here we use a 32mm socket and an impact wrench. These bolts, the center bolts, are put on here with 217 foot-pounds of torque, so you can try a breaker and a pipe, but chances are on these cars you're going to need an impact wrench to get this bolt off. Now, let's just make sure that there's play in this, and it's pushing through the hub no problem. If you find that it's stuck, you can just screw the nut back on a little bit, give it a couple of raps, and she'll loosen up no problem. I'm using the 32mm impact socket and impact gun. If you don't have these air tools you can have somebody sit in the car and apply pressure to the brake while you use the breaker bar.
I'm removing the 15mm nut on the lower stabilizer link. You'll need a breaker bar and a pipe. Get the nut free. I've broken the nut free, but I'm going to use a 14mm wrench to hold the link rod and continue. We'll just speed up here. Just to summarize, on the one side there's the 15mm nut. Don broke that free first, then on the back side of the bracket where the stabilizer link bolts into, you can fit in a 14mm wrench between the boot and the control arm, hold the stabilizer link bar or rod, and then remove the nut the rest of the way. Here. Don just uses a impact just to speed things up.
Removing the lower control arm, I'm going to start with the two 22mm bolts at the rear. Use my pipe threads for leverage. Okay, and we'll speed up and you can see, you can either use a ratchet and pipe or breaker bar and pipe for extra leverage. Those bolts are on there tight. He removes the two bolts that hold the bracket in the back, and then we move on and remove the other four bolts that hold the bar to front of the control arm. Just using an impact wrench just to save a little time. That's it, the axle's out.
The bracket that holds that axle in place has three 12mm bolts. On the bottom rear I'm going to use a regular wrench and work that free. The other two are located up on top and towards the engine. I'm going to use a one foot extension with a 12mm socket on it to get to those. I put the extension between the lower cross member and right along the axle as it's coming out of the transmission.
Speed up here again. Unfortunately, it's really hard to film. I couldn't really get the camera up in there in a way to show you those bolts, but there are three 12mm bolts that hold the axle to the bracket and we remove those. We're removing the axle from the support on the engine side and it's requiring a bit of hitting and prying to separate the two.
Okay, so we put a pry bar up in there, and there's a couple ears you can get the pry bar on. Give it some good hits with the hammer from that angle. Here we're using a hammer contacting the CV itself just to kind of get some impact on it, get it to break free and then pulling out the pry bar again. Here, just prying it right between the housing and the engine bracket and it finally comes free, even though I get in the picture and kind of lift it up, that really doesn't do anything. Have a catch pan ready and handy because we're going to lose a little fluid out when the seal separates. Once you've got the shaft separated, you can pull it out.
Okay, I'm reinstalling the right axle shaft. We put some anti-seize lubricant on the portion where it meets up to its housing. Just to make it slide in a little easier. Once you get it to the transmission, you can guide it in, and then you're going to want to line up your bolt holes from your axle shaft to the housing. With the axle in place, I'm going to put the shield back on the back side and start with my bolts. We'll speed up here as Don's putting those bolts back in.
What he found is to use a hammer, kind of press that axle into the housing and tap it with the butt end of a hammer. It helps you get the holes lined up correctly. Then put those 12mm bolts, and yes, we're up on a lift, so it does make angles easier. This is something you can do in your driveway, but it's going to be little more difficult. You're definitely going to want to have a friend or a helper handing you with tools and things like that so you don't have to slide in and out.
Lastly, when you put these bolts in you want to tighten them evenly, get one snug or get all three of them in first snug up one, snug up the other one, and then just go around and tighten them so that the bracket is sucked into the housing in a uniform and even manner. Now it's going to slide the splined end into the back hub, and we put a little grease just to help get it in there smoothly.
Just align, rotate the rotor until you get an alignment, and push right there. I'm going to put the rear end of the control arm back in. I'm going to speed it up here. Put all the six bolts in. You can try and align it as best you can, back to where it was just by looking at the marks in the alignment bracket, but you're definitely going to want to take your vehicle and have it aligned after this. Then you want to torque all six of these bolts to 120 foot-pounds.
Here, just fast-forwarding through, we're putting that stabilizer link back on, put it back through the control arm. 15mm nut, and hold the stabilizer shaft with a 14mm wrench. Get that nice and tight. Put the nut back on these. With a person in the car holding the brakes, torque that hub nut to 217 foot-pounds. I'm inserting the cotter pin back through this drive shaft, bending the gears back.
I'm going to check the fluid level in the manual transmission, and we're going to locate the filler and it's right up here. It's a 10mm Allen, and I'm going to use a 3/8" drive ratchet and break it free. I'm using a hose to fill the transmission back up with the transmission fluid. Obviously, this fill procedure's a little different if you have an automatic transmission. Once you see the drips coming out you'll know that it's to the bottom of the filler plug level and it's full.
Set your torque wrench to 100 foot-pounds and tighten the lug nuts. Use a star pattern, draw a star pattern as you tighten them, and then just re-check them.
We hope this video helps you out. Brought to you by www.1AAuto.com, your source for quality replacement parts and the best service on the Internet. Please feel free to call us toll-free, 888-844-3393. We're the company that's here for you on the Internet and in person.
Shop Products


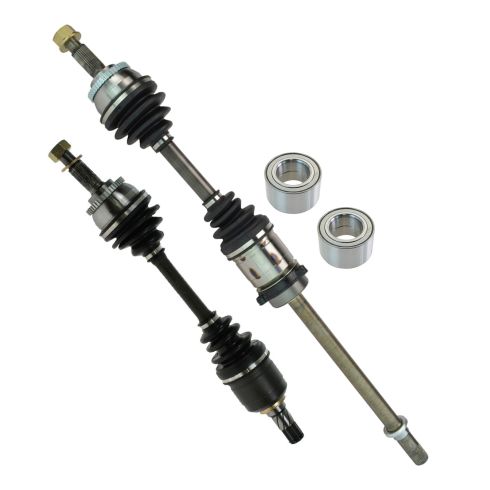
Nissan Maxima Infiniti I30 I35 Front 4 Piece Drivetrain Kit TRQ PSA84836
Part Details:
- 4 Piece
- (2) Front CV Axle Assemblies
- (2) Front Wheel Bearings

How to Replace Front Driver Side CV Axle 2011-15 Chevy Cruze
This video shows you how to install a driver side CV axle on your 2011-15 Chevy Cruze.
