How To Replace Crankshaft Position Sensor 1997-99 Ford F150
Created on: 2017-07-17
Learn how to replace the crankshaft position sensor on your 97-99 Ford F-150 with this helpful video from 1A Auto.
-
step 1 :Loosening the A/C Compressor
- Locate the sensor between the A/C compressor and harmonic balancer pulley
- Insert a 1/4" ratchet into the tensioner
- Turn the tensioner clockwise
- Slide the belt off of the A/C compressor pulley
- Tuck the belt up above the compressor pulley
- Remove the three 10mm bolts beneath the compressor
- Slide the compressor over
-
step 2 :Removing the Crankshaft Position Sensor
- Remove the 8mm bolt from the compressor
- Disconnect the wiring harness
- Turn the sensor
- Remove the sensor
-
step 3 :Installing the Crankshaft Position Sensor
- Apply motor oil to the seal
- Click the crankshaft position sensor into place
- Tighten the 8mm bolt to the sensor
-
step 4 :Tightening the A/C Compressor
- Lift the A/C compressor and line up the bolt holes
- Hand-tighten the 10mm bolts to the compressor
- Tighten the bolts with a ratchet and socket
- Connect the crankshaft position sensor wiring harness
- Insert the 1/4" ratchet into the tensioner
- Pull the ratchet clockwise
- Loop the bolt onto the A/C compressor pulley
Tools needed
-
Socket Extensions
8mm Wrench
8mm Socket
10mm Socket
Ratchet
Swivel
Needle nose pliers
Hi, I'm Mike from 1A Auto. We've been selling auto parts for over 30 years. We're dedicated to delivering quality auto parts, expert customer service, fast and free shipping, all backed by our 100% satisfaction guarantee. Visit us at 1AAuto.com, your trusted source for quality auto parts.
Your crank shift position sensor is located right here on the passenger side of the crank shaft, right in between the AC compressor and the harmonic balancer. To get at it, we are going to need to remove or at least move the AC compressor out of the way. That doesn't require removing any AC lines. We just have to unbolt it from the block and push it away.
The first step of that is actually taking the belt off of the AC compressor. We're going to start with a 1/2" ratchet, which goes up here into the tensioner. The tensioner is going to be released by pulling down on it. At that point, hopefully we can slide this belt right off just like that. There we go. We'll tuck this belt up out of the way.
Right under the AC compressor are three 10mm bolts that we'll need to remove. There's one right here, one right here, and then there is one sort of up in the center of the compressor. There's another bolt towards the back of the compressor that we don't want to touch because that actually holds the AC line on the AC compressor, so that has high-pressure gas behind it. We want to make sure we don't touch this rear bolt.
We'll take our 10mm socket, a swivel, and an extension on a 3/8 driver ratchet, and we'll crack the first bolt loose. Usually, once you've got it loose, you can just spin it out by hand. Now we can move on to the second one. Again, same size, 10mm on an extension and a swivel. With it loose, we'll spin it out. You can see that my socket is actually stuck on the bolt. Kind of embarrassing. What we're going to do is disconnect to the crank position sensor wire. That should allow us to turn the AC compressor and hopefully get my socket out of there. The socket is out.
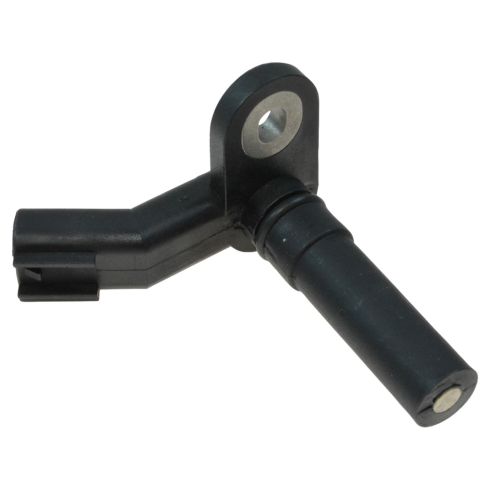
Now we're ready to take the 8mm bolt out of the sensor. I'm going to use an 8mm wrench to do so. We'll push up. Now that it's loose, I'm hoping that I can just spin it out by hand. Yes. With the bolt out, we should be able to turn this sensor a little bit and pop it right out of the hole just like that. You can see we have the old part here and the new part here. They look identical in every way. The connectors are the same; the mounting are the same. It has the metal insert just as you would expect. Of course it comes with the new seal. This one's going to work and fit and look exactly like the original.
We have the new sensor. I just took some motor oil and put it on the seal. That will allow it to slide right into the hole, hopefully nice and easily. We'll lift it right up into position and get it in its home. Then we just how to snap it into place just like that. Now we can take our 8mm bolt and make sure you start it by hand so that we don't crossthread anything. With it tightened mostly by hand, then you can get your 8mm wrench on there and start tightening it in all the way.
Unfortunately, you have this fan in the way, so you have to go around that as best you can. Now it's only an 8mm and we're going into plastic so you don't have to tighten it too much. You just want it snug. You don't have to put all of your weight on it or anything like that. Now we can lift the AC compressor into place and line up the holes as best you can with one hand while tightening the bolts with the other. With all the bolts started by hand, you can get your ratchet with your 10mm socket and extension and swivel on the bolts and start tightening them up.
Again, you just want to get all three of them sort of tightened up about the same amount. Then we'll go back and we'll make sure all three are tight. Tighten each one a little bit until they're all into place. Now that we have all three bolts hand tightened, or at least loosely tightened, we'll come back and give them a little bit more just to snug them into place. Make sure they're nice and tight. With the AC compressor back in place, we can push the connector on. Make sure it snaps in. You'll feel it snap if you're pushing on it. You can give it a little tug as well to make sure it's in place.
Lastly, we can come up here with a 1/2" ratchet and we'll get the belt back on. We'll put the 1/2" ratchet into the tensioner and we'll pull down and get the belt back on the AC compressor just like that. Then you can pull your 1/2" ratchet off and your crank sensor is done.
Thanks for watching. Visit us at 1AAuto.com for quality auto parts, fast and free shipping, and the best customer service in the industry.
Shop Products

How to Replace Crankshaft Position Sensor 2001-07 Toyota Highlander L4 2-4L
This video has steps to remove the serpentine belt, alternator, and wheel to access and replace the crankshaft position sensor
