How to Replace Cooling Fan 1991-99 Buick LeSabre
Created on: 2013-07-02
How to repair, install, fix, change or replace a broken radiator fan. If your car overheats or runs hot and the radiator cooling fan will not turn on then this may be your solution. This video shows the process for the Buick LeSabre and Pontiac Bonneville, model years 91, 92, 93, 94, 95, 96, 97, 98, and 99.
-
step 1 :Removing the Splash Shield
- Raise and secure the vehicle
- Remove the 10mm bolts from the splash shield
-
step 2 :Removing the Radiator Fans
- Loosen the 10mm bolt on the transmission line bracket
- Pull the transmission lines down
- Remove the three 10mm bolts from the bottom of the radiator fans
- Remove the two 10mm bolts from the top of the passenger side radiator fan
- Disconnect the wiring harness from the passenger side radiator fan
- Lift the passenger side radiator fan up and out
- Disconnect the wiring harness from the driver side radiator fan
- Remove the two 10mm bolts from the top of the driver side radiator fan
- Lift the driver side radiator fan up and out
-
step 3 :Installing the New Radiator Fans
- Slide the new driver side radiator fan into place
- Insert the two 10mm bolts into the top of the driver side radiator fan
- Reconnect the wiring harness to the driver side radiator fan
- Slide the new passenger side radiator fan into place
- Reconnect the wiring harness to the passenger side radiator fan
- Insert the three 10mm bolts into the bottom of the radiator fan
- Tighten the 10mm bolt into the transmission line bracket
- Insert the two 10mm bolts into the top of the passenger side radiator fan
-
step 4 :Reinstalling the Splash Shield
- Lift the splash shield into place
- Insert the 10mm bolts into the splash shield
- Lower the vehicle to the ground
Tools needed
-
Flat Blade Screwdriver
Jack Stands
10mm Socket
Ratchet
Floor Jack
Brought to you by 1AAuto.com, your source for quality replacement parts and the best service on the Internet.
Hi, I'm Don from 1A Auto. I hope this how-to video helps you out, and next time you need parts for your vehicle, think of 1AAuto.com. Thanks.
In this video, we show you how to replace the primary radiator fan. As you're looking at the engine from the front of the car, it's the fan that's on the right side. This is a '97 Buick LeSabre. This fan and the procedure is basically the same for most GM B- and C- body vehicles, which are the Pontiac Bonneville, Olds 88, Olds 98 Buick LeSabre, Park Avenue, as well as Cadillac DeVille. The tools you'll need are a 10mm socket and ratchet, jack and jack stands, and a screwdriver.
We just start out underneath. You will want to lift up the vehicle. You might be able to get to this without having to lift it up, but it's probably easiest just to jack up the vehicle, secure it, and remove a few 10mm bolts, and let this splash pan down.
There are now three bolts: one that holds the right hand fan there, and then two that hold the left hand fan right there and there. You'll have to loosen up the bracket for those transmission lines. The transmission lines are in the way of the right side bolt here, so we're going to loosen up on the plastic bracket, and it's, as well, a 10mm bolt. Pull that down a little bit and that will get you the room you need to get to that bolt. Up top, there are two 10mm bolts here and here. I am just going forward here as we remove those two top bolts. This is the clip that holds the harness in, and this is your connector. With a flat blade screwdriver pocket, just give a little pry on the tab and it should come right out. Here's your harness and the connector that we're going to take apart now. We'll start by removing that white clip. Lift up on the tab and push it out. Locate the two upper 10mm bolts on this one. Then we will fast forward here. The one on the left side, as you're looking at the engine, is easy. The one on the right side you just have to push down on the air box deflector a little bit and work the wrench in there, loosen it up, and then get it the rest of the way out with your fingers.
As you can see, we have put the radiator fan down in and Don was looking down to make sure that the lower ones were going into the right spot as well, and now he's starting in the upper bolts, and he'll tighten them up. I must set this target here. Yeah, it's good. Reconnect the harness and reinstall the white safety tab. You can reinstall the fan. Make sure your harness is out of the way, and, when you put it down, make sure the bottom one . you can see it from up here . is on the outside, or towards the engine of the radiator shroud. Reinstall the connector. Reinstall the lower two bolts. We will speed it up, here, as we reinstall those bolts, tighten them up, and then remember to tighten up that bracket that holds the transmission. Speed up here. We slot the two bolts in; just make sure you don't cross thread them, and then tighten them up. Then finish up by reinstalling the bolt for the backup A/C condenser fan, and then put the splash shield back up in place, and bolt it in.
We hope this video helps you out. Brought to you by www.1AAuto.com, your source for quality replacement parts and the best service on the Internet. Please feel free to call us toll-free, 888-844-3393. We're the company that's here for you on the Internet and in person.
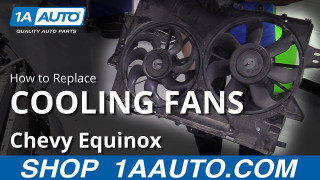
How to Replace Radiator Fans 2010-17 Chevy Equinox
Watch this video to learn how to replace the radiator cooling fans in your 10-17 Chevy Equinox with the 3.0L V6. 1A Auto shows you step by step!
