How to Replace Control Arm 2001-05 Honda Civic Not Hatchback
Created on: 2016-04-15
Check out this video from 1A Auto on how to replace the front lower control arm on a 01-05 Honda Civic.
-
step 1 :Removing the Wheel
- Loosen the 19mm lug nuts with the vehicle on the ground
- Raise the vehicle with a floor jack
- Secure the vehicle on jack stands
- Remove the lug nuts
- Pull off the wheel
-
step 2 :Removing the Stabilizer Link
- Turn the wheel by hand
- Clean off the threads with rust penetrant and a wire brush if necessary
- Hold the lower stabilizer link stud with a 14mm wrench
- Remove the nut from the stabilizer link with a 5mm hex socket
- If the nut strips out, hold it in place with locking pliers and sawzall it off
-
step 3 :Removing the Control Arm
- Remove the cotter pin from the ball joint castle nut with needle nose pliers
- Remove the 17mm lower ball joint nut
- Loosen the 19mm nuts from the end of the control arm
- Pull the control arm down and out
-
step 4 :Installing the Control Arm
- Insert the control arm into place
- Hand tighten the ball joint castle nut
- Insert the 19mm bolts to the control arm
- Tighten the 19mm bolts preliminarily
- Jack up underneath the control arm
- Tap the control arm with a hammer to sit the knuckle in
- Tighten the castle nut to 43 foot-pounds
- Insert the cotter pin into place
- Bend the cotter pin with needle nose pliers
- Simulate ride position by supporting the suspension with a jack
- Torque the 19mm bolts to 61 foot-pounds
-
step 5 :Reinstalling the Stabilizer Link
- Push the stabilizer link into place
- Start the nuts by hand
- Tighten the nuts
- Torque the nuts to 29 foot-pounds
-
step 6 :Reattaching the Wheel
- Slide the wheel into place
- Start the lug nuts by hand
- Tighten the 19mm lug nuts preliminarily
- Lower the vehicle to the ground
- Tighten the lug nuts to 80 foot-pounds in a crossing or star pattern
Tools needed
-
14mm Wrench
Socket Extensions
Torque Wrench
Hammer
Rust Penetrant
17mm Socket
Jack Stands
19mm Socket
5mm Hex Wrench
Reciprocating Saw
Flat Blade Screwdriver
Wire Brush
Floor Jack
Swivel
Needle nose pliers
1/2 Inch Breaker Bar
Brought to you by 1AAuto.com, your source for quality replacement parts and the best service on the Internet.
Hi, I'm Mike from 1A Auto. I hope this how-to video helps you out, and next time you need parts for your vehicle, think of 1AAuto.com. Thanks!
In this video, we're going to show you how to replace the lower control arm on the front of this 2003 Honda Civic, same for 2001 to 2005. We show you the driver side, but the passenger side is the same procedure. You'll need a new control arm from 1AAuto.com, and if you're going to replace one side, you might as well replace both. We do sell them as a pair. 12 to 22 millimeter sockets and wrenches with ratchets and extensions, 5 millimeter hex socket, flat-blade screwdriver, large size, breaker bar or tire iron, flex joint, hammer with a small, large, and a rubber mallet, pry bar, locking and needle-nose pliers, jack and jack stands, wire brush, penetrating oil, and we needed a reciprocating saw on ours, because we ran into an issue with the stabilizer link. You may or may not need that for yours.
Remove the front wheel, held on by four 19 millimeter lug nuts. If you have a different style hubcap, you'll need to remove that, but just use a breaker bar or your tire iron, and just loosen the lug nuts while the tire is on the ground. Now raise and support the vehicle. Now remove the lug nuts the rest of the way, and the wheel and tire.
For this repair, you want to make sure that you have your vehicle level. You need to support, you need to raise up the front of the vehicle and support both sides. You can turn the wheel and your link is right here. First thing we're going to do is just use a wire brush and some penetrating oil and try to clean off these threads as much as we can to make it easier to get it apart.
14 millimeter wrench, put it on here and turn counterclockwise. Looks like this is already spinning, so use a 5 millimeter hex socket. Ideally, at this point, the nut to the lower stabilizer link comes off, and you can just separate the stabilizer link from the control arm. Ours was much more difficult, and we wound up having to cut it off, and then we ended up replacing the whole stabilizer link. If you do that, we do sell the stabilizer link at 1A Auto as well.
Lower control arm is held on. There's a nut here. You have to remove a cotter pin, and then there's a bolt here and a bolt up through here. We'll start by removing the cotter pin here. This is the pin, you just grab ahold of the side, pull it out, and then pull the pin out. To remove this lower ball joint nut, it's 17 millimeter. Just remove it that much for now.
19 millimeter wrench, put it on, then use a bigger, I'm using a 20 millimeter wrench. Lock it in to give myself a little extra leverage. That one loosened up, loosen this one up, and, again, it's a 19 millimeter. Now I'm just going to loosen these bolts up until they're about ready to come out. Just going to try and break the ball joint free, and usually a few good hits from a good sized hammer does the job. We're free here, the bolts are ready to come out. Leave that one out, should be able to kind of move it around, sometimes you might hit it a little bit, but line it up. This bolt'll come out. Okay, remove this nut the rest of the way.
Original part from the vehicle, and the rubber bushing in this one is pretty dried out and cracked. The part from 1A Auto, exactly the same, it's going to go in there, obviously brand new bushings. All the right mounting points, fix you up.
Reinstall, kind of up into place. Ball joint on, and just put your nut on. Push it into place to make sure the font mount is going in, and then push the rear mount in. I stick my body against the rotor, lift up, and lock your bolt in place.
We've got our ball joint and nut on, we've got that, the rear bolt in, so we've just got to get this one. We'll try using a rubber mallet at first, just so we don't harm our new finish. Then once you get it in, lock it so you can get the bolt in. You can take a long screwdriver and pull on it, try and get it lined up so the bolt will go right up and in through. Sometimes you'll have to push on it here to get the bolt all the way in.
Now we're going to tighten up the 19 millimeter bolts preliminarily. In order to hold the ball joint in place while you tighten it up, you'll want to use a jack, lift the control arm up into place a little bit. Tap the control arm, get the knuckle to sit down in. Tighten this to 43 foot-pounds. Try to put your pin in, if necessary, tighten a little further to open up the hole. Need to tap it over here.
Okay, in order to tighten the two 19 millimeter bolts, you want to simulate ride position, so support the suspension. Get that jacked up so the weight's just off the lift, and we're going to torque these to 61 foot-pounds.
Used a couple extra pounds, because I had a flex joint on that one. Reconnect your stabilizer link. Again, we sell new ones at 1AAuto.com. Put the nut on and tighten it up. It's easy enough to get a torque wrench on this one, but getting a torque wrench on the inner one is pretty difficult.
Put your wheel back in place. Start your lug nuts, we'll tighten them preliminarily, and then torque them when the vehicle is back down on the ground. Tighten your lug nuts 80 foot-pounds, and just cross in the pattern.
Thanks for tuning in. We hope this video helped you out. Next time you need parts for your car, please visit 1AAuto.com. Also check out our other helpful how-to and diagnosis videos.
Shop Products


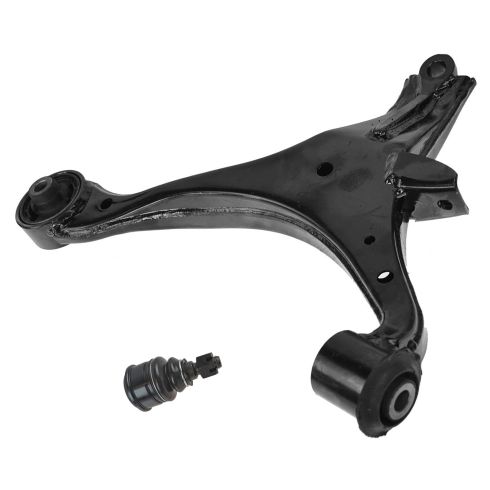
2001-05 Honda Civic Front Passenger Side Control Arm with Ball Joint TRQ PSA85841
Part Details:
- Components Individually Packaged
- No
- Yes
- No
- Press In
- Steel
- (1) Front Passenger Side Lower Ball Joint
- (1) Front Passenger Side Lower Control Arm

How to Replace Upper Control Arm 2009-14 Ford F-150
How to repair, install, fix, change or replace failing, rusted, rotted, or damaged control arms with ball joint on 11 Ford F150
