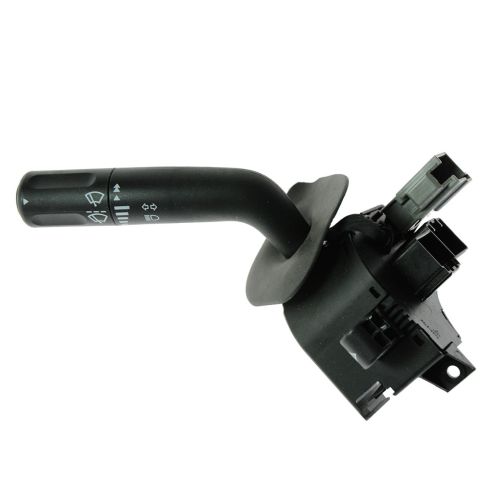
How to Replace Combination Switch 2004-05 Ford F-150
Created on: 2020-08-03
This video shows you how to install a new combination switch on your 2004-08 Ford F-150
Tools needed
-
Socket Extensions
Socket Driver
8mm Socket
Ratchet
Trim Tool Set
Pocket Screwdriver
5.5mm socket
Okay friends, one of the first things we need to do to start this job is to remove our negative battery terminal from the battery. Use your 8-millimeter, loosen it up, and get this away. Let's get inside the vehicle. Once you're inside the vehicle, go ahead and pull on this, raise your steering wheel, and then we're going to get right under here with a 5.5-millimeter socket, remove the mounting bolts. There it is. We'll set this aside so we don't lose it and we can move along. So let's make it till we can move this again. Take your small pocket screwdriver, carefully come right in between this area right here and we're going to try to separate these two pieces. The same on the other side, let's pull this down and out of here. Continuing with our 5.5-millimeter, remove this bolt, set that aside. There's one on the other side in the same exact location, you should be able to lift up on this a little bit. I'm going to try to get it out and around the steering wheel here. Take this off of here. There we are. It gives us a little bit more room.
Slide this up and out of here. So following our multifunction switch, we're going to be able to see on the backside of it, you have this wire right here, a little bit hard to see, this comes out of it, okay? I'm going to put the steering wheel in the upward position, lock this, and then if you follow it, it leads to this connector right here. So we're going to disconnect this and then of course, we'll draw it up. There we are. Get this out of those two wires. There it is. So now on the backside of the multifunction switch, you can see that there's a couple more wires. The top one has a push button on the inside area closest to the steering column, go ahead and push on that and then you should be able to draw this out. The lower one has the push button closest to you on the outside there, just go ahead and push on that and then draw that away as well. Now, right up along the top, you're going to see another mounting bolt. Remove that bolt and this should come right out. With that bolt out of the way, just push on this little tab right here and this slides right up. Get this in here.
If you notice you've got a little sliding area here and then of course, you've got the area on the back right there that you're going to slide that into. So just line those up, just like that, and then it should want to slide right in. Listen for a click to make sure it's locked in, and then install your mounting screw. Make sure it's nice and snug. Perfect. Let's grab our wiring, get that reconnected back there. That's one. Give it a nice tug, the second one, nice tug. We've got this one right here. Well, remember that this goes down and through there. Lift this up, and then connect it in right down here. Listen for the click, give it a nice tug, that feels good. Let's reconnect our battery. Make sure it's very tight and there's no movement to your terminal. So next you need to put your key in the on position and we're going to test our multifunction switch. We want to make sure it works before we go any further. Left directional, I can see it's functioning, right? Perfect. Wiper blades, awesome, and of course the squirter. You can't ask for much better than that. Let's turn off the key and continue. Let's get this back together. To start, we're going to go ahead and put the multifunction switch right through here, bring it all the way up, and now we need to put this lip underneath the steering wheel area.
Slide it in under there, around the outside here. Okay. This is looking pretty good. Slide this down, that looks like it's getting ready to line up. This side over here looks decent as well. Now we'll get this on there, it should just clip in. There we are. Let's put in our two mounting bolts that hold this together. We'll get that lined up as well. Start with the innermost portion here. Just slide it in. It's going to go behind the steering wheel. There we are. Okay. So that's one of the hardest parts, is just making it so the plastic clamshell goes in and behind the steering wheel. It's going to take a little finagling. Now let's get this rubber reattached. If you were to look at it, you're going to see that it has multiple layers, it has an inner level and then an outer portion. The inner portion goes behind the plastic and then of course the outer portion goes on the outside. Let's get that semi-lined up. I'm going to take the two pieces of my clamshell, just try to line them up together, and then squeeze them together. They should want to latch in to one another. There we are. Let's do the same to the other side with our mounting screw in along the bottom here. There we are.
Shop Products

How to Replace Turn Signal Lever 2007-09 Chevy Equinox
This video will show how to remove the steering column cover to access and replace the combination switch stalk on the 07-09 Chevy Equinox


