How to Replace Combination Switch 1995-2002 Ford Ranger
Created on: 2011-10-18
This video will show you how to remove the turn signal stalk and replace it with a new one if yours is faulty or broken.
-
step 1 :Remove the turn signal switch
- Remove four 7 mm bolts to remove the plastic cover under the steering column.
- Remove the three Phillips screws on the bottom of the steering column cover.
- Remove the bottom steering column cover panel.
- Use your T20 Torx Driver to un-mount the switch.
- Unplug the wiring harness.
-
step 2 :Install the new turn signal switch
- Plug in the wiring harness
- Mount with the two T20 Torx screws.
- Install the steering column cover and secure with the three Phillips screws.
- Replace the lower dash panel below the column and secure with four 7 mm bolts.
Tools needed
-
Socket Extensions
Flat Blade Screwdriver
T20 Driver
Phillips Head Screwdriver
7mm Socket
Ratchet
Brought to you by 1AAuto.com, your source for quality replacement parts and the best service on the internet. Hi, I'm Mike Green. I'm one of the owners of 1A Auto. I want to help you save time and money repairing and maintaining your vehicle. I'm going to use my 20 plus years experience restoring and repairing cars and trucks like this to show you the correct way to install parts from 1AAuto.com. The right parts installed correctly, that's going to save you time and money. Thank you and enjoy the video.
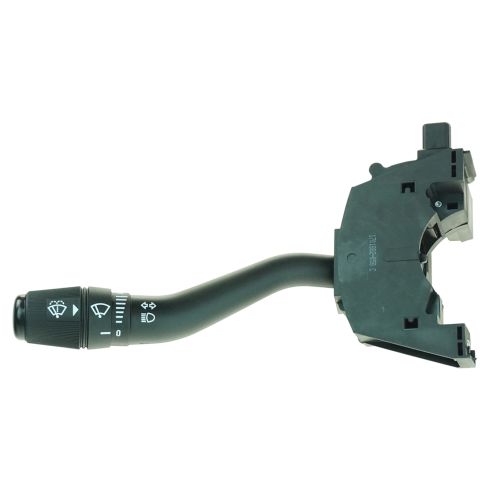
In this video we're going to show you how to replace the turn signal stock which also controls your wipers and high beams on this 96' Ford Ranger same as any 93 to 97. Tools you'll need are a seven millimeter socket with a ratchet and extension. A number one Philips screwdriver, a T20 Torx diver and a large flat blade screwdriver. We start out, we're going to remove four seven millimeter bolts, one there, and there are two underneath your hood latch here. Pull it out right there and then another one right over here. We'll use a seven millimeter socket with an extension and a ratchet. Once those bolts are out then you actually going to pull down and forward or actually turn backward on this panel. Just pull it out, there's two pins that hold it right there. Up underneath, there's three Philip screws, one is going to be up in there, one in here and one back in here. Once that's done just pull this part, you pull your lower piece down and then you just pull your upper one up.
There are two T20 Torx screws, one right in there and then one right down here. We'll speed up here a little bit as I remove those two T20 Torx screws, that upper one you just pull that bezel up and out of the way. Once you have those out, pull the switch then down and out. Give yourself access to the plugs here. Use a large screwdriver; we're going to pry up and out on these tabs. Release that one, this one has a couple of tabs as well. Pry up and out, pop it out and there's your switch out. Here's our original switch, here's a switch from 1A Auto, and it's all the same. Nice graphics on it. We're just going to plug in the same, cancel, all going to work correctly. What you want to do, put the switch up close and reconnect and reconnect. Probably you're going to hit your emergency flashers and you'll see what I mean in a second.
Lift up your cover here and lift the switch, pop it into place. I'm just going to put my screw down into the hole there, take my Torx driver and the whole time I'm just looking right to the stirring wheel here, seeing we had lined up. I'm going to speed it up here as I put those two T20 Torx screws in. You may find that this is actually the most frustrating part is just getting the switch in there and line up with the holes and getting those screws started. Little patience and you get through it. I'll put our cover back down and all and test the switch so you could flash it up. The bottom cover up, there's locating pins on each side, make sure they're going in the right place. Put those three Philip screws back in to hold the stirring column trim and then put the kick panel plate back underneath and put in the four seven millimeter bolts that hold that in place as well as the hood latch lever.
We hope this helps you out. Brought to you by www.1AAuto.com, your source for quality replacement parts and the best service on the internet. Please feel free to call us toll free, 888-844-3393. We're the company that's here for you on the internet and in person.
Shop Products
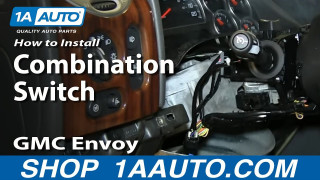
How to Replace Combination Switch 2002-06 GMC Envoy XL
Learn how to replace the combination switch on your 02-06 GMC Envoy XL in this 1A Auto video. This switch controls the wipers, turn signals and high beams.
