How to Replace Clutch Master Cylinder 2005-06 Hyundai Elantra
Created on: 2013-05-20
Let us show you how to replace a broken or leaking clutch master cylinder on your 05-06 Hyundai Elantra.
-
step 1 :Checking the Clutch Fluid Level
- If the clutch pedal feels soft, check the level of fluid in the clutch reservoir
- Make sure the fluid is between the "max" and "min" lines
- Add fluid if necessary
- If the reservoir is filled, the clutch master cylinder may be the cause of the problem
-
step 2 :Disconnecting the Clutch Pedal
- Pull the pun off the clutch connecting rod with needle nose pliers
- Pull the washer off the clutch connecting rod by hand
- Slide the connecting rod off its post
-
step 3 :Removing the Clutch Master Cylinder
- Disconnect the clutch line from the master cylinder with an 11mm wrench
- Remove the two 12mm nuts from the master cylinder
- Remove the 10mm bolt from the master cylinder
- Pull the master cylinder up and out
-
step 4 :Preparing the New Master Cylinder
- Compare the distance from the mounting flange to the pedal linkage on the new master cylinder to the old
- Turn the adjusting nut clockwise to increase the length on the new master cylinder or counterclockwise to shorten it, as necessary
- Have a drain pan ready
- Loosen the reservoir hose clamp on the old master cylinder with pliers
- Pull the reservoir and hose off of the old master cylinder
- Push the reservoir and hose onto the new master cylinder
- Tighten the hose clamp with pliers
- Add hydraulic fluid to the reservoir
- Pump the connecting rod to bench bleed the master cylinder
- Check the fluid level
- Add fluid as necessary
-
step 5 :Installing the New Clutch Master Cylinder
- Push the new master cylinder into place
- Hang the master cylinder on its studs
- Attach the clutch line to the master cylinder
- Fasten the two 12mm nuts onto the master cylinder
- Insert the 10mm bolt for the fluid reservoir
-
step 6 :Reconnecting the Clutch Pedal
- Press the connector rod onto the clutch pedal
- Put the washer onto the connecting rod
- Clip the pin onto the clutch connecting rod
-
step 7 :Bleeding the Clutch
- Pry the plastic cap off the bleeder screw with a flat blade screwdriver
- Attach a hose to the bleeder valve, with something to catch the fluid
- Attach a 10mm wrench to the bleeder
- Enlist the help of an assistant
- Instruct the assistant to pump the clutch pedal and then hold it
- Loosen the bleeder valve
- Tighten the bleeder valve
- Repeat this process until fluid rather than air comes out of the bleeder valve
- Check that the reservoir is full to the proper level
- Add fluid to the reservoir as necessary
- The clutch pedal should feel firm
Tools needed
-
12mm Socket
Socket Extensions
Flat Blade Screwdriver
Brake Fluid
10mm Wrench
Drain Pan
10mm Socket
Ratchet
Cloth Rags
Needle nose pliers
Assistant
11mm Wrench
Brought to you by 1AAuto.com, your source for quality replacement parts and the best service on the Internet.
Hi, I'm Don from 1A Auto. I hope this how-to video helps you out, and next time you need parts for your vehicle, think of 1AAuto.com. Thanks.
In this video, we're going to show you how to replace the clutch master cylinder. If your clutch master cylinder is going bad, usually you'll feel that your clutch is not disengaging, you'll hear some grinding of the gears, or you'll have to press it way down to the floor in order to get the clutch to disengage. We're doing this on a 2005 Hyundia Elantra. The procedure is pretty similar for just about any vehicle. The tools you'll need for this vehicle are pliers, 10mm and 12mm sockets with a ratchet and extension, and an 11mm tube wrench, although we do show you that as long as you don't run into any obstacles you can get it down with a regular 11mm wrench but the 11mm tube wrench is the ideal tool. You'll need some rags, DOT 3 brake fluid and a helper to help you bleed the system afterwards.
If you find that your clutch pedal goes to the floor and your clutch engagement is a little off, first, you want to check your fluid in your clutch master cylinder. There's a max and minimal line. You're going to want to make sure it's within those ranges. Secondly is the possibility that your clutch master could be going. We're going to remove the pin that holds the plunger from the clutch master cylinder from the clutch pedal itself. I got my needle nose pliers on the end of the clip and I'm going to pull off. There's a washer, as well, that you'll want to pull off. Slide your master cylinder connecting rod off the post.
I've located the fitting that we're going to need to remove that carries the brake fluid from the master cylinder to the slave and using an 11mm wrench, I'm going to remove it. I've got a rag underneath to catch the brake fluid. We're just going to speed it up here as we take that fitting apart. In just a minute we'll have a little bit more on the tool we used and the proper tool for the job. We've got the regular wrench, 11mm, and then we've got one specifically made for brake pipe fittings. As your vehicle gets older, you might find a heavier resistance, in which case it would be better to use this because rounding off any of those fittings would just cause more repair to be necessary. We were able to break it free with just a regular wrench, but if you do find heavy resistance with the fastener and that you might start to round the edges off, it would be best to invest in a set of these.
I got my new master cylinder, clutch master cylinder from 1A Auto and you can see that on the top there'll be a stud coming through the firewall with a nut on it, right here, and one that's tougher to see is right below it. I'm going to use a 12mm wrench with an extension and remove those nuts. We'll speed it up here again so you can see the top nut is pretty easy to get to. The bottom one, you have to reach down and under, it's not difficult to get to, a little bit difficult to see sometimes, though. Locate the 10mm bolt that holds your reservoir clamp and remove. Open up the clamp, pull your reservoir aside and then pull your entire linkage out.
The new part from 1A Auto does not include the pipe and the reservoir. So, we need to swap it over from the original. Before we do that, we can just put them side to side and make sure that the length from the flange to the center of, where the connecting rod meets the linkage on the pedal is the same and in this case they are. We just go ahead, use a pair of pliers and swap over. If you found that that distance was a little bit different, there's just a little locking nut that you can loosen and then turn the bushing that connects to the pedal either clockwise or counterclockwise to either lengthen or shorten it until it matches your original.
I'm filling the master cylinder with brake fluid, DOT 3. Keep topping it up, and most likely you'll see some fluid starting to come out. Just to ease or speed up the process and make bleeding once it's back in the car faster, you can do what's called bench bleed. Just gently apply pressure, squeezing out some of fluid and making sure that your reservoir stays full.
Now, I've got my finger over the hole for the brake fluid, and I'm just going to line it up on the studs and try to re-secure that fitting as quickly as possible. The first step is you get it in, get it mounted on the studs, and I know I'm just repeating Don here, but take the line that goes to the slave cylinder and just get it threaded back in, and get that tightened up first. I'm installing the nuts. Hold the master cylinder. Again, here, we'll speed it up. First Don threads the nuts onto the studs and then tightens them up nice and firm with the 12mm socket and ratchet and extension. I'm reinstalling the bolt to the reservoir.
I've got the master cylinder linkage here and I'm pressing it onto the clutch pedal. Then, I'm reinstalling the washer and finally a pin. Here's the pin, and the pin's going to slide in through the hole on this stud on the clutch pedal. You put it here, and then this will clip it in but it's too tight to get the camera in there.
I'm going to bleed the system now. I've located my clutch slave cylinder, which sits right on top of the transmission and the bleeder screw right here and I'm removing the plastic cap on the end of the bleeder screw. We've got a homemade brake fluid catcher here that we've got a little hose and a little bottle here so that the spent brake fluid will go in it and not into the car. I'm going to go ahead and put that hose on the end of the bleeder and I'm going to have my 10mm wrench ready on the nut. With Michael in the car, he's going to give several pumps of the clutch pedal and then he's going to hold down and then I'm going to say, "Ready." I'm going to crack the bleeder and leave it open for a couple of seconds, close it tight. Mike, go ahead and pump again. I'm going to say, "Hold." Crack the bleeder again, tighten it up. All right, pump and hold. Crack the bleeder and close and do it may be two more times. Pump. I'm also going to make sure, at the same time, that I've got brake fluid in the reservoir and this is a good time to fill it back up. Mike is pumped and holding, crack the bleeder, tighten back up. Hold. Let's do it one more time, Mike. Hold and crack. Close up the bleeder and pump. You should feel stiffness in the clutch pedal. It's good. All right, it sounds good. It's all pumped. We're pumped.
We hope this video helps you out. Brought to you by www.1AAuto.com, your source for quality replacement parts and the best service on the Internet. Please feel free to call us toll-free, 888-844-3393. We're the company that's here for you on the Internet and in person.
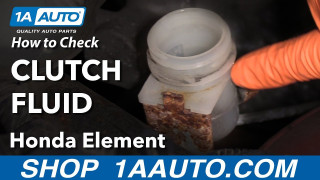
How to Check Clutch Fluid 2003-11 Honda Element
How to check the clutch fluid on 03, 04, 05, 06, 07, 08, 09, 10, 11 Honda Element
