How to Replace Camshaft Position Sensor 2007-13 Chevy Silverado
Created on: 2019-02-15
How to repair, install, fix, change or replace a broken, worn out, or damaged camshaft position sensor on 07, 08, 09, 10, 11, 12, 13 Chevy Silverado
Tools needed
-
12mm Socket
13mm Socket
Socket Extensions
14mm Socket
15mm Socket
Pry Bar
16mm Socket
Flat Blade Screwdriver
Harmonic Balancer Puller
Belt Wrench
10mm Socket
Ratchet
Needle nose pliers
1/2 Inch Impact Gun
11mm Socket
Hi. I'm Mike from 1A Auto. We've been selling auto parts for over 30 years.
What's up guys? I'm Andy from 1A Auto. In this video, I'm going to be replacing a cam sensor in this 2008 Chevy Silverado with a 4.3 liter V6 engine. If you need this part, or other parts for your vehicle, click the link in the description and head over to 1AAuto.com.
I'm going to remove this serpentine belt. I'm just going to use a 3/8 ratchet for the tensioner right here. You can use a serpentine belt tool as well. Just loosen up the tension on the belt, take it off right here, on the idler pulley and loosen the tensioner. Get my ratchet out of the way.
Now we can remove the belt off the alternator, off the AC compressor, off the power steering pump, the water pump, and then off the crank.
Right, so we're going to remove these bolts on the crank pulley. It's easier to do this up in the air, to at least show, but you can do it from on the ground. We need to take out these four bolts. The center one is a 16 mm, these other three are 15 mm. If you have the ability to hold the crank from spinning, you can do it with a ratchet, otherwise, you're going to want to use an air tool.
We're going to use a 16 mm socket and an air gun. Take that out first. Then we'll use a 15 mm socket on these other three.
Next, I'm going to use this harmonic balancer puller. Just line this up, just make sure you get the correct bolts that thread right into the balancer. We're going to tighten these down so they're all about the same level. Now, I'm going to tighten up the center bolt on this puller. We're going to use a socket and a ratchet. We're going to tighten up the center, it's going to pull the balancer off the crank. Sometimes you have to hold it from spinning.
So the pulley just keeps spinning, so I'm just going to use a pry bar and brace it up against the puller just to keep it from spinning. Now it's loose. Just grab the balancer and pull it right off.
The cam sensor is located right here above the crank. Now, in the repair manual it states to remove the water pump to access the cam sensor, but actually when you have the crank pulley off, it accesses a little bit easier. You can do either one if you wanted to replace, pull the water pump off, you have to take all the hoses off, drain all the coolant, disconnect the four bolts, and then you're going to have to replace the seals when you do that.
If you're pulling the crank pulley off, all you would have to do is check the crank seal and make sure the seal's okay or replace the seal. I'm going to use a 10 mm socket extension and a ratchet. I'll take this bolt out.
I'm going to disconnect the electrical connector, just push up on the connector, and just push it out. It's a little bit tight in there, but it's not impossible.
The sensor's in there pretty good. I'm just going to take a screwdriver, try to pry a little bit here, try to get the sensor to twist a little bit so that the seal breaks. If I can twist it back and forth a little bit this will make it easier to remove. You can also use a little bit of rust penetrant if that helps to remove it. With the 90 degree pick, as I work the sensor back and forth, it's pulling the sensor out a little bit.
At this point, I'm just going to grab it with some pliers, just rotate it back and forth with the pliers and I'm just going to take a screwdriver and pry up underneath while I rotate it back and forth.
I'm going to try two screwdrivers and just pry out a little bit being careful not to break it, although we're replacing it anyway. We're just going to spray a little rust penetrant on there. Hopefully that will help. I am going to cover up the crank seal, because I don't want any of that getting in the seal or into the engine. Spray that, let that soak for a little bit.
We're just going to rock it back and forth, a screwdriver and a pry bar. All right. I'm just going to try and use this hook tool as leverage and rotate it back and forth, that will help a little. I'm trying to not break the sensor.
Oops, and I broke the sensor. Now that the sensor broke, I'm just going to try to twist this completely around. I'm going to try and use some locking pliers, just rock it back and forth, and now this piece broke off.
Okay, so most of that broke which isn't good. I can take this metal cover off here, just slip that out of my way. There is an O ring right here, and what happens is the engine block gets corroded and causes corrosion in there, and that's why it's stuck in there. I'm going to use two picks, I'll just slide one under here just to hold the O ring and take the O ring off with the other one, get that O ring off.
I'm just going to spray a little more rust penetrant in there. I'm going to try and get under where the O ring was, just try to pry out. I'm going to take a couple pry bars and try to get under where the O ring was and just pry out. Now, if there wasn't so much oil in this area, I would try to heat it up with a torch, but there's a lot of oil that is leaking out of this engine.
At this point, I'm going to try using a heat gun and heat up the area. It's a little bit safer than using a torch, although you've still got to be cautious. So, I'll just try and heat this area up.
Here are some smaller locking pliers, can we get it to wiggle at all. I'm going to try and take a drill bit and I'm going to try and drill into the sensor. You don't want to drill too deep, and you don't want to go too close to the side, so let's drill into the sensor. Drill this hole a little bit bigger. You don't want to drill too far, we don't want to hit the reluctor wheel that the sensor picks up.
Now, I'm going to find a screw that works. If you have a wood screw that would work, this happens to be a masonry screw. I'm just going to tighten this up. That's pretty good. I'm going to need something to pry, to try to pry the sensor out. This just happens to be a trim tool. Got to get it in there and just try to pry it out.
Now, I'm just going to use a pry bar, I'm just going to use a socket, so I have some leverage. Get underneath here and just try to pry it up. I'm just going to try tapping this in a little bit, I don't want to tap it all the way in, but just tap it a little bit. Okay, it's moving a little bit when I tap it in.
The reason why it's stuck in there, there's a lot of rust buildup on the sensor ... not on the sensor itself, but the corrosion built up on the case, so I'm just going to take a wire brush and try to get some of it off. I'm not going to get all of it off, but just try to get some of it.
I'm going to try this trim tool, just pry it out a little bit as I try to spin it.
I'm going to take this little slide hammer, I actually made this little slide hammer. If you have one, you can use it, or you can make one too. Just took some threaded rod, and some nuts, and sockets. I'm going to try and hammer this sensor out. Just spray a little more rust penetrant.
All right. I modified my slide hammer slightly. I just added a little more length to this, so I can pinch on this bolt so it's a little more stable and I added a little more weight to the slide itself. Let me try again. Tap it in a little bit. Now, I'm going to try and get it out again. I'm just going to try and heat up the metal with the heat gun. Now, give this a try.
All right, so I took part of the slide hammer apart, because it's really not working too well. Just modified this so that I can get a hammer and just tap right here. See if this works, hard to get an angle right here.
All right. We're going to try something different. A couple of our other attempts hadn't worked, so we're probably on plan F, or Q, or Z at this point. We just modified a wrench and we're going to see if we can pull this out. See what happens. All right, I'm going to give this a try.
All right, I'm going to try another thing. I'm just going to tap it in a little bit, spray a little more rust penetrant, all right. We're going to just try taking this piece of aluminum right here, you could probably take a piece of wood and just going to try and pry it out this way, see if I can get anything. Oh, it's coming out, look at, there we go. Got it.
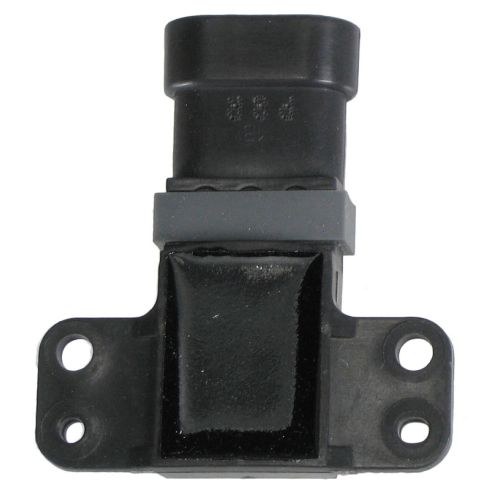
Now, there's our old cam sensor that broke when we took it out. Here's our new cam sensor from 1AAuto.com. From what's left of this one, you can see that it's the same. It's got the same height. When the old one was still in the vehicle, the connector was the same. This bracket was the same. Get yours at 1AAuto.com and you'll be ready to rock and roll.
So, because that old sensor came out really difficult, I'm just going to take a wire brush and clean out that hole. One thing to keep in mind, we want to be careful if any of these little needles break off it'll go into the engine. So, it's not the best thing to do, but we just want to clean around the edge of the front.
Now, we're going to take the new sensor. I'm just going to put a little grease around the sensor. The old one came out really difficult, just put a little grease on there. You could also put a little oil on there instead.
The old sensor went through this little metal housing, so get that lined up first. Get that housing lined up and slide that sensor in. Actually, it will be a little bit easier to plug this sensor in now. I'll just get this lined up. I'll plug that sensor in, push it down, take this 10 mm bolt, take that 10 mm socket and ratchet and snug it up. Make sure you push down on the sensor.
Now, we're going to use a torque wrench and torque this bolt to 89 inch pounds. Make sure you're on inch pounds and not foot pounds. That's good.
Now, we're going to take the new harmonic balancer. Normally, if you have the ability to replace the crank seal, it would be a good time to replace it. If it looks okay, you can reuse it, just keep in mind double check, make sure it's not leaking after you're done. If you're doing the crank seal, it's easier to replace that little key way. We're not going to replace that key way, we're just going to reuse the old one, because there's nothing wrong with it, but the new balancer does come with one.
I'll just line this up, line that slot up with the key way. You're going to take a harmonic balancer installer, or crank pulley installer. You don't ever want to use a rubber mallet or hit it with a hammer, because you could cause internal engine damage.
Now, I'm just going to use my installer and tighten this down. All right, that's tightened all the way down. I can loosen up the tool and remove the the tool. Sometime the tool comes apart, so just take that center part out.
Now that that harmonic balancer is all the way down, now we can install the crank pulley. Slide that in position, take the bolts, get these started. Take the center bolt, install that. I'm just going to snug these up first, before I torque them down. When I go over to tighten this bolt down, I'm going to use this strap wrench. It's just going to hold the pulley, just go around here.
If you don't have one of these when you install the serpentine belt, you could always try to hold it from spinning that way. Now I'm going to use a 16 mm socket and a torque wrench, and I'm going to torque this to 70 foot pounds.
Another way to prevent the crank shaft from spinning, we can come back here, take this little cover off, just us a pick from the transmission. You can have a partner take a little pry bar, just hold it against the fly wheel right there and that will prevent it from spinning. Then you can torque the crankshaft bolt.
I'm going to torque these other three bolts down with a 15 mm socket and a torque wrench to 43 foot pounds. Here we go. Remove that, next, I can install the serpentine.
Now, I'm going to install the serpentine belt. I'm going to go around the crank pulley first. Get that lined up and come around the water pump pulley and down around the power steering pump pulley and up around the AC compressor. Then you're going to go over here, around the alternator and the tensioner pulley. Then I'm going to hold it down near the idler pulley and I'm going to take my ratchet, this is a flex head ratchet, so it makes it a little bit easier, and then I'm going to relive tension on the pulley and just sneak it under the idler. Just like that and take my ratchet away.
Thanks for watching. Visit us at 1AAuto.com for quality auto parts, fast and free shipping, and the best customer service in the industry.
Shop Products

How to Replace Intake Cam Sensor 2001-05 BMW 325Xi
Watch this video to learn how to replace the intake cam position sensor! 1A Auto shows you how to DIY and save money!
