How to Replace Brake Drum 1995-2002 Pontiac Sunfire
Created on: 2010-07-20
Learn the components of the drum brake system, and how to replace parts on your 95-02 Pontiac Sunfire. This video will show you what you need to know
-
step 1 :Removing the Rear Wheel
- Raise the car onto jack stands
- Secure the car in place
- Remove the rear wheel
-
step 2 :Inspecting the Brakes
- Remove the brake drum
- Assess the thickness of the brake shoes
- Inspect the wear indicator rivets
-
step 3 :Removing the brake shoes
- Using the vice grip pliers, remove the springs and other attaching hardware.
- Using the screwdriver to pry off the adjuster lever.
- Remove the pin and attaching clip by prying it off with the screwdriver.
- Remove the emergency brake lever
-
step 4 :Installing the new brakes
- Attach the emergency brake lever to the brake shoes with the pin and attach it with the small c-clamp
- Hook the emergency brake lever into the cable.
- Reattach the adjusting lever.
- Reattach the pins, springs and other hardware using the pliers
-
step 5 :Cleaning the brakes
- Apply brake parts cleaner or mineral spirits
-
step 6 :Installing the new brake drum
- Slide on the new brake drum
Tools needed
-
Flat Blade Screwdriver
Jack Stands
19mm Socket
Mineral Spirits
Slip-Joint Pliers
Lug Wrench
Ratchet
Cloth Rags
Floor Jack
Brought to you by 1AAuto.com, your source for quality replacement parts and the best service on the internet.
Hi, I'm Mike Green. I'm one of the owners of 1A Auto. I want to help you save time and money repairing and maintaining your vehicle. I'm going to use my 20+ years experience restoring and repairing cars and trucks like this to show you the correct way to install parts from 1AAuto.com. The right parts installed correctly, that's going to save you time and money. Thank you, and enjoy the video.
In this video, we're going to be showing you how to take apart and check the rear brakes, and the subject vehicle is this 1997 Pontiac Sunfire. This procedure will be the same for just about any 1982 to '05 Sunfire, Cavalier, or Sunbird, and really very similar for any vehicle that has drum rear brakes.
The tools you'll need are 19 mm socket and ratchet or a lug wrench to remove the tire, jack and jack stands, pliers, and a flat blade screwdriver. This is pretty much what you need for any vehicle.
You're going to want to raise the car, secure it, and remove the rear wheel. Once you have the rear wheel off, to inspect the rear brakes, inspect the drum brakes, you pull the drum off. That came off pretty easy. It's not always going to come off that easily.
Here's your typical drum brake set-up. Here you have your shoes. This right up here is the wheel cylinder. You can see that there's a plunger pushing on the shoe. Basically, when you press your brakes, the wheel cylinder pushes those plungers out, which pushes the shoes out and contacts the drum as it goes around. You can see a little L coming down here. This is the automatic adjuster. What happens is: when you press your brakes, the shoes come out and this rod actually causes this to pull up on the adjuster and it just slowly moves your shoes out. Basically, this is an adjusting rod here. The shoes are basically just held on here by a couple of pins here, these two pins, and then these springs
On drum brakes, when you talk about how good are the brakes, you're talking about basically the width, or how much life is left on these brake shoes. As you can see, there's about a little over an eighth of an inch all the way around. Actually, it does have something of wear indicators. These are rivets. Once the shoes wear down, those will start hitting against the drum and making a squeaking noise. You can see, there's a little bit of life left in these. I would consider these brakes okay. Definitely want to check them, probably in another 5,000 miles because they don't have a whole lot of life left in them.
I'm going to show you how to take them apart. The best advice I can give you for taking these apart is just do them one side at a time. If you keep the other side together, you'll be able to see how they come apart and how they go back together.
Basically hook your vice grips on to a spring, and pull the spring off. I'm going to use a different set of pliers. You basically get your pliers on here, push, and turn. These release, and the stud comes out. Same thing over here. You take a screwdriver and pry off the adjuster lever. Try and come off here. Now, basically all that you have holding it together is this pin here, which is attached on the backside by a clip. Just drive that clip off with a screwdriver. Just watch it because it will usually go flying. If you don't have a new set of hardware, you'll want to keep track of it. Now, the shoes are off.
When you put your new shoes on, you'll want to have this adjuster all the way in so it's as short as possible. This piece here, this is your emergency brake lever. When you pull the emergency brake, basically, there's a cable down here. It pulls on this and just wedges itself against the shoes and pushes the shoes out.
Now to put the brakes back together, this is actually the backside of the brakes. Put this pin through. This is your emergency brake lever. Push this little c-clamp on. This lever goes in, so now put that lever in. Take your emergency brake lever, hook it into your cable, and put that down and in. Put those kind of together like that. Next is your adjuster lever, put that on there and put this cone-shaped spring under. You're going to hook this lever in behind there, pull down on that lever, and push it on there. You take it and you load it up into your pliers, put the pin in the back here, coming through, and twist it on. Same thing for the other side. Load it up, put the pin through. These two springs are basically the same. This one went on first, and hooking on to this very edge up here is how we got it off. These are the same springs. It doesn't matter which one's in which position.
The brakes are together. This is a little brake part cleaner. You can also use mineral spirits. You just want to make sure you get all finger oil or anything off the brakes.
It's a little difficult because the brakes, I think, have been separated a little bit.
We hope this helps you out. Brought to you by www.1AAuto.com, your source for quality replacement parts and the best service on the internet. Please feel free to call us toll-free, 888-844-3393, we're the company that's here for you on the internet and in person.
Shop Products

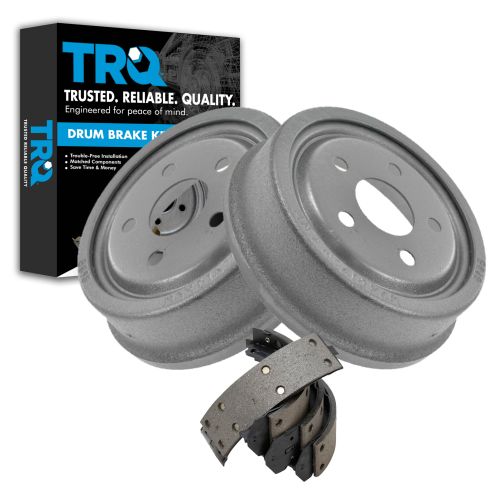
Rear Brake Shoe & Drum Kit TRQ BKA14130
Part Details:
- (1) Rear Brake Shoe Set
- (2) Rear Brake Drums
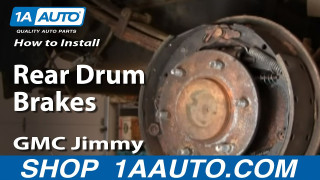
How To Replace Rear Drum Brake Wheel Cylinder 1984-91 GMC Jimmy
Watch this 1A Auto video on how to replace rear drum brakes on your 84-91 GMC Jimmy, and you can learn how to do it yourself!
