How to Replace Blower Motor Resistor 2005-10 Chrysler 300
Created on: 2017-02-02
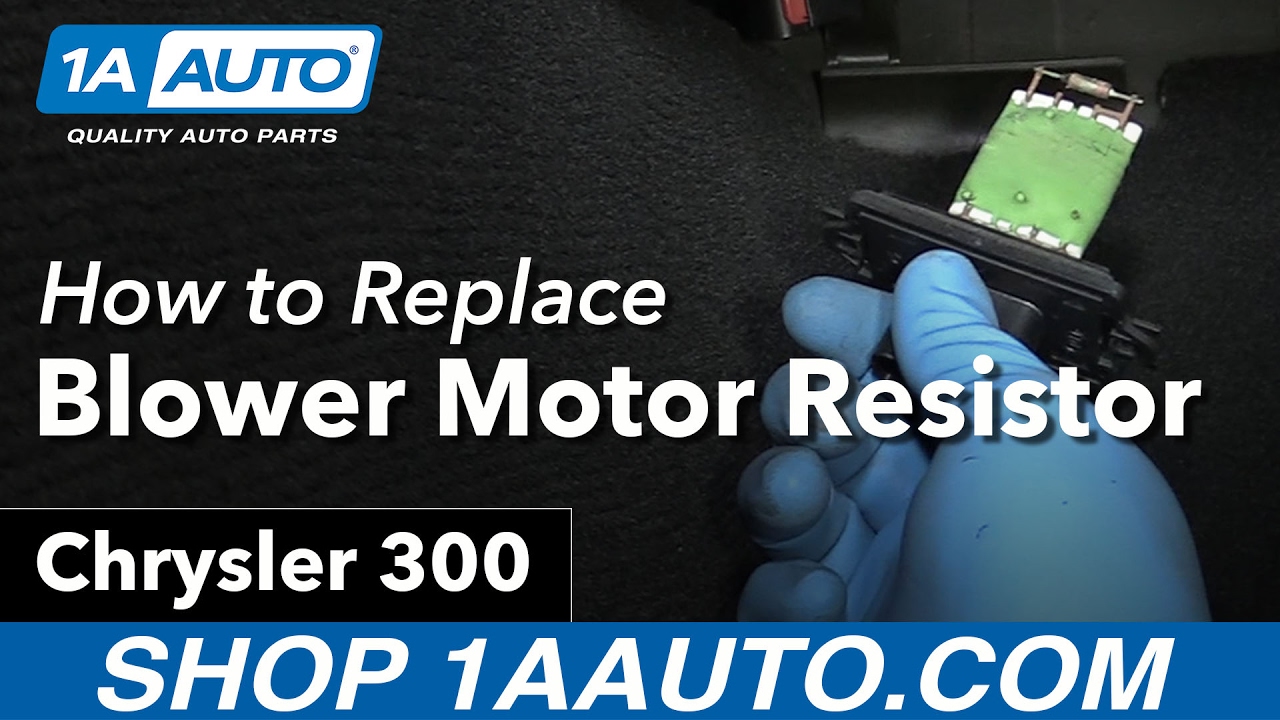
How to repair, install, fix, change or replace a bad or broken blower motor resistor on 05, 06, 07, 08, 09, 10 Chrysler 300
-
step 1 :Removing the Blower Motor Resistor
- Remove the plastic clips from underneath the dash
- Pull down the carpeted panel under the dash
- Disconnect the bower motor resistor wiring harness
- Remove the two 8mm bolts from the blower motor resistor
- Pull out the blower motor resistor
-
step 2 :Installing the Blower Motor Resistor
- Put the blower motor resistor into place
- Install the two 8mm bolts for the resistor
- Connect the resistor wring harness
- Put the carpet into place
- Push the plastic clips into the carpet
Tools needed
-
Socket Extensions
Flat Blade Screwdriver
8mm Socket
Ratchet
Trim Tool Set
Hi, I'm Mike from 1A Auto. We've been selling auto parts for over 30 years. We're dedicated to delivering quality auto parts, expert customer service, fast and free shipping, all backed by our 100% satisfaction guarantee. Visit us at 1AAuto.com, your trusted source for quality auto parts.
In this video, we're going to be working with our 2006 Chrysler 300. We're going to show you how to remove and replace your vehicle's blower motor resistor, which is responsible for the individual fan speeds on your dash. If you're not getting all of the fan speeds as in lower ones don't work and higher ones do, your blower motor resistor is likely at fault. If you like this video, please click subscribe. We have a ton more information on this and many other vehicles and if you ever need parts for your car, you can follow the link down in the description over to 1AAuto.com. Here are the items you'll need for this repair.
Your blower motor and blower motor resistor are located underneath your dashboard behind this carpeted panel under the glove box. You'll have to remove each of these plastic clips. This is a great use of the 1A Auto interior trim removal tools, because you can slide this forked end underneath and pry them out. They do still take a little bit of work, but it's a lot safer than doing this with side cutters or screwdrivers. Once that's down you can remove the carpeted panel from under your dash. Using a small flat blade screwdriver, slide out the red safety tab on the connector for your blower motor resistor. Push down and remove it. You can now access and remove the two 8 millimeter screws, one on either side of the resistor. Remove these using an 8 millimeter socket and ratchet. Once the screws are out, remove your blower motor resistor from the vehicle.
Install the blower motor resistor and your two 8 millimeter screws. You'll want to start these off by hand first. Tighten the screws down with an 8 millimeter socket and ratchet. Reconnect the electrical connector and snap the safety tab back into place. Reinstall the carpeting under the dash and snap the pushpins back into place. With your carpeting reinstalled, you're good to go.
Thanks for watching. Visit us at 1AAuto.com for quality auto parts, fast and free shipping, and the best customer service in the industry.

Cmo diagnosticar un Eje Delantero Subttulos
1a auto videos, 1a auto parts review, 1aauto, diy, car repair, diagnosticar eje delantero, reparar carros, como reparar eje delantero, eje delantero, eje, hazlo tu mismo, como cambiar rodamiento de rueda, como cambiar cojinete de rueda delantero, como cambiar, mecanica automotriz, car repair videos, cambiar, reparar, clicks debajo del carro, sonidos debajo del carro, porque suena cuando giro el volante, porque suena el timon cuando giro, porque suena el carro cuando giro el volante
