How to Replace Blower Motor 2011-17 Toyota Camry
Created on: 2019-03-13
How to repair, install, fix, change or replace a bad or broken blower motor on 11, 12, 13, 14, 15, 16, 17 Toyota Camry
-
step 1 :Removing the Blower Motor
- Disconnect the negative battery terminal with a 10mm wrench
- Press the tabs with a flat blade screwdriver to release the shield underneath the glove compartment
- Remove the electrical connector from the shield
- Disconnect the electrical connector from the blower motor
- Remove the 8mm bolts from the blower motor
- Lower the blower motor down and out
-
step 2 :Installing the Blower Motor
- Insert the blower motor into place
- Tighten the 8mm bolts to the blower motor
- Connect the electrical connector to the blower motor
- Snap the electrical connector to the shield
- Clip the shield into place
- Connect the negative battery cable with a 10mm wrench
-
step 3 :Testing the Blower Motor
- Press the start button with your foot off the brake
- Test the fan settings
Tools needed
-
Socket Extensions
Flat Blade Screwdriver
8mm Socket
10mm Wrench
Ratchet
Hi, I'm Mike from 1A Auto. We've been selling auto parts for over 30 years.
Hi, everyone. Sue here from 1A Auto. And today we have our 2013 Toyota Camry in the shop. And I'm going to be replacing the blow motor. If you need this part or any other part for your car, click on the link below and head on over to 1aauto.com.
First thing I'm going to do is open the hood. We're going to disconnect the negative battery. Whenever we're working with electrical, you always want to disconnect the negative. And wait about 30 seconds to a minute before disconnecting anything. With a 10 millimeter wrench, lift it up. Tuck it aside, and make sure that it doesn't rest on that.
So on the driver's floor compartment, you'll see this kick panel under the glove box area. And there's four connections--they are metal clips. I take a flat screwdriver and I push down in there, and I pull the tab out. And then I have this one electrical connector right here, and we can disconnect the whole thing right there. Let's discard that. And now we can have access to the blow motor.
First thing I'm going to do is disconnect the electrical connector by pushing down on this tab and pull out the connector. We've got a body clip tool, and I'm going to disconnect where it punches in over here. Let's see if it's the way. Actually, I don't think it touches it, so I'm not going to do that--I'm going to leave that right there.
There's three mounting screws, and they need an eight millimeter socket. Take those out. And the last one is right here. As someone that works on cars, this is where you pray that there's no sleeping mouse family in that blow motor. We don't want to disturb them. More or less we don't want to be disturbed. Bring that down. Now you might have to manipulate a little bit, not much.
And here we have the blower motor with the cage intact. So here we have the actual blower motor we just ordered from 1A Auto, and here's the factory blower motor. This one from 1A comes with its cage. It's balanced, just like the factory. Those are those metal clips you'll see inside on these fins. That means that they powered this up. Made sure it worked. And they balanced the cage out, so you don't get a vibration noise. It comes with the resistor, just like the factory one. You have the same connector. Three prong connector, right there, and three mounting screws. And this actually goes to the vent. There's a cooling system that let's the air flow in here to cool that motor down, because of the resistor that's mounted on the back.
If you need this part or any other part for your car, click on the link below and head on over to 1aauto.com.
Now we're just going to reverse procedure to install the new one. Now because no leaves came out or anything, it's pretty clean in here. Normally I would just check real quick by putting my hand up in here, because you don't want debris in the new blow motor.
Line it up, and let it sit up there. I'll start the first screw. Because it's plastic, it's easy to start it by hand. Now we're free to tighten this up. You want it to bottom out, and just a little smidge of a turn, quarter turn. It is plastic so you don't want to strip it.
All right, let's connect the connector. Line it up until it clicks. Now we'll get that undercarriage kick panel. This has two guide pins, right here. Just see the holes in the back of the pry wall or kick panel. You'll line those right up. We're going to connect our little electrical connector here. And line your clip pins up. Push them back. And we're ready to connect that battery again. Let's try it out.
Now we're ready to connect our negative battery cable. Just going to bring it right over. Move it so it sits nice and flush on top of that battery. The post still sticking out on the top. Take our 10 millimeter wrench and tighten this down. Let's try it out.
With this car, all's you got to do is push the button without your foot on the brake twice. And now the power comes on. And I can actually check the blow motor out. So there's all the speeds. Right up to high. It's nice and quiet. You can't hear anything but the air flow.
Thanks for watching. Visit us at 1aauto.com for quality auto parts, fast and free shipping, and the best customer service in the industry.
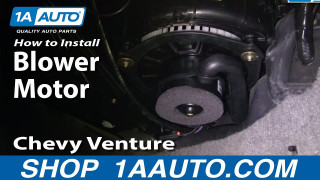
How to Replace Blower Motor 1997-2005 Chevy Venture
Check out this video on how to repair, install, fix, change or replace a broken, weak, noisy or screeching heater and air conditioning fan blower motor
