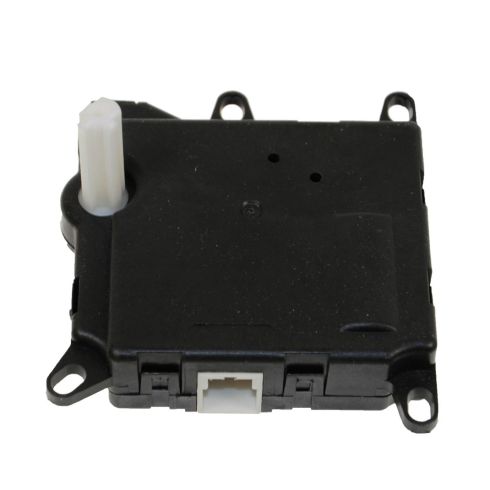
How to Replace Blend Mode Actuator 2006-10 Ford Explorer
Created on: 2017-05-23
Watch this video to learn how to replace the vent mode actuator on your 06-10 Ford Explorer. 1A Auto shows you how to do it yourself!
-
step 1 :Removing the Vent Mode Actuator
- Pry out the trim button on the bottom trim
- Remove the trim
- Remove the two 7mm bolts from the knee dash panel
- Remove the 8mm bolts from the vent mode actuator
- Remove the vent mode actuator
-
step 2 :Installing the Vent Mode Actuator
- Place the seal on the new actuator
- Insert the actuator into place
- Tighten the 8mm bolts to the vent mode actuator
- Insert the knee dash panel into place
- Tighten the two 7mm bolts to the knee dash panel
- Press the lower trim into place
- Press the trim button onto the lower dash
Tools needed
-
Socket Extensions
8mm Socket
7mm Socket
Ratchet
Flashlight
Hi, I'm Mike from 1AAuto. We've been selling auto parts for over 30 years! We're dedicated to delivering quality auto parts, expert customer service, and fast and free shipping, all backed by our 100% satisfaction guarantee. We've created thousands of videos to help you install our parts with confidence. That saves you time and money, so visit us at 1AAuto.com, your trusted source for quality auto parts.
In this video, we're going to show how to replace the automatic temperature door actuator on the driver's side. This is a 2006 Ford Explorer. Pretty much the same for this generation Explorer, as well as Mountaineer.
We hope this video helps you. Please click subscribe. Check out all our other Ford videos, as well as videos for all kinds of makes and models.
The items we'll need for this video: interior trim removal kit, 7-8mm socket, ratchet, socket extensions, flashlight
Here's a 7 millimeter socket with a ratchet extension and there are two 7 millimeter bolts: one here and one here— remove those. Hold this panel straight back and remove it. Then your actuator is hid underneath.
There’s one of the mounting bolts right here, pretty easy to get to. There's another one up in further. You can see right there, that you can get to with a small 8 millimeter socket and a ratchet, and then the third one is reachable. You can see it right to the left of that corrugated tube. There's a third one that we can reach with an extension and a flexible joint. I have a flexible joint on here. The tape that you see just helps it so that the joint stays a little bit rigid. And we feed that in the long extension right in onto the screw. Then that one is kind of midway up, just the 8 millimeter socket with the ratchet, and remove it.
The last one's a little easier to get to, just a straight extension and your 8 millimeter socket. Remove it. Reach up in there. Hold the actuator straight out and bring it down. Get that out of the way. As you bring it down, there's a tab on the upper part of the connector, push the tab down, push the connector out of the way. The tab is this way when you're pushing it.
Here’s the original one from our vehicle and a new actuator from 1AAuto.com. You can see they're generally the same. Slight differences. Just cosmetic though. Once you bot the new one in from 1A Auto, if you're having issues with the temperature settings in your vehicle, this may be able to fix up your problem. There's a little seal, just put it on the actuator, and then you can just slide it right up in there. Line up the actuator pin with the hole in the air box.
Start with your easiest 8 millimeter bolt right down in the bottom corner. Before I put the other two in, I'm going to reconnect my lead. Guide it into place. It's hard to see. Take another one of your 8 millimeter bolts and, you've got to do this by feel a little bit, get it up in place. I'll tighten it up. This duct, here, actually connects right there. There's two alignment tabs and then the clips. These tabs go into the little holes. Push in place, and reinstall your two 7 millimeter bolts at the bottom. Again, this has a little alignment tab. It goes into the hole, here, to help you line it up. Then there's a plug at the front.
Thanks for watching. Visit us at 1AAuto.com for quality auto parts, fast and free shipping, and the best customer service in the industry.
Shop Products

Ford Lincoln Mercury Rear HVAC Blend Door Actuator TRQ HCA40142
Part Details:
- 4
- Plastic
- No
- Rotary

Top 5 Problems Ford Explorer Sport Trac SUV 1st Gen 2001-05
This video shows you the top problems with the 1st generation Ford Explorer Sport Trac.
