How to Replace Ball Joint 1997-2010 Mercury Mountaineer
Created on: 2014-12-23
Check out this video to learn how to replace the lower ball joint on your 97-10 Mercury Mountaineer.
-
step 1 :Removing the Wheel
- Pry off the center cap with a flat blade screwdriver
- Loosen the lug nuts with the vehicle on the ground
- Raise the vehicle with a floor jack
- Secure the vehicle on jack stands
- Remove the lug nuts
- Pull off the wheel
-
step 2 :Loosening the Steering Knuckle
- Break off the cotter pin from the lower ball joint nut
- Remove the 24mm nut from the lower ball joint
- Thread the 24mm nut back on a couple of threads
- Remove the 30mm axle nut
- Twist the 30mm nut on until it's flush with the end of the axle
- Tap the 30mm nut with a hammer to hold it in place
- Remove the 18mm nut from the upper ball joint
- Thread the 18mm nut back on a couple of threads
-
step 3 :Removing the Sway Bar Link
- Remove the 15mm nut from the top of the sway bar link
- Raise the opposite side of the vehicle with the jack
- Apply rust penetrant to the sway bar link
- Hold the sway bar link with vise grip pliers
- Loosen the sway bar link with a 15mm socket and ratchet
- Tap the sway bar link out with a hammer
-
step 4 :Removing the Tie Rod
- Remove the cotter pin from the tie rod nut using pliers
- Remove the 19mm nut from the tie rod
- Thread the 19mm nut on a couple of threads
- Strike the steering knuckle with a hammer until it comes free
- Remove the 19mm nut from the tie rod
- Pull out the tie rod
-
step 5 :Disconnecting the Steering Knuckle
- Strike the steering knuckle with a hammer to loosen the lower ball joint from the knuckle
- Support the lower control arm with a jack
- Tap the axle loose from the steering knuckle with a hammer
- Twist off the axle nut
- Remove the upper ball joint nut
- Pull the upper control arm out of the knuckle
- Remove the lower ball joint nut
- Pull the lower ball joint and the axle out of the steering knuckle
- Put the steering knuckle onto the upper ball joint
- Thread on the upper ball joint nut
-
step 6 :Removing the Lower Ball Joint
- Remove the snap ring from the top of the ball joint
- Put the ball joint press onto the ball joint
- Tighten the ball joint press to break the ball joint free
- Pull out the ball joint
-
step 7 :Installing the Lower Ball Joint
- Carefully pry the boot off the ball joint with a flat blade screwdriver
- Put the ball joint into the ball joint press
- Push the ball joint into place
- Tighten the ball joint press
- Push the boot onto the ball joint
- Put the snap ring onto the ball joint
-
step 8 :Connecting the Wheel Knuckle
- Remove the upper ball joint nut
- Push the lower ball joint and the axle into the wheel knuckle
- Thread on the lower ball joint nut
- Push the upper ball joint into the wheel knuckle
- Thread on the upper ball joint nut
- Push the tie rod into the steering knuckle
- Thread on the tie rod nut
- Tighten the tie rod nut to 50 foot-pounds of torque
- Push the cotter pin through the tie rod nut
- Bend the cotter pin into place
- Tighten the upper ball joint nut to 50-55 foot-pounds
- Thread on the axle nut
- Tighten the axle nut preliminarily
- Raise the steering knuckle with a jack
- Tighten the lower ball joint nut to 70-75 foot-pounds
- Turn the nut to line up the cotter pin hole
- Push the cotter pin through the lower ball joint nut
- Bend the cotter pin into place
-
step 9 :Greasing the Ball Joint
- Put the grease fitting onto the ball joint
- Tighten the grease fitting with a 7mm wrench
- Add grease to the grease fitting with a grease gun
-
step 10 :Installing the Sway Bar Link
- Put a washer on the sway bar link
- Put a bushing on the sway bar link
- Slide the sway bar link into place
- Put a bushing on the sway bar link
- Put a washer on the sway bar link
- Put a metal tube on the sway bar link
- Put a washer on the sway bar link
- Put a bushing on the sway bar link
- Lift the opposite wheel with a jack to raise the sway bar
- Put the sway bar onto the sway bar link
- Put a bushing on the sway bar link
- Put a washer on the sway bar link
- Lower the opposite wheel
- Fasten the nut onto the sway bar link
-
step 11 :Reattaching the Wheel
- Slide the wheel into place
- Start the lug nuts by hand
- Tighten the lug nuts preliminarily
- Lower the vehicle to the ground
- Tighten the lug nuts to 100 foot-pounds in a crossing or star pattern
- Tighten the axle nut to 184 foot-pounds
- Reattach the center cap
Tools needed
-
24mm Socket
A Piece of Pipe (for leverage)
Torque Wrench
Hammer
15mm Socket
Ball Joint Press
7mm Wrench
Jack Stands
18mm Socket
19mm Socket
Grease Gun
Hog Ring Pliers
21mm Socket
Bearing Grease
Flat Blade Screwdriver
30mm Socket
Slip-Joint Pliers
Ratchet
Floor Jack
Needle nose pliers
Brought to you by 1AAuto.com, your source for quality replacement parts and the best service on the Internet.
Hi, I'm Mike from 1A Auto. I hope this how-to video helps you out, and next time you need parts for your vehicle, think of 1AAuto.com. Thanks.
In this video, we're going to show you how to replace the lower ball joint on this 2003 Mercury Mountaineer. We show you on the driver side, but the passenger side is the same procedure. It's the same part and similar process on these Mountaineers from '97 to 2010. The items you'll need for this are a new lower ball joint from 1AAuto.com; 15, 18, 19, 21, 24 and 30mm socket and ratchet; a piece of pipe for some leverage; pliers; snap-ring pliers; a flat-blade screwdriver; hammer; ball joint press; torque wrench; jack and jack stands, and locking pliers, depending on the condition of your sway bar link.
Start off by removing your hub cab and then remove these 19mm lug nuts. If you don't have air-powered tools, you want to loosen them up while the vehicle's on the ground, then jack up the vehicle and support it, and then loosen the lug nuts the rest of the way. Once you've removed those, you'll be able to pull it free.
Now, you want to break off the ends on the Cotter pin right here underneath your wheel knuckle and then you can either hammer it out with a punch or, if the Cotter pin is only sticking out on one side of the castle nut, you can actually just use your 24mm socket and ratchet to break it free. Then, just remove that nut and then put it back on just a few threads.
Remove the nut on the end of the axle and, obviously, if you have air-powered tools it's not a problem. You can have somebody hold the brakes and use a socket and breaker bar if you need to. You want to twist this nut back on until it's flush with the axle and just hammer it until you can see it move. Then come up here and just remove this 18mm nut. With that nut twisted on, again, just a few threads, hammer the wheel knuckle until it drops down. Then, using a 15mm socket and ratchet, you want to remove the nut at the top of your sway bar link. You can hold the bottom with a wrench if it's turning. You can see ours is turning and, in an ideal world, this would just loosen up and you could pull it down, but the top of ours just breaks off.
To help get it out, you want to jack up the other side of the vehicle, and this will lift the sway bar on this side, allowing you to get to the top of sway bar link easier. We'll just spray it with some penetrating oil. Then, using locking pliers, you want to hold onto it while twisting the nut on the bottom of the sway bar link. You'll notice that the plastic will start breaking away and that's fine. You just want to keep repeating the process until all the plastic is gone and you have better access to it. We'll fast-forward as Mike does this. When it gets to this point, you'll be able to remove it and slide it down and out. If it is jammed up, just use a hammer.
Now disconnect your tie rod end, so remove the Cotter pin from the tie rod and I break off the bent over section. I just break it off and then I'm able to pull out the rest of the pin. Then, a 19mm socket, ratchet and a breaker bar loosen it up. You want to take the nut all the way off and then just thread it back on a few threads. Then hit the steering knuckle with a hammer until it pops free. Remove the nut and take the tie rod off and set it aside. If the nut is still on the lower ball joint, hit with a hammer to break it free.
Now support your lower control arm. You can see I have jack stands underneath the frame in the front for both sides. Jack that up with a jack. Here again, make sure the axle is free. I'm not hitting that hard. You don't want to hit your axle too hard because you could damage the CV joints. I'm really just tapping it. Jack it up a little further and now just lift up on the steering knuckle and remove the nut from the lower ball joint. Now remove the nut at the top of the wheel knuckle and pull the upper control arm out of the knuckle.
Take the axle out. Then, you want to take the wheel knuckle and pull it off the stud on the lower ball joints. Just remove that nut the rest of the way. Put it back on there and then just pull the wheel knuckle down and off that stud while pulling your axle out at the same time. It can be a little difficult, but it will eventually go. It's a good idea to just keep it secured to the top of the upper control arm, so just put that nut back on halfway for now.
Using snap-ring pliers, remove the snap ring along the top of the ball joint. Once you get it about halfway, you can just use a flat blade screwdriver and pry it up the rest of the way. With the ball joint press, we've got a cup around the lower part of the ball joint and that there, with a hole through there, so just press the ball joint right down through. I'm just tightening the press and then I hit it with a hammer at the same time, and that just kind of helps to break the ball joint free.
On the left is the old ball joint; on the right is the new one from 1A Auto. They do look similar, but there's some slight differences. However, ours will fit exactly the same. Remove the nut from your new ball joint and then you want to just carefully pry this boot off. Then set up your ball joint press and push the ball joint back into place. Again here, I'm going to tighten it up and just use the hammer to shock it a little bit to help it work its way in.
Once it's all the way back in, just replace that boot and make sure it's on all the way. Take your snap ring and put the snap ring along the top and make sure it's all the way down. Now take your wheel knuckle and you can remove the nut at the top holding it to the upper control arm. Then you want to feed your axle through while putting it back on that stud for your ball joint. This can take some maneuvering, but it will go, and then when you get enough space in the lower ball joint, you want to just replace that nut so it will hold it in place there.
Now push your upper control arm back into the wheel knuckle and replace that nut. Take your outer tie rod and push it back down and into the wheel knuckle and replace that nut. Then you want to torque that to 50 foot-pounds.
Push your new Cotter pin through, or your old one if you managed to save it, then just bend the tabs in opposite directions. Torque the upper ball joint nut to 50 to 55 foot-pounds.
Now replace the axle nut. Tighten it preliminarily. Put a jack underneath your steering knuckle and this basically raises the knuckle onto the ball joint to hold the ball joint in place. You want to tighten that nut up to 70 to 75 foot-pounds, and then further if you need to, to get the Cotter pin through.
Now, you can lower the wheel knuckle and then twist in your grease fitting at the top of the ball joint. We actually end up putting in a 90-degree grease fitting so it's a little easier to grease, and just tighten it up with our 7mm wrench. Then, just top the ball joint off with some grease.
Now you want to replace your sway bar link and you could see that ours was badly destroyed, so we're going to use a new one. You just slide it up through and the order is washer, then bushing, then the lower control arm, then bushing, then washer, then that metal tube, and then another washer and another bushing. Then it should be the sway bar, but you can see that the sway bar is just a little bit too low, so if you jack up the other wheel, you can see the sway bar go up and now you can fit in that bushing. Push the sway bar link up through the sway bar and then do another bushing, then a washer and then the nut. Then just lower the other side and it will compress the sway bar link and then just tighten that up with your 15mm wrench and 15mm socket and ratchet. For your final tightening of the stabilizer link, you can see I've got the vehicle on the ground, and the jack's underneath holding the suspension up in its usual ride height, and then I want to tighten it up so that the bushings basically come out to the same spot as the washers, basically compress the bushings down.
We'll fast-forward as Mike replaces the wheel and then replaces those lug nuts and just tightens them up preliminarily. Then lower the vehicle and torque each of the lug nuts to 100 foot-pounds in a crossing pattern. Then torque this 30mm nut to 184 foot-pounds, and then just replace your hub cap.
We hope this video helps you out. Brought to you by www.1AAuto.com, your source for quality replacement parts and the best service on the Internet. Please feel free to call us toll-free, 888-844-3393. We're the company that's here for you on the Internet and in person.
Shop Products


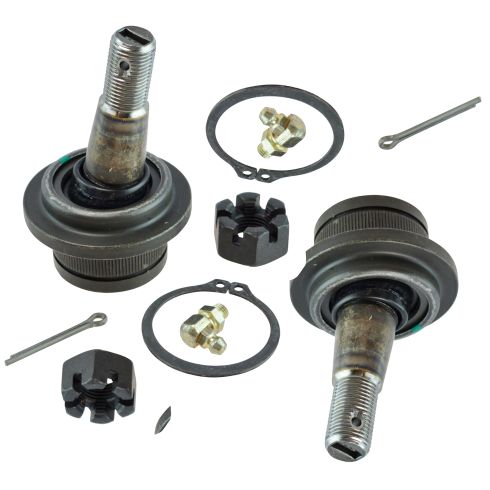
Ford Mazda Lincoln Mercury Front Driver & Passenger Side 2 Piece Ball Joint Set MOOG MGSBS00030
Part Details:
- 2 Piece
- (1) Front Passenger Side Lower Ball Joint
- (1) Front Driver Side Lower Ball Joint

How to Replace Front Lower Ball Joint 2002-14 Volvo XC90
This video shows you how to replace the front lower ball joint on your 02-14 Volvo XC90. 1A Auto shows you how you can do it yourself, step by step!
